
Let’s face it, while your mom or wife may really appreciate getting a gift certificate to the spa or a shopping spree or something like that, hand-made presents are really the way to go and leave the best impression. This is part of the reason why many schools work on some sort of craft a week or so prior to Mother’s Day.
Hand-crafting a gift is also less expensive in the long run, something that is pretty important this day and age. So what follows in this article is a project that you can do by yourself, with your siblings or your kids using the Adobe Elements suite.
Most mom’s are photo junkies and now with the proliferation of digital cameras and camera phones, your wife or mom has probably amassed a large amount of pictures on their hard drive somewhere. But that is probably the worst place for those photos. For one, not many people have access to them and two, there is no real permanency attributed to them.
So, why don’t you create a media rich DVD for Mother’s Day? It can have movies and slideshows, as well as an archive of the images or movies you used. And, with the Elements suite, it’s actually pretty easy to do.
If you are reading this before Mother’s Day 2009, you can pick up the Adobe Photoshop Elements & Premiere Elements bundle at Amazon now for $90 (after a $30 mail-in rebate from Adobe). It normally retails for about $150.
While there are many different types of projects you can undertake, I’m going to quickly outline one that you can do relatively easily.
Do note, however, you can easily just use either Photoshop Elements OR Premiere Elements to create a slideshow on DVD. If you do both, you can have multiple slideshows that are driven by a themed DVD menu which is very slick.
Here are 10 high-level steps:
- Find the photos
- Import to Adobe Photoshop Elements
- Tag the Faces
- Choose the photos you want
- Retouch the photos
- Create a slideshow with transitions
- Export slideshow to Adobe Premiere Elements
- Add & tweak media to your Project
- Create menus & interactive DVD
- Burn the DVD and wrap your gift!
Breakdown of Steps
Find the Photos
This is usually the tricky part but has become a bit easier with the use of digital cameras. I recently did a Wedding Anniversary projects where I had to find all of our wedding photos, scan them and then stealthily put them back in their place without knowledge. It took time to digitize via scanning and the quality was just ok (since it was rushed).
With digital cameras, most people store them on their hard drive or in some type of storage (physical or online). You have to do a bit of sleuthing to find them. Start by checking Documents & Settings in Windows or in the Pictures directory under the user’s Home folder on a Mac.
Import to Photoshop Elements
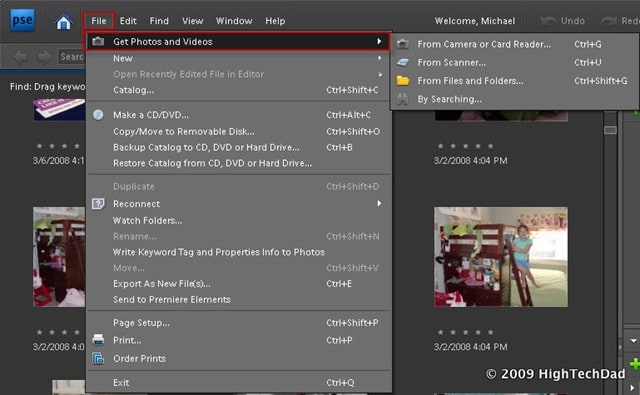
The next step is to import your photos into Photoshop Elements. To do this, when you launch Photoshop Elements, choose Organize. Then simply go to File > Get Photos and Videos and then choose how you want to import them.
Tag the Photos
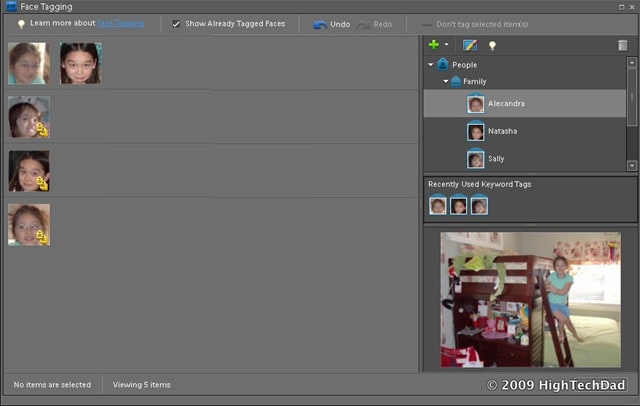
Photoshop Elements has a quick and easy way to assign people’s names to photos. While not quite as easy as the face recognition feature in the new version of iPhoto, Photoshop Elements can identify the faces in any photo. Once faces are found, you simply create a “People” tag (like the name of the person) and drag that tag onto the face selection.
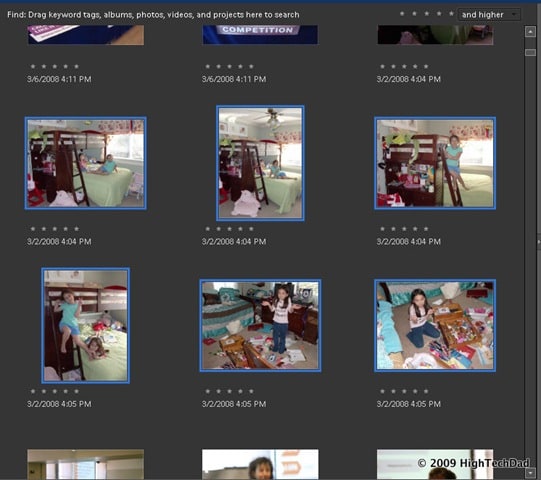
First, select the photos that you want Photoshop to work within the Organizer:
Then go to Find > Find Faces for Tagging…

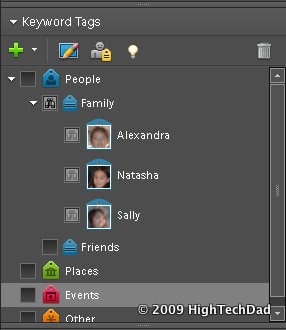
While Photoshop Elements is identifying the faces in all of your selected pictures, you can set up some People tags. On the right, you will see a menu with colored tags. Create a tag for the person:
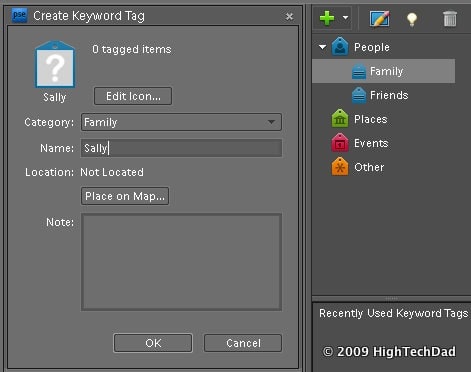
It then helps to drag a thumbnail over to the tag to help you visualize who the person is:
To tag other face thumbnails, simply drag the tag on top of the face. Or you can do this in bulk by selecting multiple faces and then drag the face tag onto one of the ones selected. Photoshop Elements also gives you a preview of the full picture in case you need to see it. You can see this below:
Once you are finished tagging faces, just click Done. It helps to do a bit of legwork here and set up multiple tags. You can do it for Places, Events or anything else you want to configure. This will really help you in the long run!
Choose the Photos you Want
Now that you have tagged all of your photos, it’s easy to quickly choose ones with the people you want in them. Once you are back in the organizer, simply check off the Keywords that you want in your search set. If you want only one person, just select their name. You can create multiple sub categories (for example, Photoshop Elements already has People / Family set up for you. So if you want only Family pictures, just click the Family category.
Once you have a set of photos that you want to work with, you are ready to go to the next step.
Retouch the Photos
When you work with Adobe, you really have the power of many years of photo editing, retouching and manipulation experience. Since we just quickly explored the Organize section, let’s move to the Fix section.
Photoshop Elements has a great tool chest for you to quickly “fix” your photos automatically:
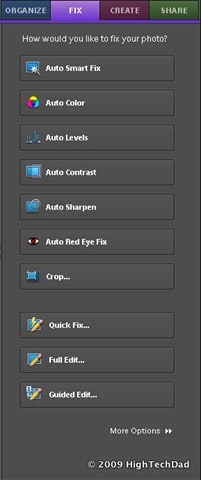
Just select a photo (or group of photos for batch processing) and choose one of the selections:
- Auto Smart Fix
- Auto Color
- Auto Levels
- Auto Contrast
- Auto Sharpen
- Auto Red Eye Fix
- Crop
- Quick Fix
- Full Edit
- Guided Edit
It’s really hard to go wrong. I encourage you to try some of these to see what works best for you. If you click on Full Edit, for example, you have an incredible amount of tools that you can use to fully edit any image.
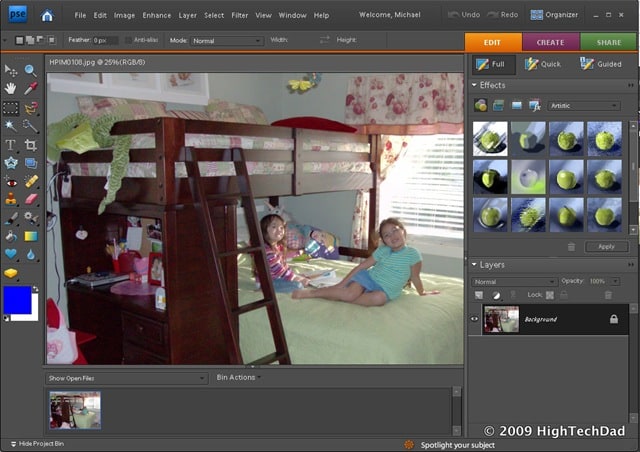
I would recommend testing out some of the “Auto” items a bit as some of the fixes might not be exactly what you want. One nice feature that they have is the ability to compare the original against the modified image:
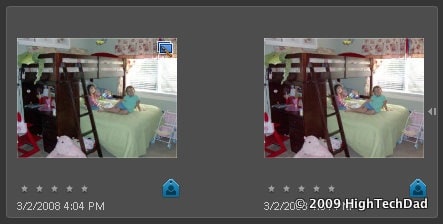
The little icon in the upper right hand corner is the modified version.
Create a Slideshow with Transitions
The next part of the Photoshop Elements workflow is the “Create” section. This is where the fun really begins. Photoshop Elements presents you with a few options to choose from in terms of what you want to create:
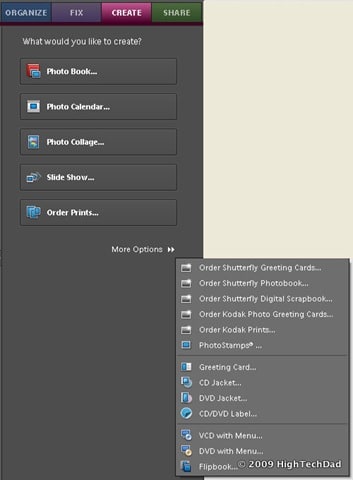
Select the images that you want to work with and choose the appropriate selection. I chose the Slide Show… option.
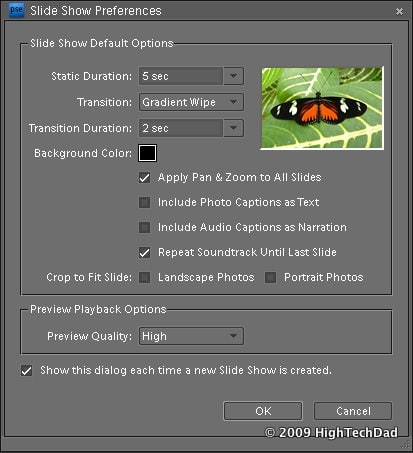
Within the Slideshow Options pane, you can choose image duration, transition type & duration, and other things to add spark to your slideshow. I particularly like the Gradient Wipe in conjunction with the “Pan & Zoom” option.
Click OK and then you can fine-tune the Slideshow.
There are a lot of things that you can do once you are editing the slideshow. Here is what the slideshow editor looks like:

Within the Storyboard bar, you can tweak the transitions and timing and add other images to the mix:

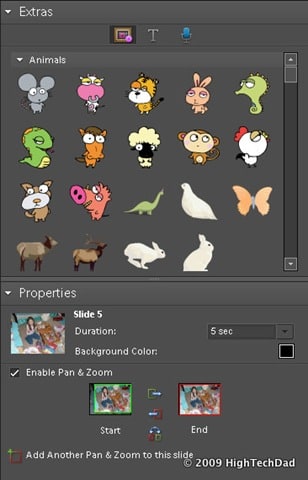
The Extras & Properties section lets you drop in all sorts of clipart, costumes, frames, backgrounds, ornaments and other items. If you have enabled the Pan & Zoom option, you can tweak how that works (the starting and ending zoom points and adding additional pan points).
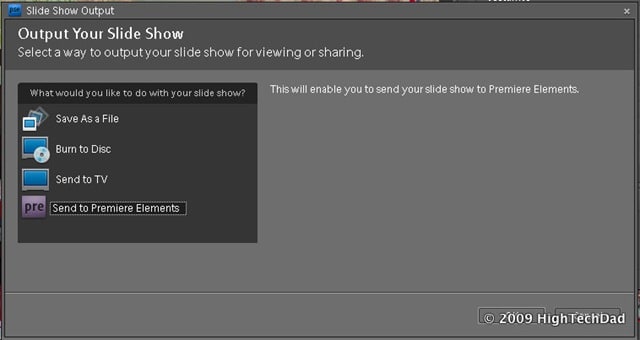
Export Slideshow to Adobe Premiere Elements
Once you are satisfied with your slideshow, select the Output option. I chose Send to Premiere Elements as I want to create a DVD.
Note: You could create a slideshow directly within Premiere Elements as well and bypass the steps above.
Premiere Elements automatically starts, with your slideshow imported. I was actually a bit surprised at the quality (lack thereof) of the movie within it, however it does look a lot better once you export the DVD.
Do note, the slideshow creation from within Premiere Elements is pretty darn good. You don’t get all of the granularity that you do in Photoshop Elements, but you can work with the same set of photos and tags that you see in the Organizer. I won’t go into the instructions for creating a slideshow within Premiere Elements but it is very intuitive. Simply go to the Organize section, then click Instant Movie (which moves you to the Edit section).
Add & Tweak Media to your Project
If you create a series of slideshows within Photoshop Elements, you can continue to import them into the Premiere timeline. This is actually where the possibilities get larger. There are so many options within Premiere that I cannot cover all of them. You can Get Media From… and a variety of formats including: DV Camcorder, HDV Camcorder, DVD, HD, Still Camera, Mobile Phone, Webcam, Files and Folders.
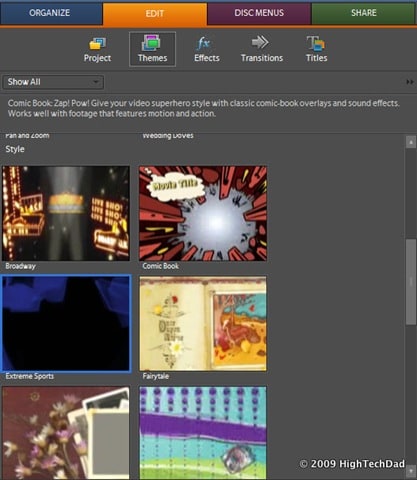
Once you import in media, it’s easy enough to edit. You can apply themes:
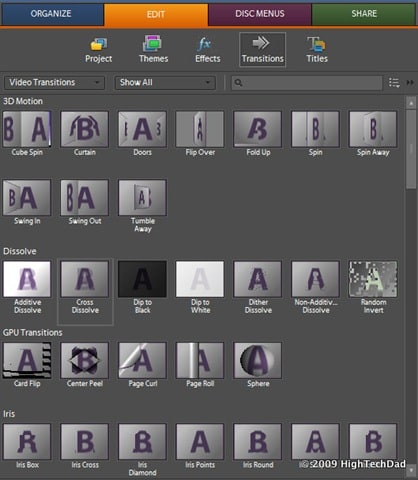
Or transitions:
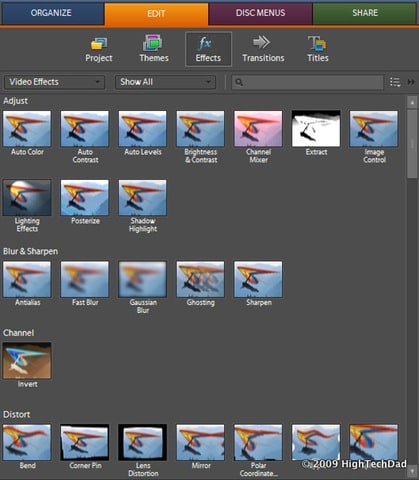
Or effects:
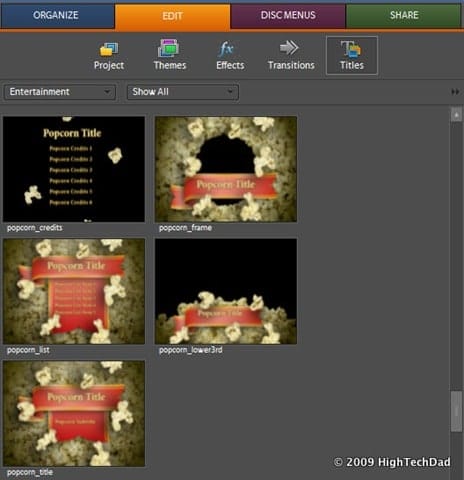
Or titles:
You can also easily add Sound via SmartSound which tailors your music to match the duration of your movie, via an Audio Mix or even Add Narration on top of the entire movie or clip. The possibilities are pretty great.
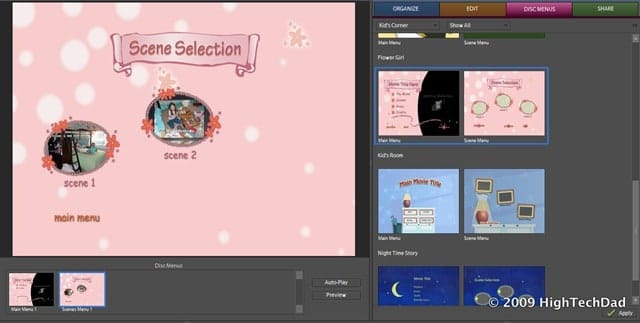
Create Menus & Interactive DVD
Once you have all of your media, photos, music, movies, etc. all set, you can set up interactive DVD menus. From the Disc Menus section, you can choose from a variety of pre-made templates which include Main Menus and Scene Menus.
One really nice feature is the ability to “Auto-Generate Menu Markers.” This will help you to create a bunch of scenes “auto-magically.”
You don’t have to use the pre-made templates for your menus. You can easily make your own based on still images or even movies with audio.
Burn your DVD & Wrap your Gift!
After you are happy with your final DVD (you can test it out through-out the creation process and I encourage you to do so), just click on the Share tab. There are a variety of options that you can choose from to share your work:
- Disc – DVD or Blu-ray
- Online – to YouTube or your own site
- Personal Computer – MPEG, DV AVI, Flash Video, Windows Media, Quicktime
- Mobile Phone – iPhone/iPod, Podcast, Zen, Zune, Pocket PC, Smartphone, PSP
- Tape – DV or HDV tape
I recommend if you are burning to disc, that you first do a “folder” export and use a player like VNC to fully test out the quality and interaction of the movies and DVD. Once you are happy, burn that baby to a DVD.
Summing It All Up
The Adobe Photoshop Elements & Premiere Elements suite is an extremely powerful set of applications for media organization, management, manipulation, and creativity. I could probably write a book on all of the functionality baked into this Adobe suite. However, that was not the goal of this article. For one, I wanted to give Dads, Husbands and kids some ideas on a creative and memorable Mother’s Day gift. This could be for any occasion for that matter. The Adobe Elements 7 Suite has the powerful tools and capability to let you be extremely creative with your digital media. And, it is all attainable at a reasonable price, much less than the “grown up” counterparts of Adobe Photoshop and Adobe Premiere. The Elements brand gives you much of the same functionality you would find in their larger, more expensive counterparts.
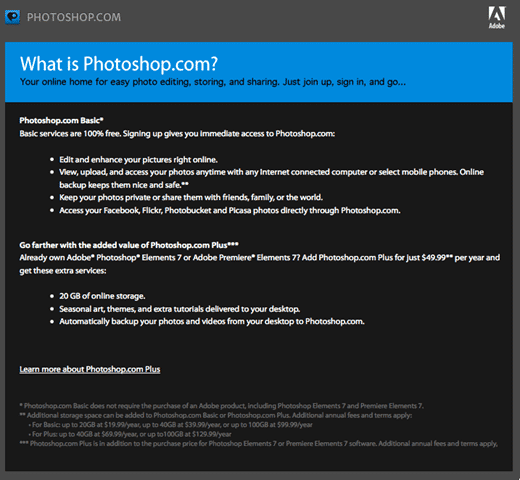
Also, you can get access to Photoshop.com which has a variety of value-added features including additional storage, automatic backups and seasonal artwork. Check this image for more details:
Of course, you don’t have to go the Adobe Elements route, there are other software options like iPhoto, iMovie and iDVD by Apple that have many of the same functions. My only words of advice, be sure to plan ahead as doing projects like these do take time.
HTD Says: Be sure to check out Adobe Photoshop Elements 7 and Premiere Elements 7 when undertaking a multi-media project. They can definitely get you where you need to go quickly and easily, with an extremely creative and memorable end result.


6 comments
Wrapped Mothers Day Presents
That is so cool, i will definately have to give it a try
Alexis Bradd
I was looking for this. thanks
Fathers Day Gifts
I definitely agree with you 'Gift Ideas'. Everyone should always remember the true meaning of gifting someone, It should always be given with the heart :)
Mother day flowers
With the help of adobe one can print a lovely card for mother to say her, Happy Mother day.
Traveller_Adventure
This is quite impressive, I am pleased to read this post, keep posts like this coming, you totally rock!
Cheers,
Blog Review
Gift Ideas
I definitely agree personalized gifts are better, well the person will totally appreciate the effort you did to do the gift for him/her. Price doesn't matter its the thought that counts.