I have been using the NETGEAR R8500 WiFi router as my primary WiFi router at home. One of the great features that it has is the ability to run OpenVPN on Mac’s and PC’s. This enables you to not only remotely access your home network in a secure manner, but it also encrypts your traffic when you are using a potentially insecure public network. The only thing missing from this puzzle was the smartphone connection. Well, NETGEAR released a firmware update for the R8500/Nighthawk X8 (version 1.0.2.54 – release notes) to enable OpenVPN connections with iOS and Android smartphones!
This is quite an important update as it allows you to encrypt the traffic on your smartphone when you are out and about. The setup doesn’t take much time whatsoever. But you need the following items to be able to do it:
- NETGEAR Nighthawk X8 (R8500) – my review is here
- A Dynamic DNS service – through NETGEAR, NoIP.com or DynDNS.org
- A smartphone/tablet – well duh!
- OpenVPN Connect app – you need this on your iOS device
The setup really just takes a few minutes. Here’s how to do it!
Enable OpenVPN on NETGEAR Router
I quickly checked to see if any other NETGEAR WiFi routers have had this OpenVPN/smartphone connectivity recently added via a firmware update, but didn’t see anything. However, this functionality could potentially be added to other NETGEAR WiFi routers which currently support OpenVPN on Mac/PCs.
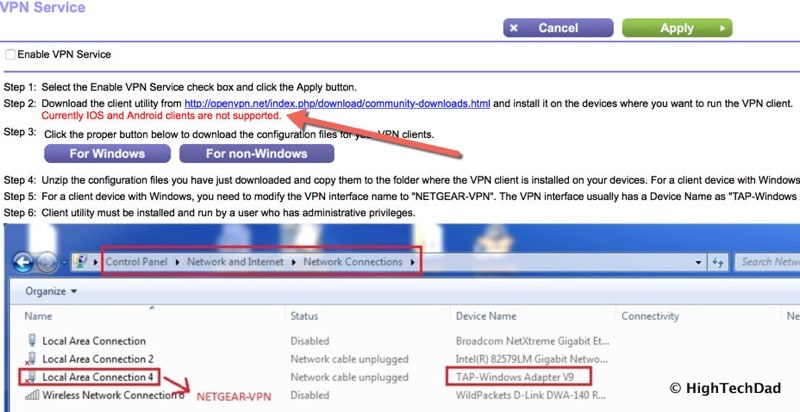
This is what my NETGEAR R7500 shows.
Anyway, so for now, you can only get this on the R8500 (as far as I know). Here’s how to set it up.
1 – Set up a Dynamic DNS service on the R8500
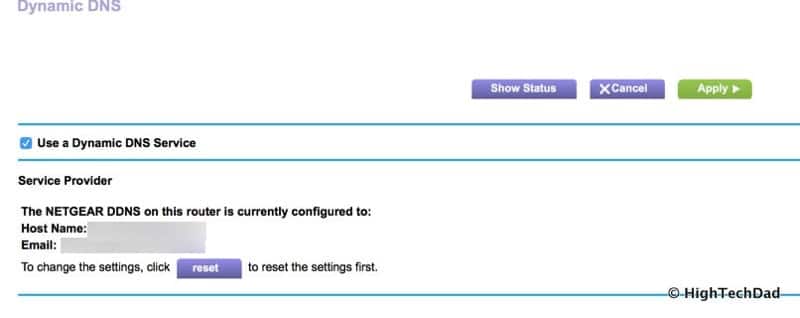
Within the R8500’s Advanced configuration screen, go over to Advanced Setup and click on the Dynamic DNS menu item. You can choose from three DNS services: NETGEAR, NoIP.com or DynDNS.org.
I used the free NETGEAR one. You must have one of these configured to be able to use the OpenVPN service. On your remote device, the configuration file has to be able to easily find you home router through a name (not IP address since IP addresses change).
Once you have the Dynamic DNS service configured and tested that it’s working, you can move on to configuring the VPN Service on the router.
2 – Enable the VPN Service on the R8500
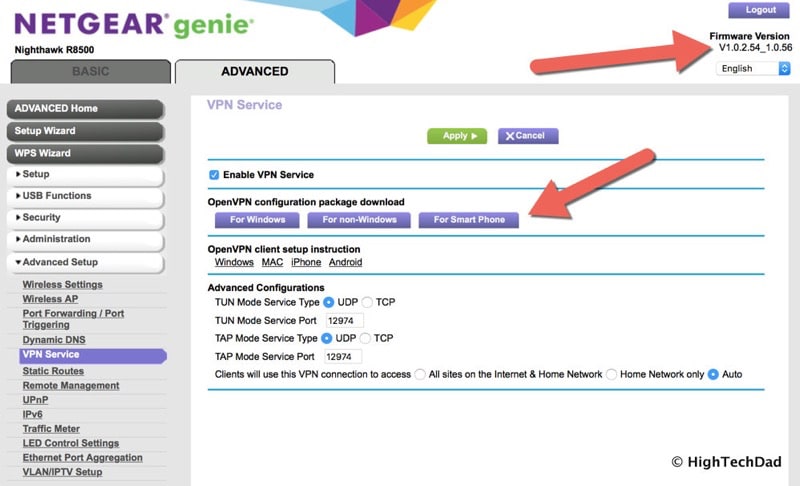
Once you have set up the Dynamic DNS service, you can set up the VPN Service. NETGEAR has simplified the screens a bit with less “documentation” on the screen (see the R7500 above for how it used to look like).
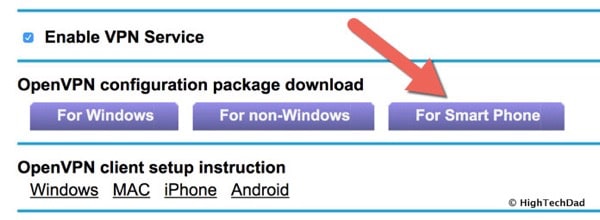
You can now download OpenVPN configuration packages for: Windows, Non-Windows (like a Mac) and for Smartphones.
Just a quick side note, I use Tunnelblick for my OpenVPN connections on my Mac and it works great! I’m not going to talk about how to configure for Windows or Mac though, this is all about smartphones and tablets (and, sorry, I don’t have an Android device to test this with – so I’m just going to show how to do this with iOS).
So, click the checkbox to “Enable VPN Service”. I left all of the other configuration items as is with the ports, etc. And I left the “Auto” setting for “VPN connections to access.”
Easy, right?
3 – Get the OpenVPN configuration file on your device
Now that you have the VPN enabled (and don’t forget to hit the “Apply” button at the top of the screen), you should download the “For Smart Phone” OpenVPN configuration file. This will download a zipped file that contains (note: names may be different from what is shown below):
- ca.crt
- client.crt
- client.key
- client3.ovpn
Next, head over to the appropriate App Store (in this case, I’m on iTunes) and download the free OpenVPN Connect app. Get that installed on your iPhone or iPad.
Do note, there are instructions within the NETGEAR page, but mine are a bit more detailed with pretty pictures (grin).
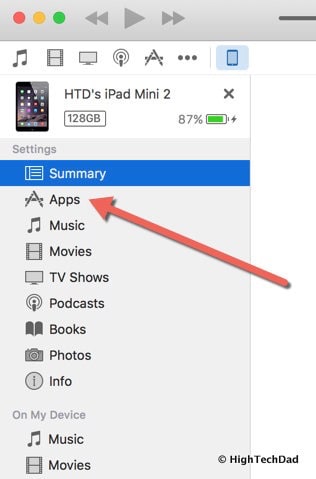
Once you have the OpenVPN Connect app on your device, you need to connect your device to your computer in order to get the OpenVPN configuration certificates and files onto the device. You do this via iTunes.
Click on your device within iTunes and choose the Apps menu.
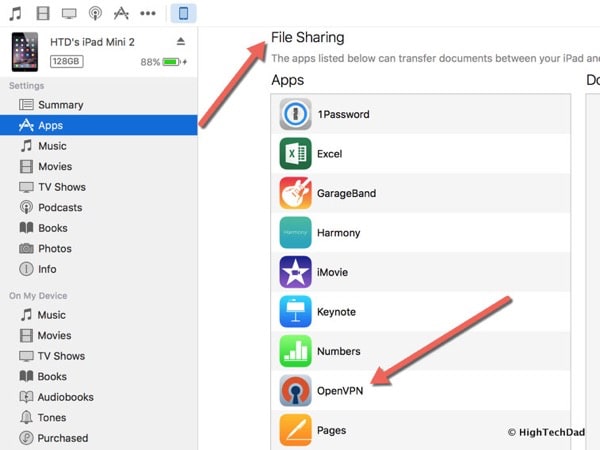
Then scroll past the Apps section and down to the File Sharing section. You should see “OpenVPN” listed there.
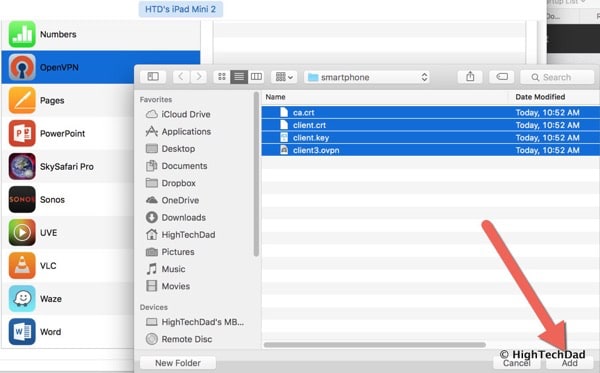
Then select OpenVPN and add the four files that were in the smartphone zipped file you downloaded and unzipped (see above).
The files will copy over to your iOS device (assuming it is connected to your computer).
4 – Enable the OpenVPN profile on your device
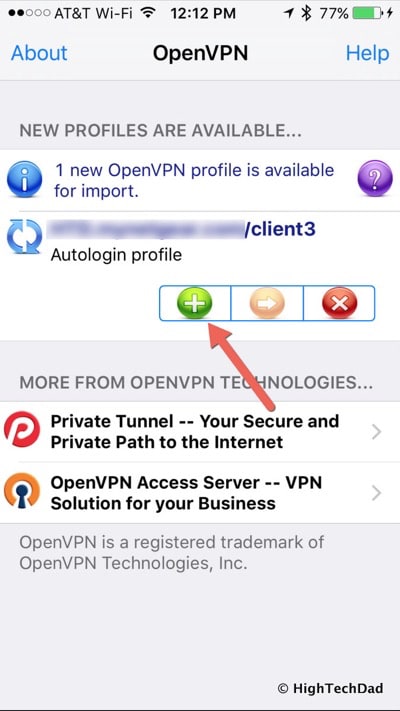
Once you copy over the files, you can open the OpenVPN Connect app. You should see the new profile available to import or replace (or delete). Click the green plus button to import in the profile.
Once you have the profile fully imported, you are pretty much done. All that you need to do is test it out. For starters, if you are at home (or connected via WiFi to the NETGEAR router), disconnect from it (or WiFi). You can test while you are on a cellular connection.
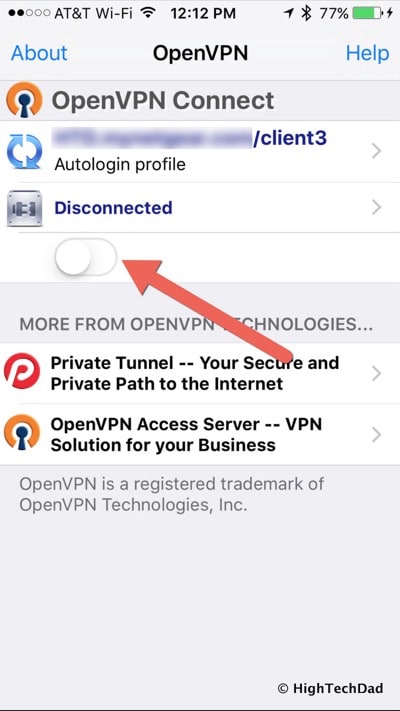
There are two ways to enable the VPN connection with the NETGEAR router. One way is to launch the OpenVPN Connect app and click the toggle to connect.
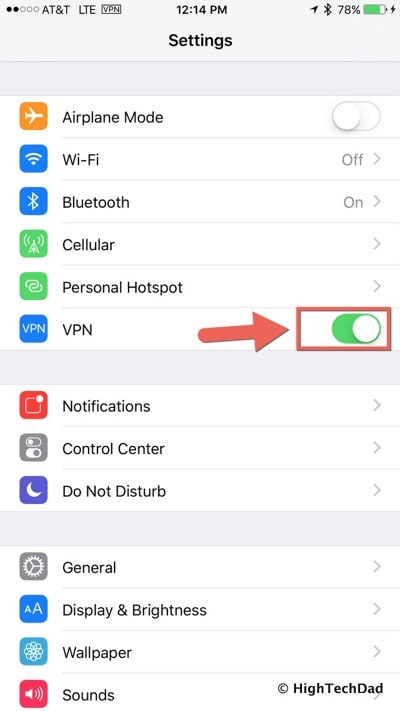
The other way you can do it is to go into your iOS Settings app and look for the VPN toggle. Click that toggle to turn the VPN on or off.
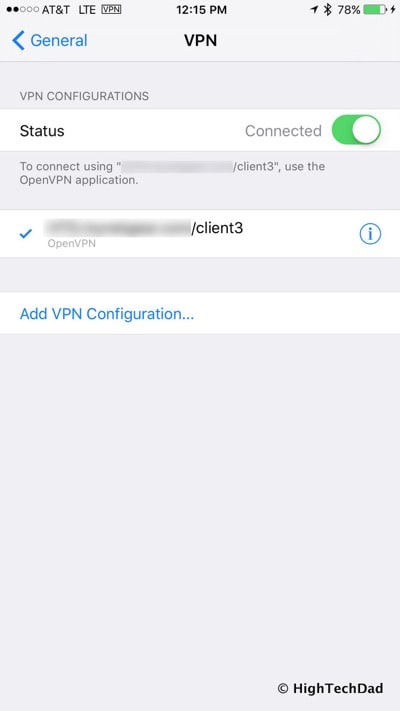
If you want to see more details on the VPN connection within the iOS Settings, go to Settings > General and scroll to VPN. There you can see the details of which VPN you are connecting to.
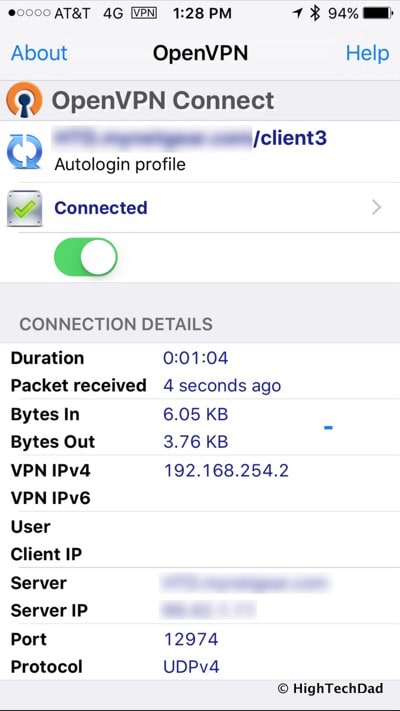
Within the OpenVPN Connect app, you can see more details about your VPN connection including the internal and external IP addresses.
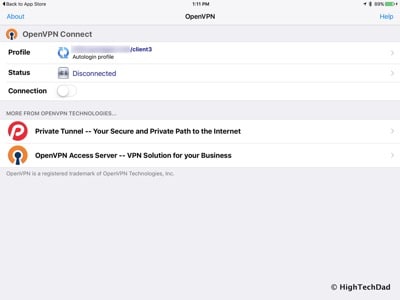
The exact same process can be done on an iPad as well.
That’s pretty much it. Once you have securely connected to your home network (or whatever network you have the NETGEAR R8500 running on) you can connect to local devices like printers or scanners or any media servers you have.
It’s nice to see that NETGEAR has enabled this function on their high-end WiFi router! Oh, and by the way, I’m a NETGEAR ambassador which means they regularly send me products to review. I get to keep the products after my review period. But, they didn’t ask me to write this article. I pretty much discovered this myself and thought it was important to share.
[StandardDisclosure]
HTD says: Having a way to securely connect to your home or business network is critical. With the NETGEAR R8500 & OpenVPN, you can create a free, secure VPN connection easily!






4 Responses
Thanks for the great article. Wondering if would be possible to setup with the “For non-Windows” option. The mobile configuration isn’t available on my R8000, but I’d imagine it’d be a matter of matching the settings. Not sure what the big difference is. Would you mind sharing some of those details?
Thanks.
Thanks for the comment. Honestly, I’m not too sure if there is a difference or not. Have you checked to see if there is a firmware update to the R8000? They may be enabling additional features/settings. I would reach out to NETGEAR support to see if they might be able to help out. I don’t want to give you misinformation. Good luck!
Just checked and there’s no update yet. Would you be able to upload the config files? I’d like to compare for anything that may be unique to them. I’ll give the non-windows files a try, though.
I would really recommend contacting Netgear. Also since the vpn settings are particular to my security settings, I can’t really share them.
Good luck!