My iPhone 3GS has been showing signs of a dying battery for a month or so now. The symptoms included the battery depleting faster than normal, charging very quickly (because there wasn’t much to “charge”), and the iPhone simply crashing when the battery was at 75-90% FULL. It would simply crash as I was doing some tasks, not even showing a warning that it needed a charge. Sometimes when I would plug it in to get charged after crashing, it would show the red battery icon which means that it was at a very low level of charge. Then after plugging it in, it would show about 75% full after a few seconds. There was definitely something wrong there with the power.
So while I was waiting for an iPhone 4 to arrive in a local AT&T store (you should read my issue about that whole process here), I decided that it would make sense to try to replace the battery on my iPhone 3GS because the phone itself was in great shape. Also, when I do eventually upgrade, my kids would get my old iPhone to play with and I wanted to be sure that it had a strong battery for their game time on it.,
Also if you are thinking about getting an iPhone 4 and you have an iPhone 3GS that is dying, you could do this process to bump up the re-sale value of your 3GS!
I did a little bit of research and found that iFixit.com (my favorite repair guide website for Mac/iPhone repairs and how-to guides) had a replacement battery kit for $19.95 which was a really good deal. The only thing is, you have to do it yourself! That’s not a big deal, right? Well, if you have never done any repairs on electronics, it is a bit challenging. But it is definitely doable, and I was willing to accept that challenge. And the nice folks at iFixIt.com hooked me up with a free battery…the only catch, I had to successfully do the install and document the process!
Be sure to read the last section below “Words of Warning Advice” before diving in.
To quickly cut to the chase, I WAS successful and the only way I could do it was with the iFixIt guide that tells you how to do it.
My How-To Video
Here is the step-by-step video which documents the process I went through to successfully install the battery (NOTE: be sure NOT to drink a lot of coffee beforehand, that was the ONLY mistake that I made!):
Be sure you watch this video (and others) a few times before you try to do this yourself!
Some Photos of the Process
I took some photos along the way as well so that you could see the innards of the iPhone 3GS and some of the install process.
Note: the photos below do NOT reflect all of the steps involved in this replacement process. Please be sure to look at the guide for ALL of the steps (complete with pictures as well). Or you can watch the video which walks through the process based on the install guide.
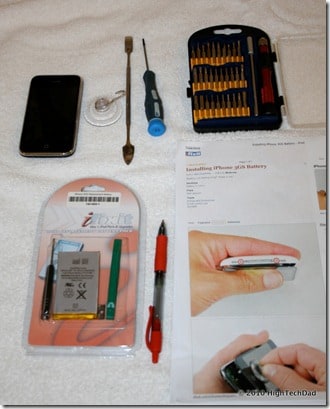
The tools that I used for the install were:
- The iFixIt Replacement Battery
- #00 Phillips Screwdriver (included with the Battery kit but I used my own which was a bit bigger)
- Spudger (included with the Battery kit but I used my own for this as well)
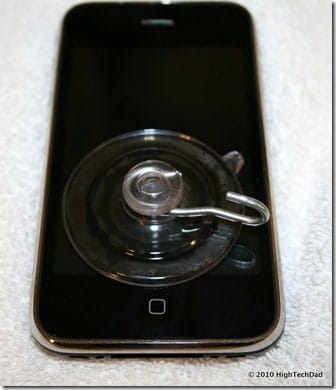
- Suction cup (to remove the screen – you can get one at a hardware store)
- Pen (to take notes and write on the iFixIt guide)
- iFixIt Repair Guide
- Tweezers
- Pliers (small nose & larger ones)
- Paper clip (to pop out the SIM card)
- Egg carton (I use that to store the small screws as I go)
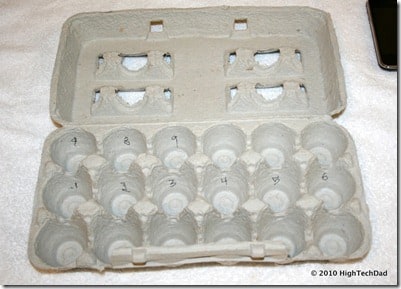
This is my high-tech screw holder. I label it according to the steps in the instructions. If there is a step where you need to remove screws, I write a number in the instructions and then put the screws in the corresponding egg carton section.
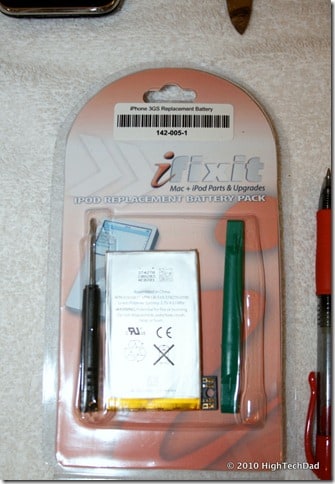
This is the iFixIt Battery Replacement kit.
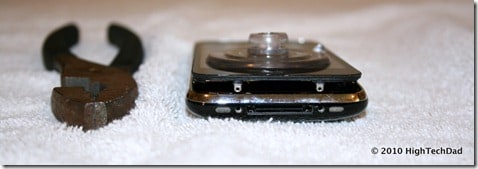
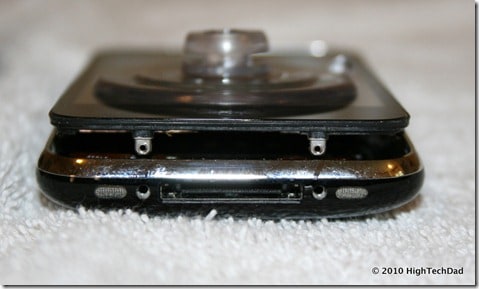
You will definitely need a suction cup to remove the screen of your iPhone. I ended up taking the little metal clip off to get a better grip. You put the suction cup down towards the Home button and lift from there. It does take a bit of force to do but be careful as you lift up to not jerk it off, possibly breaking some of the connector ribbons.
I ended up using some pliers to get a better grip on the suction cup.
But I was able to lift up the screen ok.
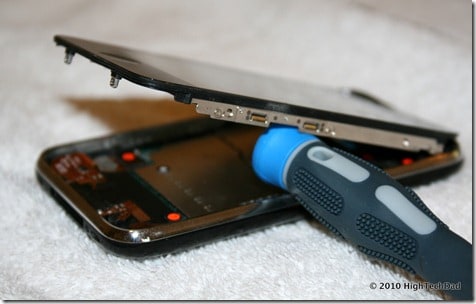
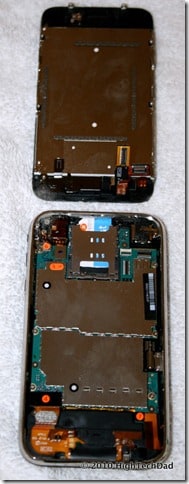
Here is the screen propped up. Inside the iPhone 3GS, the ribbons are actually very nicely labeled. This helps you identify which ribbons you need to disconnect and the order of doing so. You can see the orange circles in the picture below.
You can see the screen here fully detached from the body.
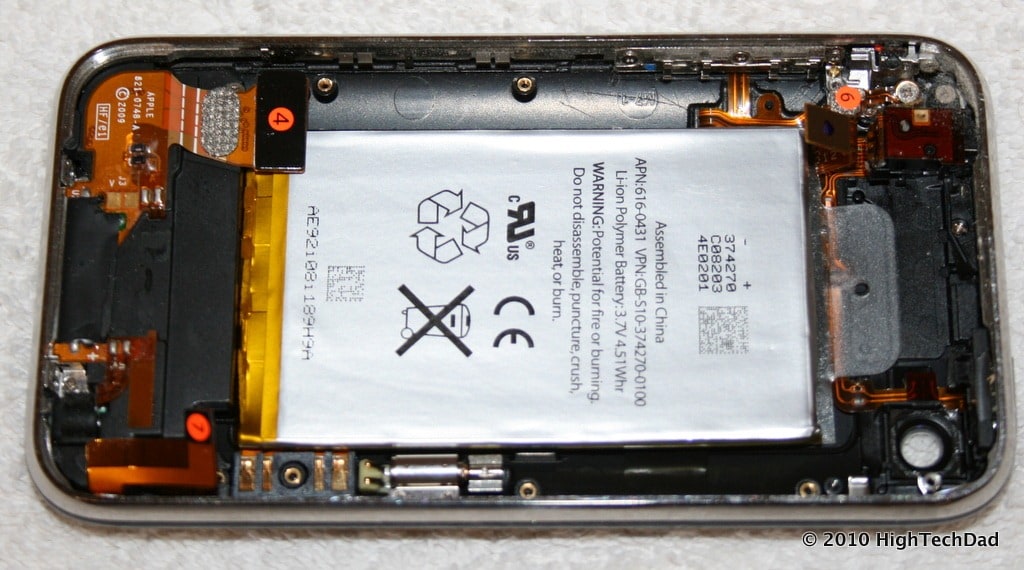
This is what the battery looks like after you have removed the screen, disconnected the various ribbons, removed the screws and taken out the logic board.
Words of Warning Advice
A few things to think about prior to going through this replacement process:
- This voids your warranty, I believe. If you mess up something, like break a cable or do something wrong, you do RUN THE RISK of breaking your iPhone. Apple might not help you fix it either!
- Be patient. This is not an easy thing to do. If you get scared by anything you see here, better to have a “professional” do it. Don’t race through the process. Expect to take an hour or two to do this right. It took me, complete with video taping, photographing and a few breaks, about an hour and a half to do it all.
- Don’t lose your screws (or your marbles)! They are REALLY small and you should keep track of them. I definitely recommend using the egg carton to keep everything in order.
- Don’t panic. Things go wrong. Be sure to read the instructions a few times. Watch my video and other ones to get an idea for what you are in for. You can ask me questions by leaving a comment on this post or asking me on Twitter.
- Don’t blame me or iFixIt if something goes wrong. The folks at iFixIt are professionals. They know what they are doing. I’m NOT a professional, but taking things apart and fixing them is something that I like to do because I learn in the process and can hopefully help others figure out how to do it as well. YOU ASSUME ALL RISK IF YOU UNDERTAKE THIS! That being said, it is definitely doable!
- Do a full backup of your iPhone prior to doing the repair. This is a no-brainer. If something goes wrong, you want to be sure that you have all of your iPhone’s data backed up somewhere.
- Don’t drink coffee before you do the repair. Trust me (and you can see my shaky hands in the video). It’s pretty hard to screw in those tiny screws if you are jumpy or have shaky hands.
- Don’t panic – wait, I said that already. Definitely need to say it a few times though!
If you do try to do this repair, please let me know how it went. Was my video helpful? Are there any steps that I missed or need clarification on? Be sure to leave a comment and let me know.
Disclosure Text : I have a material connection because I received a gift or sample of a product for consideration in preparing to write this content. I was/am not expected to return this item or gift after my review period. More information can be found in my About page as well as here.
HTD says: Doing repairs yourself gives you a great sense of fulfillment. And, in the end, you benefit by having a renewed gadget!

![IMG_8832[4] IMG_8832[4]](https://www.hightechdad.com/wp-content/uploads/2010/07/IMG_88324_thumb.jpg)
![IMG_8832[4] IMG_8832[4]](https://www.hightechdad.com/wp-content/uploads/2010/07/IMG_88324_thumb1.jpg)




20 Responses
How is the new battery doing now after couple of months of use?
It has been performing perfectly. No issues what so ever.
you have saved my life okay just my phone this is my story yeah yeah go get a cup of coffee you’re going to need it a couple of days ago I noticed my battery on my iPhone 3Gs started to depreciate I had to plug it up when I got in the car when I got to work when I went on lunch when I got back home and before I went to bed so you could say yes I needed a new battery so I decided to take my iPhone 3G S to a local phone store and have the battery replaced they offer their services for $35 prior to him repairing my phone I asked if it was an OEM battery he replied why yes it is an Apple certified replacement battery awesome I thought it took him about 15 min. to do what they had to do charge me replace the battery and I was on my way right before I left the store the sales clerk told me to make sure I charge my phone 100% this way there would be no rapid depreciation in the cell life of the lithium-ion batterie they have placed in my phone when I got to the car my battery life was at 45% when I got home my battery life was at 45% when I brought the phone into the house and put it on the wall charger it was at 35% I thought this is kind of crazy so I searched the Internet and tried all kinds of different crazy methods and none of them work so I tore apart my phone did what is said and now my phone is back to the way it was so thank you .
Great Article Thank You
Thanks for this. With your instructions I managed to change my iPhone’s battery in 15 mins!
You are welcome. It’s pretty easy!
Thanks so much for this video. Your tips, especially numbering the different screws and parts, were really helpful. The whole job took a little less than two hours.
The only things I would add to the list of stuff you might want to have on hand are a really small tweezers for getting the camera clip back in place, a lot of patience, and, if you’re an old guy like me, a really good magnifying glass. :)
Thanks for the comment. Good point there. I also recommend NOT drinking coffee prior to doing delicate work like this. Tweezers are KEY. Luckily, my eyes are still pretty good but that is a good point.
is it normal to but any batrry or its have to be as the old number like this
616-0434?
You need to have the proper battery for the particular iPhone that you are using because of firmware compatibility between the battery & iPhone. The battery has firmware and if it is not correct, it will crash the iPhone (as I experienced).
I changed the battery in my 3gs and now i’m not getting service. I have checked all the cables and have taken everything apart and back together very carefully and still no service…. Help!
That’s a tough one. Sometimes you might knock another cable out in the process. And some of the connectors really have to be carefully but firmly snapped in.
Thanks, I used this video to clean my screen from the inside. After putting everything in place, the home power button didn’t work, however, after I put the screen in its final place, it worked just fine. For a moment, I got scared that I missed up my iphone for something that I didn’t necessarily need.
Thanks for the video. I ran into trouble reconnecting number 7 (snap) and it absolutely, positively will not snap back into place. Do you think if I had someone solder the connection it will work once I get it all back together?
You need to take part in a contest for one of the best websites online. I will recommend this blog!
http://egydroid.blogspot.com
Just watched the video to change the battery in my 3gs – very helpful, thank you!
I am not sure if anyone has commented this helpful hint, but a helpful hint for for future viewers…I dipped the tip of my screwdriver into a little mighty mend-it (I assume any sort of glue will work) to help the TINY screw stick making it easier to line up to the screw holes when putting the phone back together!!
Thanks again!
Nice tip! Thanks for sharing.
I am so grateful to you! I followed your instructions. The suction cup was a great idea. I had one screw I couldn’t loosen with the 00 Phillips screwdriver that came with the iFixIt kit, and bought a set of Precision screwdrivers. It worked perfectly!
I noticed in the video that you replaced a 616-0435 with a 616-0431
How do you know what is compatible?
I did just what you said and had no problem until I turned it on. It saws “searching” and I can’t get on the network. Verizon said that you are not supposed to be able to change the battery, so now my warranty is void and I don’t have a working phone. Sometimes doing something the cheap way can cost lots of money. I don’t have money for a new phone, so I’m out of luck.