Getting a new car is always fun. I personally love that new car smell that comes with your purchase. And making your car more “yours” is always important. Many people will cover their cars with bumper stickers or other types of customization. Some are purely aesthetic while others not only look good but also provide an additional function like safety or the preservation of your car. Any many of these upgrades can be done days or even years after your purchase.
As part of my car buying series (see here and here), I’m focusing on how consumers can save money after buying a lower model car (e.g., the base model) and then buying after-market add-ons to bring it closer to more expensive trimlines but without paying the dealer’s dramatically inflated pricing. One great thing about after-market upgrades, like in this case window tinting, is that you can pick and choose exactly the ones that you want and not get “extras” in a package that you don’t really need.
So let’s take a look at the first thing that I had done on my new car, window tinting. This is an upgrade that I definitely recommend that you do for a variety of reasons:
- It protects the interior of your car from harmful UV rays
- It keeps the interior of the car cooler
- It provides added safety in the event of crash by containing all of the broken glass
- It gives added security from a break-ins since it is more difficult to break the glass
- It provides privacy to your passengers (great for kids)
- And it simply looks great (my opinion)
Many times, you can buy a new car with privacy windows or the window tinting already done. Some of these tints are done in the glass making process itself. Some cars even have double paned glass making them stronger, more energy efficient and, of course, more expensive. But, did you know that many car dealers will actually send out many of their vehicles to get the windows tinted by a 3rd party and then later mark up the price on the sticker.
Car window tinting is actually not as expensive as you might think (starting possibly around $200-300 depending on the installer, your vehicle and location). You can buy do-it-yourself kits (which I DON’T recommend) or you can get it done professionally (which I DO recommend). The problem is, not all window tinters (or the film that they use) are the same. Some tinters use cheap films that don’t stand the tests of time and tend to fade, crack, bubble, peel or turn purple. Also these inexperienced or less expensive tinters might simply do a poor application job with the film. So, it is extremely important to shop around and get recommendations (look at Yelp reviews for example). And DON’T always settle for the least expensive.
For my window tinting, I choose a local installer that had the best Yelp recommendations. I read through all of the reviews (the good AND the bad ones) and then spent some time looking at their website. My installer had been in business for 25 years and was run by a father and son team. They also do audio, GPS, video and alarm system installs, in addition to window tinting, so auto upgrades are their passion.
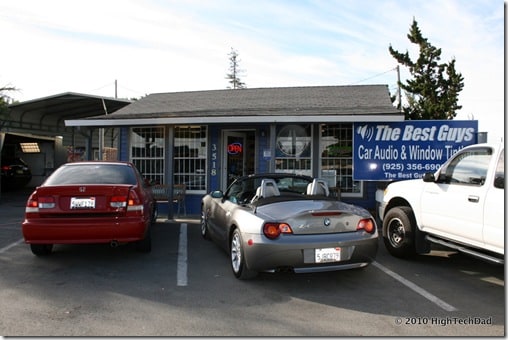
This post is designed to provide you with some insight into what is involved in the window tinting process. The tinting was done by a company called The Best Guys and I was present to photograph and film the entire process. Most of the time, you don’t normally watch the process but I found it really interesting. If you can, ask to watch the install, especially if you have a couple of hours to burn.
Below is a 20 minute video that first talks about the company and their philosophy and then how my particular installation was done. After this video in the content below are some photos that document the process as well. It’s pretty interesting so watch and read on!
The installation process can be broken down into the following components:
- Choosing the film tints
- Cleaning the windows outside
- Cutting the film (by machine and/or by hand)
- Shrinking the film to remove “the fingers”
- Cleaning the inside
- Laying the film, squeegee and de-bubbling
Choosing the film tints
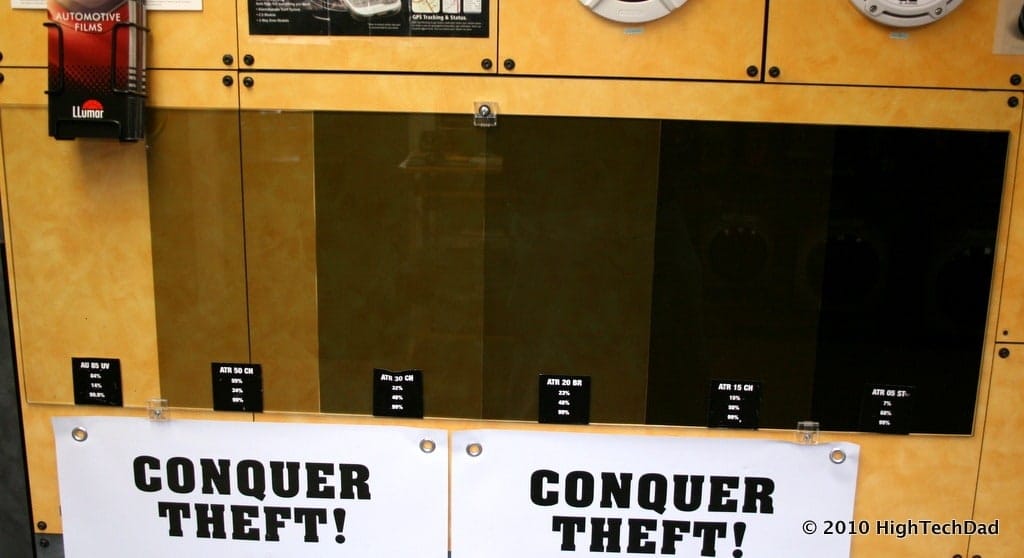
This is a very personal preference. Also, the tint levels may be determined by state laws. For example, in California, you aren’t legally allowed to tint the front side windows, however, you can pretty much tint the back and rear window however you see fit. The darker the tint typically means that it will dramatically reduce the temperature of the sun coming through it. It also means that at night time, it will be a lot more difficult to see through. My recommendation is NOT to go “limo dark” and do more of a 15% or 20% tint, which is more like what you get from a factory-tinted auto.
The percentage associated with the tint is for the amount of visible light that comes through the film.
I do recommend that if you can tint the front, even with a clear tint, you do so, because you get many of the advantages that I listed initially. You can especially notice that the sun on your arm with the windows closed feels just a bit cooler than without the tint.
I don’t really know much about the different manufacturers of the film but the one that The Best Guys swore by was Llumar, which has a life-time warranty (always a good thing). The Llumar tints that were used for my job were:
- Charcoal ATR 15 (Back & Rear Windows) – 15% visible light transmission, 50% total solar energy rejection, 99% UV rejection, 83% glare reduction and 8% visible light rejection
- Neutral AU 85 (Front Windows) – 85% visible light transmission, 16% total solar energy rejection, 99.9% UV rejection, 13% glare reduction and 8% visible light rejection
Once the tints were chosen, the prep work started.
Cleaning the windows outside
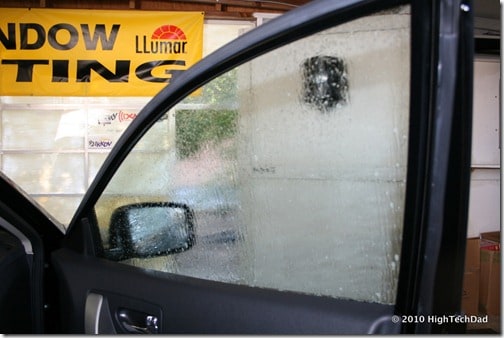
One of the most important steps that is repeated throughout the process is that of scrubbing and cleaning the windows. Any tiny bit of dust or dirt can cause issues. First, the outside of the windows were washed. This was, at first, a bit confusing to me as I thought that tints go on the inside of the car. Why wash the outside? For starters, you have to have it clean so that you can see dirt or bubbles much easier once the tints are being installed on the inside.
Also, as it turns out, the tint is first applied on the outside so that the shrinking step can take place. I will explain the shrinking process later. However, since the film has to be cut/trimmed and shrunk on the outside, you have to be sure that the windows are clean.
Cutting the film (by machine and/or by hand)
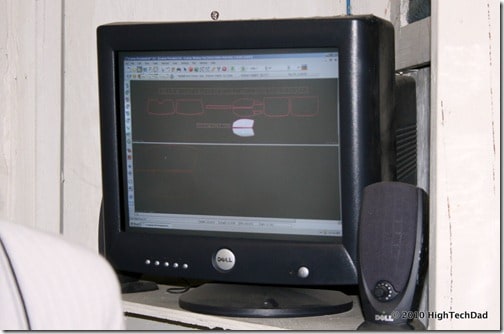
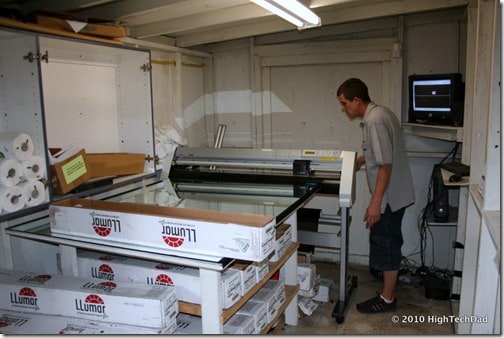
There are a couple of main ways to cut the film. A lot of shops now use computers and automatic cutting machines to accurately cut the film. Other shops cut their film by hand. Frequently you have to hand-cut films for older cars or for complex or custom jobs.
The computers store the exact sizes of all of the windows for recent automobiles. You simply look up the year, make and model and the computer displays all of the window templates. With the particular program that The Best Guys used, you could drag and drop the stencils around for best placement on the film and then when you were happy with the arrangement, you sent the cutting instructions to the automatic cutter.
This cutter was so precise that it would cut through the film but not the backing paper underneath. It was pretty amazing to watch it cut out all of my rear windows (rear, 2 small and 2 rear passenger ones).
For the front window, since the tint was a slightly different thickness and the cutting machine was not configured for that type of cutting, my installer, Charlie, who has been putting on window tints for 9 years, cut the film by hand. I was pretty amazed that he was able to cut and size the two front passenger windows so quickly and accurately.
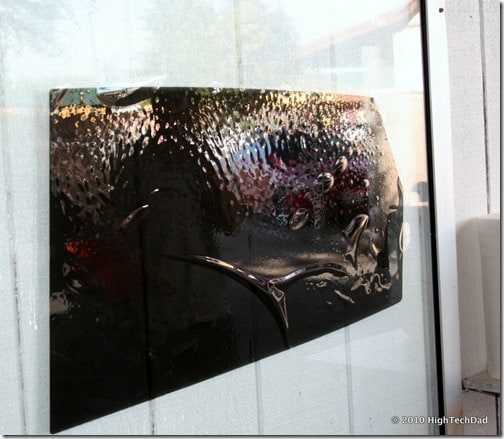
Other cut film is then placed on some glass boards near the car. There were two of these glass boards, one on each side of the car. The boards were used for trimming, sizing, shirking and simply keeping them handy.
Shrinking the film to remove “the fingers”
I have put window tinting on my house windows. It’s a bit of a pain in the butt but once you figure it out, it’s not too hard. But when it comes to putting tinting on a car, it gets much more complicated very quickly. This is due to the fact that auto windows are curved and not completely flat. What that means is that when you put film on a curved surface, there are sections or “fingers” (as Charlie called them) that curve up. If you don’t remove these fingers, you can not do a good job applying the film on the inside.
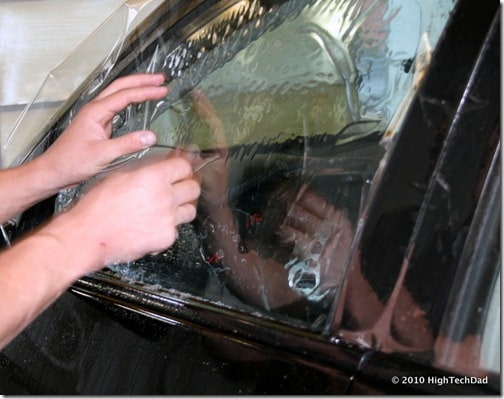
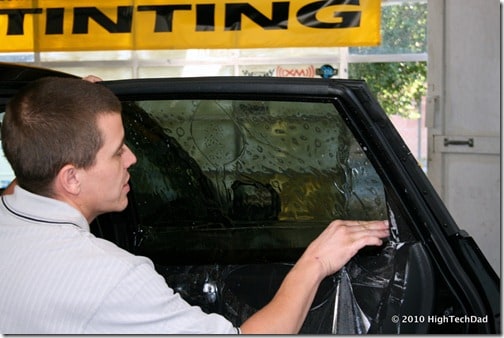
First, the film is placed on a thoroughly wet and cleaned window.
Then, trimming down the film is important.
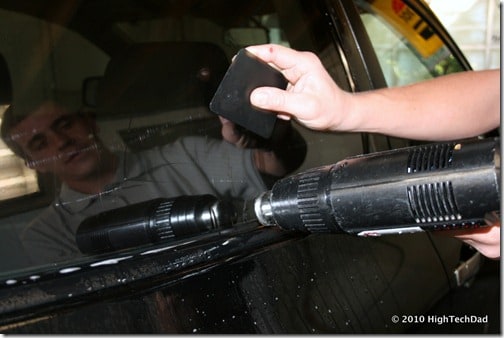
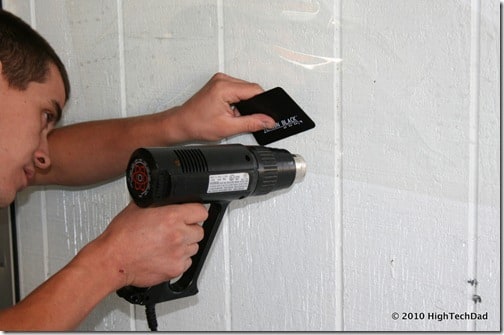
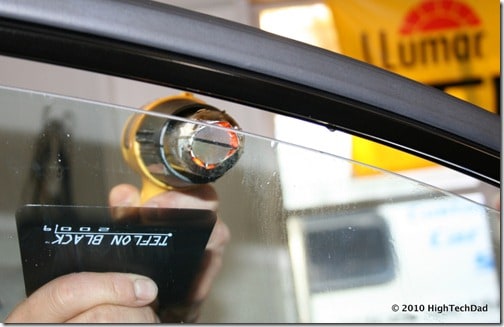
So, to remove these fingers, you need to heat up the film so that it shrinks to match the curvature of the window. Armed with a heat gun, Charlie worked, magically removed the fingers.
Some shrinking can be done on the glass board where film is placed for trimming.
The heat gun gets all of the bubbles and fingers out with the help of a squeegee (I’m not too sure of the technical term for this item).
Cleaning the inside
As I mentioned before, cleaning is critical to the success of an install. Also, as I learned from installing tinting on my home windows, it is much easier to place and flatten the film and remove the bubbles if not only the window is clean but also very wet. The film needs to be wet as well. Eventually the water between the film and the window will evaporate, pulling the film closer to the window. But while it is wet, you can slide the film around briefly to position it correctly.
The solution that Charlie uses is comprised of baby shampoo and water (but he didn’t tell me the exact proportions). He uses the same mixture to clean the windows as well to prep the film to put on. Also, when the windows are scrubbed, you have to use a non-ceramic based scrub. If you use a kitchen scrub, for example, you will scratch the window because it has ceramics in it.
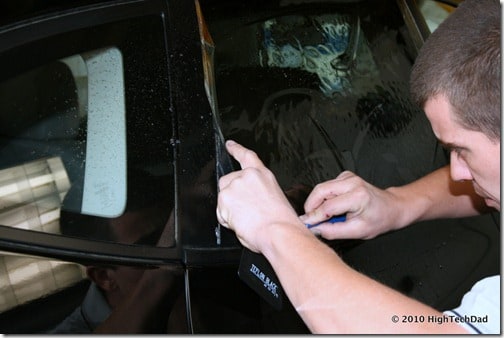
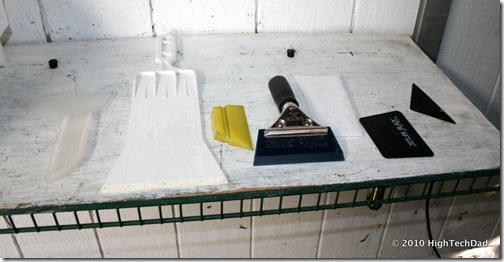
Eventually, once everything is well scrubbed, the installation of the films can be done. Below are some of the “tools of the trade.”
And they definitely go through a lot of razor blades!
Laying the film, squeegee and de-bubbling
Since all of the prep work is done, the film can now be applied. Compared to all of the other steps, this is probably one of the fastest. You have to move quickly to ensure the film adheres to the window while it is wet.
The video at the beginning of this article shows the process in action.
The Final Result
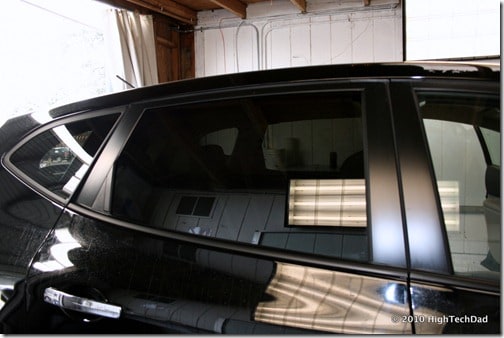
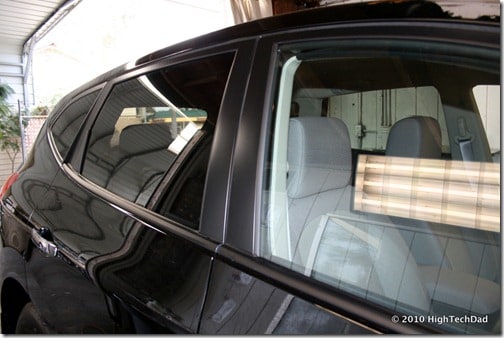
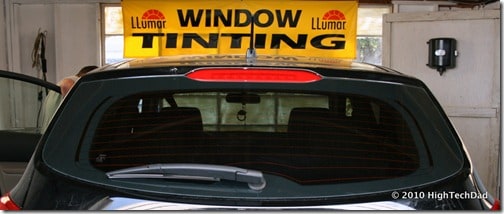
The entire install procedure takes between 1-3 hours or so, depending on the type of car and how many windows. Hopefully things go smoothly and your end result looks as good as mine did:
The window tinting looks as good as a factory installed version. But, it is done at a fraction of the price of paying for a package that includes window tinting. And, if you ask the dealer to do it for you, you will pay a premium for it.
Like I said, when shopping around for a window tinter, be sure that you do your research. You might even want to visit the shops where the tinting is done. Get the sales pitch, watch some of the work in progress and ask questions like:
- What kind of warranty do you have?
- What kind of warranty does the film have?
- How long have your installers been with you?
- How long have you be installing film (or stereos or whatever)?
- How long have the installers been doing their trade
The other thing to remember is that window tinting is not a permanent thing. Films can easily be removed in a short period of time.
Anyway, I want to thank The Best Guys for walking me through the process of window tinting and letting me film the install in action. I definitely learned a lot.
Disclosure Text : I have a material connection because I received a gift, service or sample of a product for consideration in preparing to write this content. I was/am not expected to return this item or gift after my review period. More information can be found in my About page as well as here.
HTD says: Window tinting is one GREAT example of an after-market upgrade that isn’t expensive, and if done well, can protect your car as well as also raise the level of its aesthetics quite a bit.

![IMG_9391[4] IMG_9391[4]](https://www.hightechdad.com/wp-content/uploads/2010/10/IMG_93914_thumb.jpg)
![IMG_9372[4] IMG_9372[4]](https://www.hightechdad.com/wp-content/uploads/2010/10/IMG_93724_thumb.jpg)
![IMG_9400[4] IMG_9400[4]](https://www.hightechdad.com/wp-content/uploads/2010/10/IMG_94004_thumb.jpg)
![IMG_9398[4] IMG_9398[4]](https://www.hightechdad.com/wp-content/uploads/2010/10/IMG_93984_thumb.jpg)



9 Responses
Now, your car looks mysterious! Very nice. Aside from giving your car some stylish feature, tinting its windows really protects you from theft. Combining it with car alarms, there is no chance robbers can steal from you. It’s also advisable to avoid leaving highly valuable items in your car.
I work in the same area, good work Is it possible: The name of the system will cut the movie thank you
Thanks for the great review! I’m getting my windows tinted at the same place so I’m glad to see your positive results :)
Car window tinting is an amazing idea in oder to protect your privacy along with your skin. And our author here has described some best techniques to clean the window tint. It is most to keep your window clean and well.
it’s a great and helpful guide on step by step procedure how to install car window tint. I think I must consult with the service man while installing the film. I hope that after following these method I can have my car window tinted.
This is a complex method and Should be done done under the supervision of any professional. Because installing a window tinting without having any skill it might get bubble in window so Make sure, You will never get any bubble inside your window tinting.
Should I prefer to install the film from myself or Should I concern with any professional because According to me Window tinting is a complex method but I think I can do it without any supervision. And the steps menioned here in this post will help me a lot.
PROFESSIONAL is always better, but make sure they have good tint, or buy your own and have them install it.
Sometimes, some good tint like LLumar and Banari, or other high end stuff might only be available at the shop. I know for a FACT, LLumar doesn’t sell their stuff to consumers, but to the shops.
Thanks for posting this blog. I read the whole blog and I learned a lot from this blog. It is important to choose the best quality and affordable glass service for your window upgrade at home. I hope you post more blog tips for us.