
New iOS devices are starting to come with a ton of storage. Take the new iPhone Xs and Xs Max. You can get a configuration up to 512GBs! That’s a lot of storage! And who doesn’t like having a ton of space for videos, photos, music, or movies? Well, if you do local iTunes backups (which is what I recommend doing) — you are making regular backups, right? — you may suddenly discover that there is not enough space on your Mac to do backups anymore. This can be maddening! Luckily, with a little bit of work, you can change that default location for your iTunes backups to an external USB hard drive. And I’m going to show you how to do this easily.
First off, I would recommend having a dedicated (or really big) hard drive that you can use for your future iTunes backups. There are a ton of options available, but I would recommend having at least 1TB just to play it safe. A quick search on Amazon for 1TB USB hard drives has quite a number of options for around $50. For a 2TB external USB drive, you are looking at about still less than $100 for that peace of mind.
Next a quick tip – when doing local backups, I definitely recommend using a true Apple Lightning Cable. If you use a cheap knock-off, even if they do say “Apple Certified,” you may have some problems doing a backup. I have heard horror stories when people use cheap cables (and those can even damage the circuitry of your iOS device).
Now, let’s get into how to move or change the location of your iPhone or iPad backups within iTunes.
Be sure to read through all of these instructions before actually doing any of it to be sure you understand what you are doing.
This article does contain information for changing the iTunes backup location on a Mac only. (If you want me to do an article for PC users, please leave a comment!)
Lastly, these instructions are for people who do backups using iTunes and NOT iCloud. Personally, I recommend doing local iTunes backups (encrypted) as you never know your connection health for iCloud, especially when everybody is upgrading, for example. Also, if you have a ton of stuff on your iOS device, you will probably have to pay for additional iCloud storage space. I’m cheap (just ask my kids) so I do the “free” option of a local iTunes backup. The disadvantages of doing a local iTunes backup are 1) the size of the backups and 2) being tied to a single computer for your backups.
Regardless, let’s see how to change those backup locations on a Mac.
Changing the iTunes Backup Location on a Mac
There are really two ways to approach this. You can move the entire backup folder which contains backups from all of your iOS devices (this is the easiest but takes up the most space), or you can move individual device backups (a bit trickier but allows you to move just the device backups you want). Since I’m all about making things EASY, I’m only going to focus on the first option, the ENTIRE backups folder.
STEP 1 – Find the current backup location
The first step is finding the location of your iOS backup on your Mac. This is pretty easy to do.
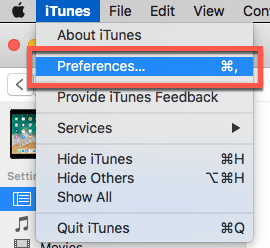
- First, launch iTunes and go to your iTunes Preferences.

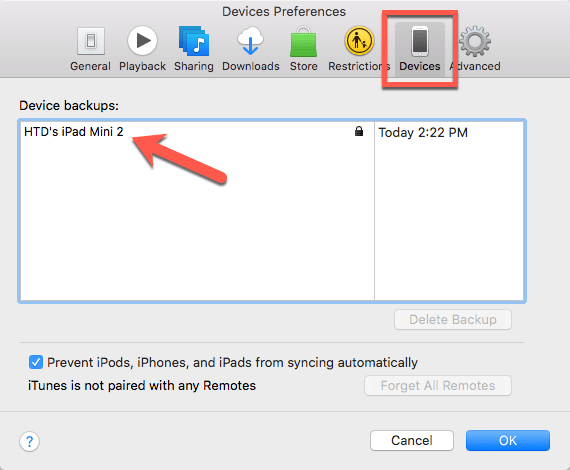
- Next choose the Devices tab.

- Then, select the device backup you want to move and either right-click it or click it while holding the Control key.
- Then select Show in Finder from the list of possible items.
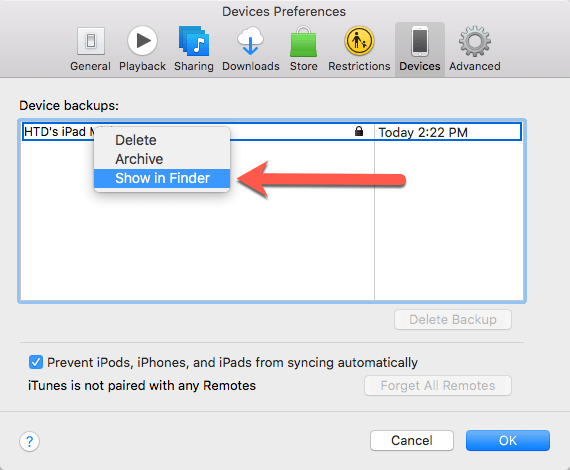
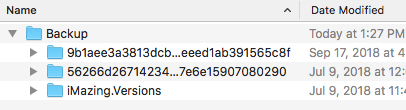
This will open up the iOS backup which typically is in the ~/Library/Application Support/MobileSync/Backup folder. This “Backup” folder is the backup folder that you are going to move to the external or other hard drive.
STEP 2 – Move backup to external drive
The next step is probably even easier than the previous one, that of moving the backup to the external drive. But one thing to think about here. I would keep your external hard drive naming extremely simple. I probably wouldn’t use multiple words and definitely not use spaces or punctuation. Name your backup hard drive something like “iOSbackup” or if you want to use a space, use an underscore character like “iOS_backup” to keep things simple.
Assuming that your external hard drive is already connected to your Mac, you are ready to go copy the backup file from your Mac to the external hard drive.
- Close iTunes!
- Open your external hard drive in the Finder (better to have as a second Finder window).
- Find the iOS Backup folder (the one that holds the individual backups) in the previous step and have that as another open Finder window.
- Drag the current iOS Backup folder from your Mac’s hard drive to the connected USB hard drive.

- Your Mac may prompt you to enter your administrator password to authenticate the move.
- Let the backup file copy from your Mac to your external hard drive.
- Note: don’t delete the old backup file yet!
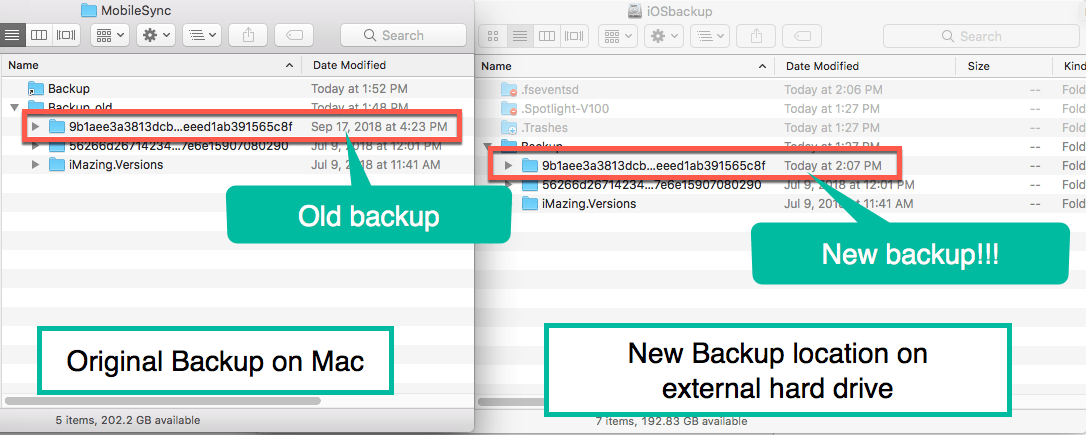
- You should now have a “Backup” folder on your external hard drive with copies of your individual backups
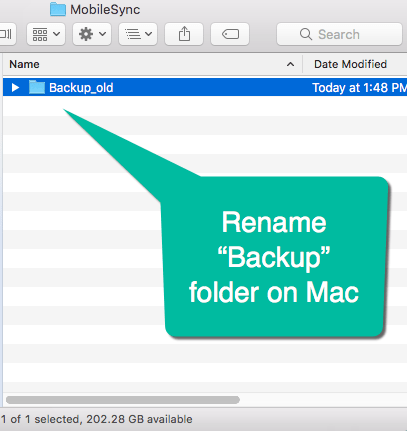
- RENAME the original “Backup” folder on your Mac to “Backup_old”

STEP 3 – Creating a Symlink
Now comes the trickier stuff, that of creating a symbolic link (symlink). Basically, this process tells your Mac (and iTunes) about the new path to the backup folder for your iOS backup on your external hard drive. It’s like an alias, only better.
Note: this next step involves using the Terminal application and running commands on your Mac. If you aren’t comfortable with this, you probably should give up now. Haha, actually, it’s not that tricky, IF you are precise and pay attention to the details. Also, the name of your hard drive on your Mac (or external drive) may be different than what I’m showing below. It is critical that you use the names of YOUR folders and hard drives and not what I’m showing here. Also note, if you have a space in a folder or hard drive name, you need to be sure you use a backslash “\” in the naming. So for “My Hardrive” in the Terminal app, it would look like “My\ Harddrive” and capitalization does count!
Tip: there is a really great, helpful trick to use when you are writing out long directories within Terminal. You can start typing the name of the directory and hit the TAB button to have the folder name automatically fill in. This helps eliminate type-os. If there are two or more directories that start with the same letter, nothing will fill in and you will have to enter the next letter in the directory or folder name. It will also add the backslash automatically for folders that have spaces in them.
- Launch the Terminal app.
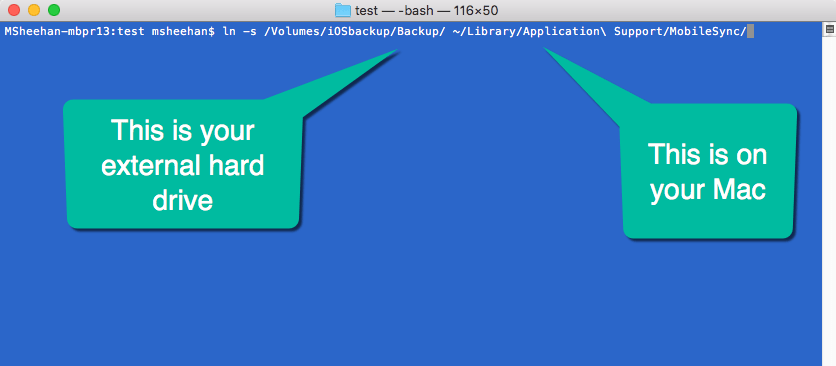
- Type in the code below to create a symlink. Remember to change the names of your file and hard drive to reflect your specific computer environment (see red text for variables):
ln -s /Volumes/iOSbackup/Backup ~/Library/Application\ Support/MobileSync/
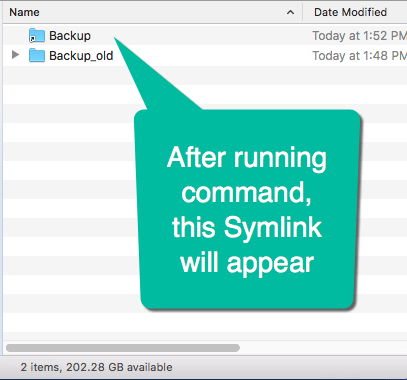
- Check your backup folder on your Mac to see if the new Symlink has been created. It looks like a folder with a little arrow at the bottom. (If you get an “Operation Not Supported” error, I have a solution at the bottom of the article.)

That’s it! You can test to see if things worked a couple of ways. First, just double-click on the new Symlink folder and see if it opens the Backups folder on your external hard drive. If it does, it worked! (If it doesn’t, you may have to try it all again.)
Then, you can also test by opening iTunes and doing Step 1 (the first set of instructions above) again by right-clicking on a backup and choosing “show in Finder.” If the backup location is the new one on your external hard drive, you should be good to go!
Then, do a backup of your iOS device and once it completes, review the timestamp in the old backup location (on your hard drive) and in the new location (on your external drive).
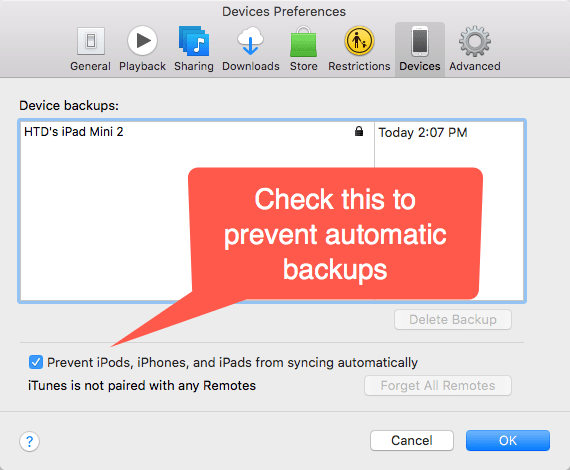
One last important thing! Since you might not always have the external drive plugged in, I would highly recommend checking the “Prevent iPods, iPhones, and iPads from syncing automatically” within the Devices tab in iTunes preferences. You should only back up with you have the hard drive connected.
Ok, one MORE last important thing! You can now delete the old backup directory on your Mac, the one we renamed to “Backup_old” in Step 2 – #9 above. Look at all the space you freed up!
Lastly, if you ever want to UNDO what you just did and change the location back to your Mac and the default backup location, all that you need to do is delete the Symlink in your MobileSync directory: ~/Library/Application\ Support/MobileSync/ and then copy the complete “Backup” folder from your external hard drive back to your Mac.
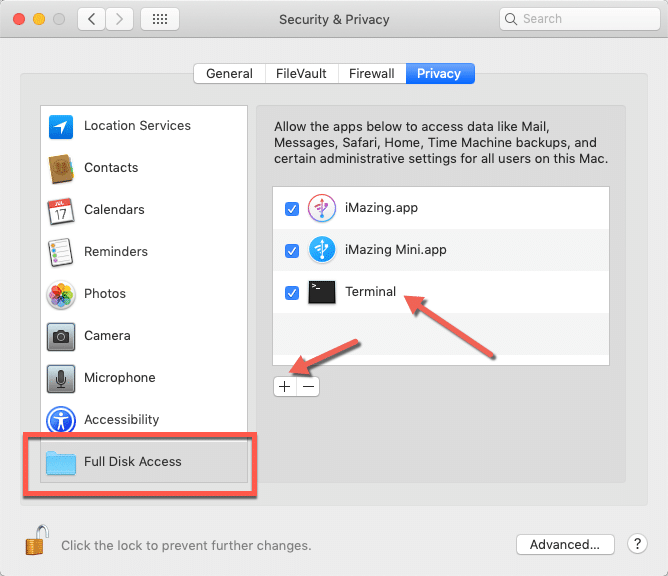
If you run into an “operation not supported” when you try to run the Terminal command, it is probably due to System Integrity Protection which happens on El Capitan or later. I found an easy way to fix this. You just need to open your System Preferences and go to the Security & Privacy pane. Then go to the Privacy tab and look at the Full Disk Access section. All you need to do is add the Terminal application (located in your Utilities folder) to the Full Disk Access section. Then just run the command and it should work.
Whew! It’s a lot harder to write out than to actually do. The steps are basic:
- Find the current backup location
- Move the backup folder and data from Mac to external hard drive
- Create the symbolic link
- Delete the old backup folder
I hope this was easy enough to understand and do. If you have any questions, please feel free to leave a comment, and I will do my best to answer it.
I hope this How-To article will save you some precious space on your Mac, especially if you now have an iPhone and/or iPad that has a HUGE amount of storage!
HTD says: While Apple doesn’t officially approve of this, moving your iTunes iOS backup location to an external hard drive can save you a huge amount of space on your Mac!


1 comment
C. Rivera
Worked like a charm!!!! Thank you for such a detailed, complete and humorous article on how to relocate the backup folder for Macs.
Only one suggestion: When explaining the path to use in the symlink creation, you can use placeholder like this: /… etc. and then explain: where is the name of your drive, and so on. That was the part I find it a bit tricky to understand from your article.