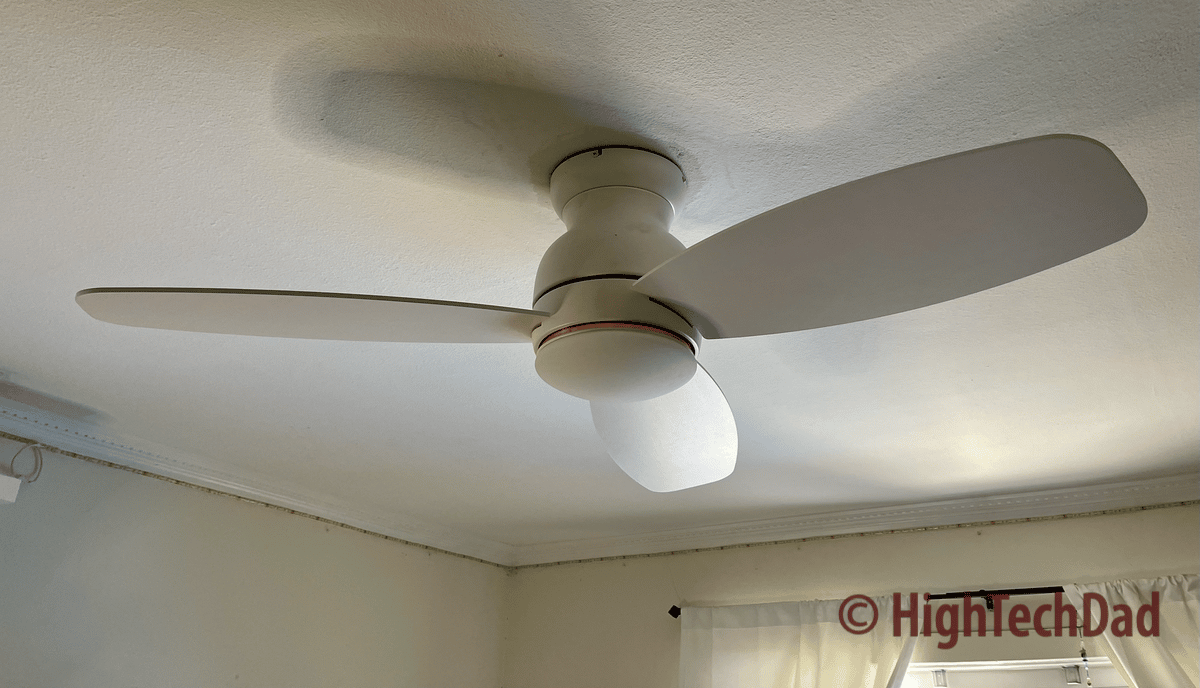
One of the few remaining items in my house that aren’t smart is the ceiling fan in my kids’ room. (Well, there are other not-so-smart things remaining, myself included.) But, thanks to the help of Smafan, their room now has a modern, sleek, stylish ceiling fan that is connected to Amazon Alexa and Google Home! This smart fan is easy to install and connect to your smart home and a great weekend project for someone with only a little electrical experience. (*Disclosure below.)
What is a smart fan? My definition is that it can be connected to various smart hubs (like Google or Amazon) via WiFi and can be controlled by those apps, its own app, or by voice commands. Many of the ceiling fans at Smafan, also known as Carro Technology, do precisely that. You simply install the fan and connect it.
In this review, I will walk through some of the features as well as the installation of the Smafan smart fan. This should be a relatively easy process for most people who have done minor electrical installations in their homes. If you are replacing an existing ceiling fan or light, this can take you a couple of hours, depending on your skills. However, if this is a new fan install, I recommend consulting or using a certified electrician. You can’t be too safe!
UPDATE: at the end of this article is a 10% off promocode for your next Smafan smart fan!
Installation and feature walk-through video
Most of my installation steps and tips are included in the video below. Initially, I was not going to show much of the installation, but as I started down that path, I realized that if I had questions or wanted to see how to install the Smafan smart fan Trendsetter, I would have wanted to see a video to become more of an “expert.” And some of the steps in the video may also apply to other Smafan fans.
In my video, I show the unboxing so you know what you will get in the 48″ Trendsetter smart fan box, how to do the ceiling mount, connect the wires (including the ground, which confused me at first), use the safety harness, attach the fan blades, connect the LED lights, and use the smart apps.
The video is a bit long, but if you view it on YouTube, in the video description, you can see various chapter marks for specific items in the process.
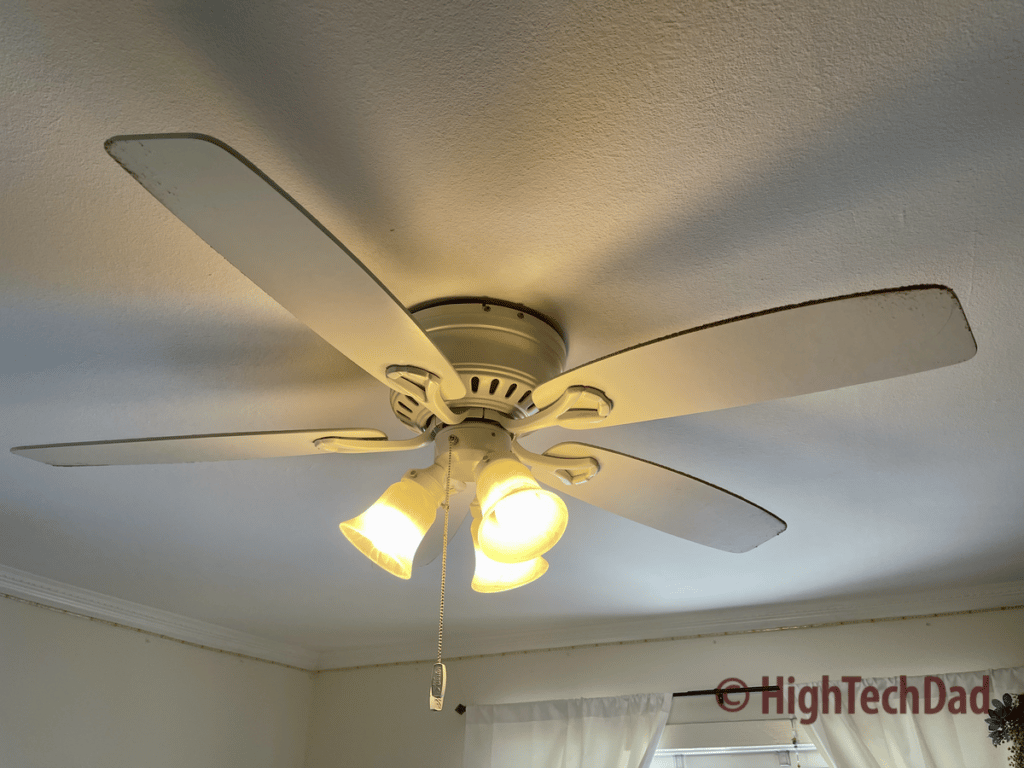
What I don’t cover in the video is the removal of my old fan (shown above – old and a bit ugly, right?). This actually turned out to be the more complicated thing in the entire process. I didn’t have a manual, so I just started unscrewing things.
NOTE: Before you do ANY removals or installations, be sure you turn off the power at your circuit breaker! Do NOT just turn at the wall switch. Be safe!
After the unboxing, the video starts up with the ceiling mount installed. There was a junction box that was secure enough to hold the fan (as it held the old fan previously).
Photos, tips, and thoughts on the installation process of the Smafan smart fan
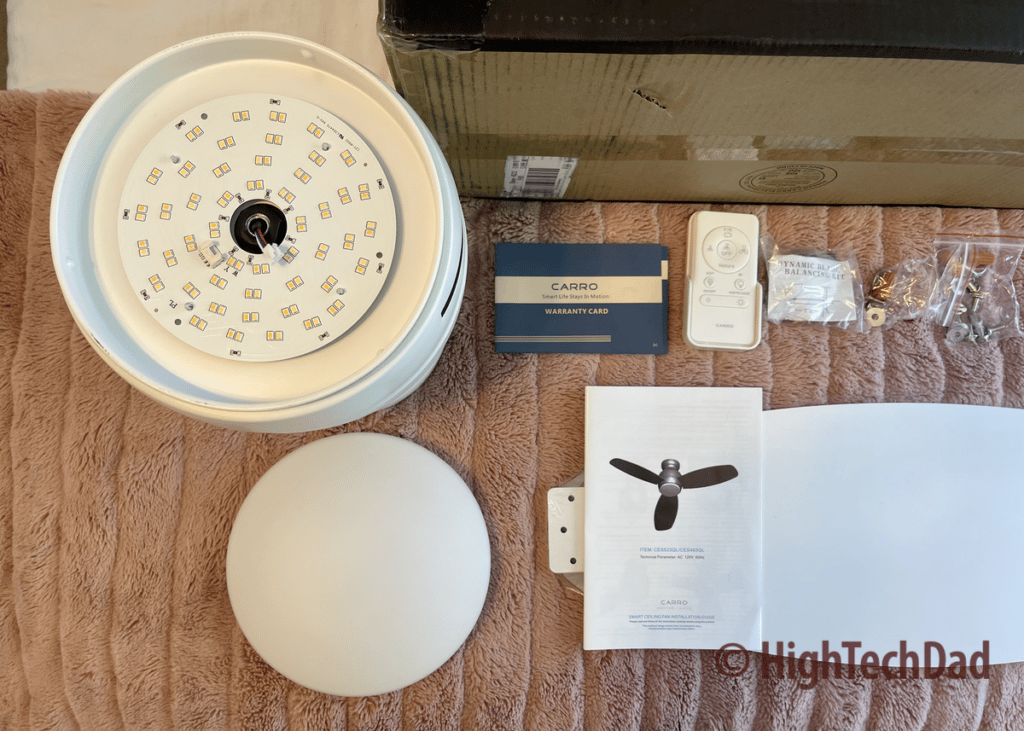
Here is what is included in the Smafan 48″ Trendsetter smart fan box. And, by the way, everything is nicely and carefully packaged so that it can be easily shipped to you.
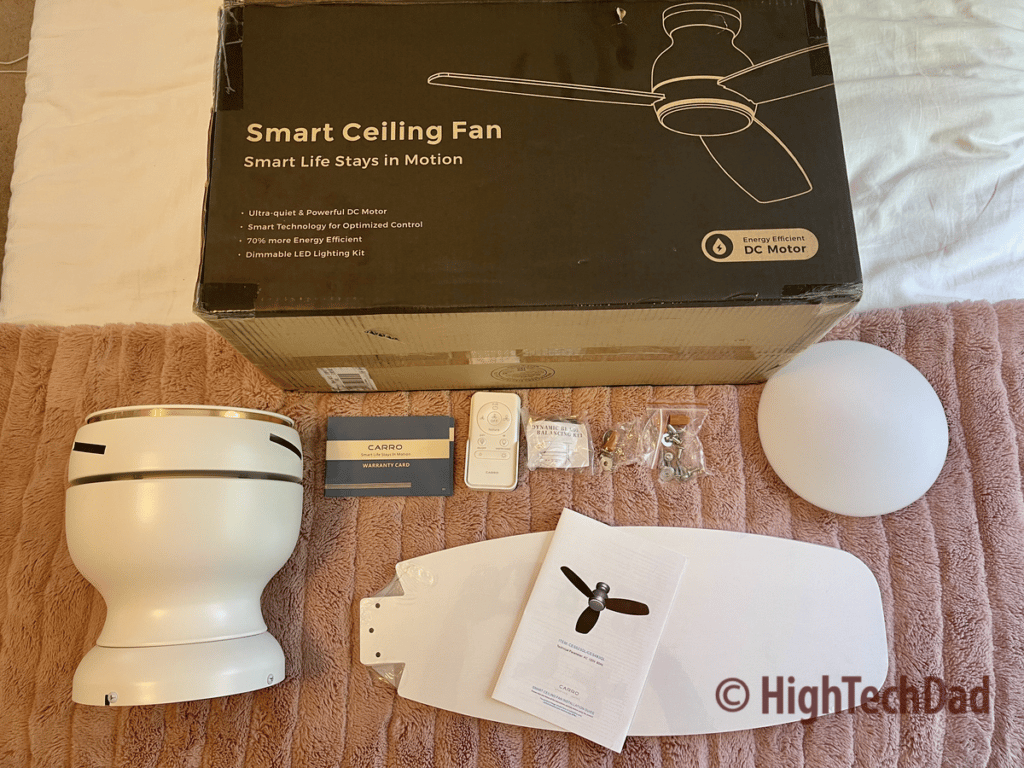
Items included:
- Motor, LED lighting, and ceiling mount (they come attached)
- 3 blades (you may have more depending on the model of fan you select)
- Domed light cover (again, it may vary based on your model)
- Hardware (various screws, washers, wire connectors)
- Balance weights (to correct wobble – I didn’t have to use these)
- Installation guide & manual
- Carro warranty card
For the installation itself, I recommend having the following items:
- A helper (at some point, you may need an extra hand – see my video)
- Phillips head screwdriver
- Electrical tape (optional)
- Larger wire connectors (optional)
- Original screws from junction box ceiling mount (optional – I reused mine as they fit better)
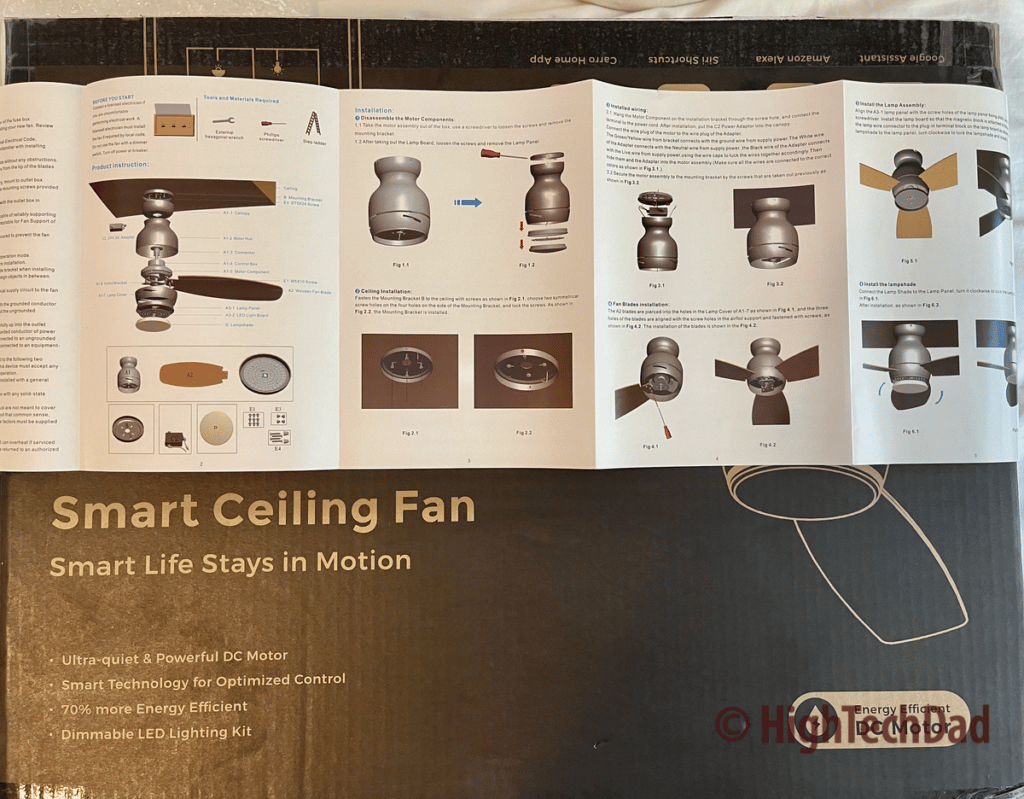
The manual is pretty good. However, I do wish that there was a bit more detail on the wiring diagram other than just the picture, as I was confused as to if the ground wire needed to connect to the DC motor. It turns out not – you just connect the ground wire to the mounting base.
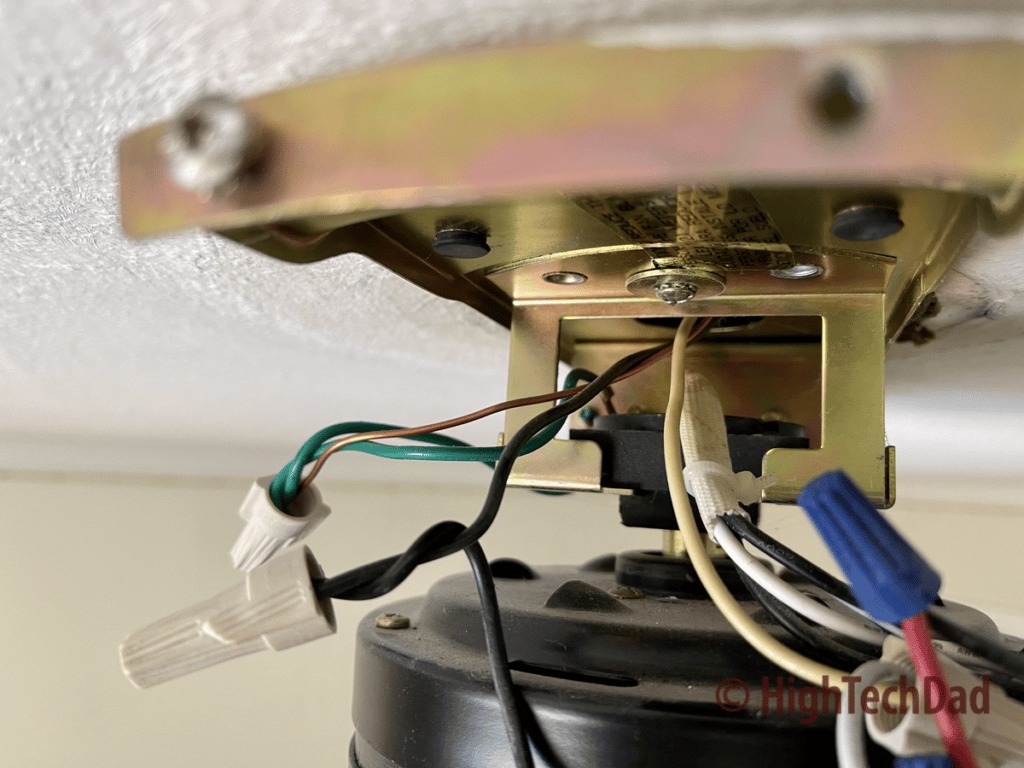
My old fan did have the ground wire connected to the motor itself. As part of my installation of anything electrical, I always take a photo of the wiring BEFORE I disconnect it all. That way, if you need to put back the old equipment for any reason, you have the photo as a reference point.
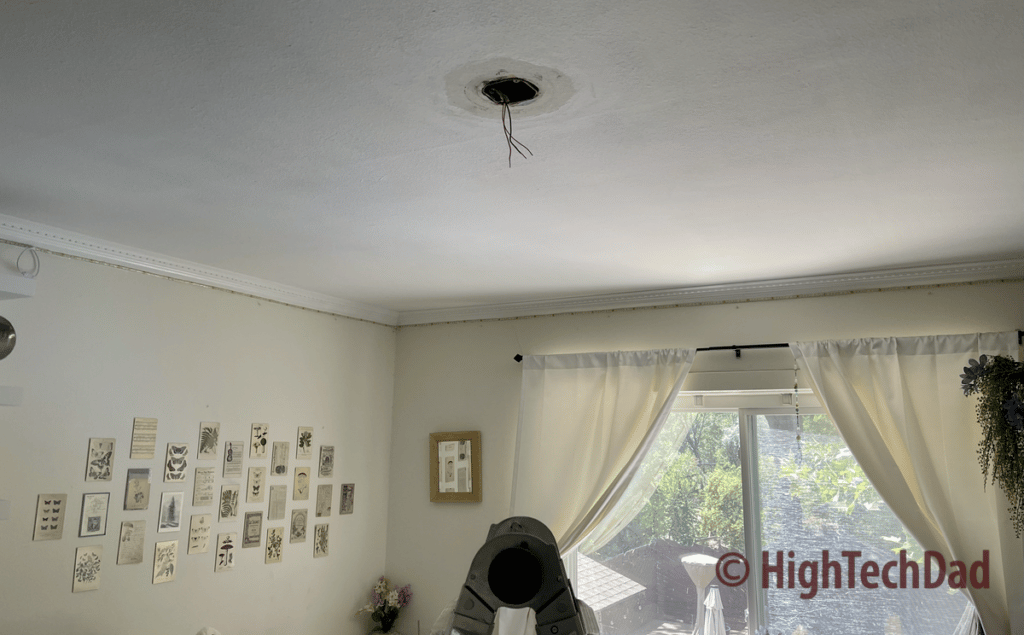
The ceiling definitely looked quite empty with the old fan entirely removed. (And now I realize I probably have to do some painting spot work!)
Again, I’m not going to show all the steps in the process. The video (above) shows much more detail and has more explanation. Also, I didn’t capture photos of every step. What is shown below are just a few highlights. To quickly note, the ceiling mount (and the LED lights) come attached to the motor during shipping. You have to detach them to mount them separately during the installation process.
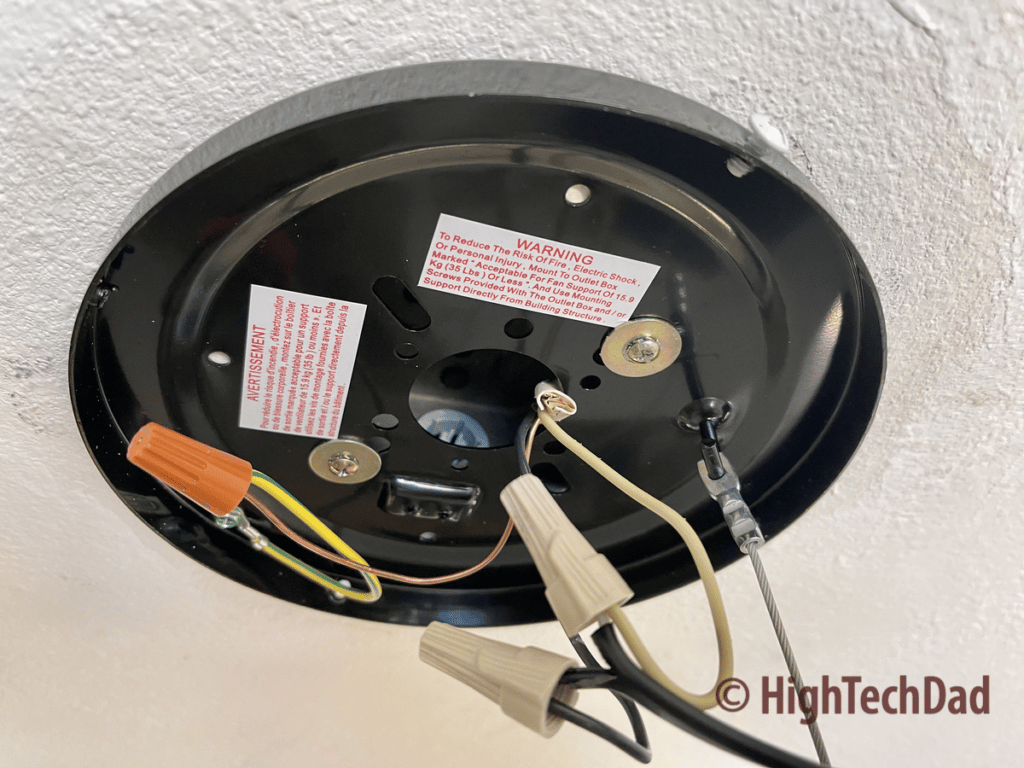
This is the ceiling mount and the wiring fully attached. A couple of things to note – the ground wire is the one capped with the orange wire connector. It connects to the mount and to the bare copper wire coming from the ceiling. Next, the black and white wires are connected and capped with larger wire connectors (I decided to use my own versus the ones included in the box). And finally, the hook and silver wire on the right is the installation/safety wire (see the video for more on that).
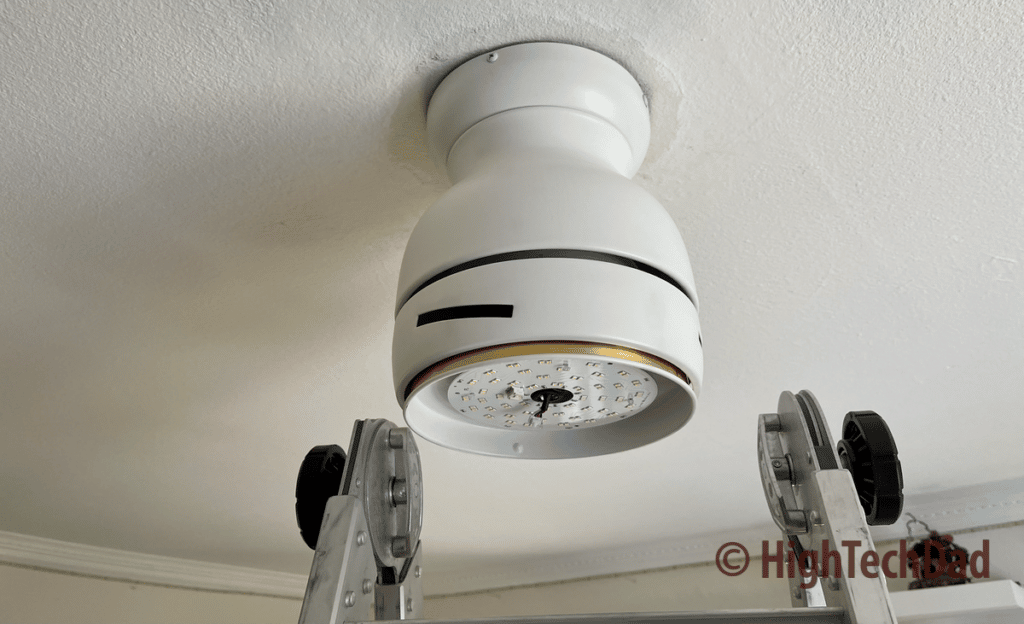
After some creative ladder work, I was able to attach the motor to the ceiling mount. To install the blades, you will need to remove the light assembly, which is just a matter of removing three screws.
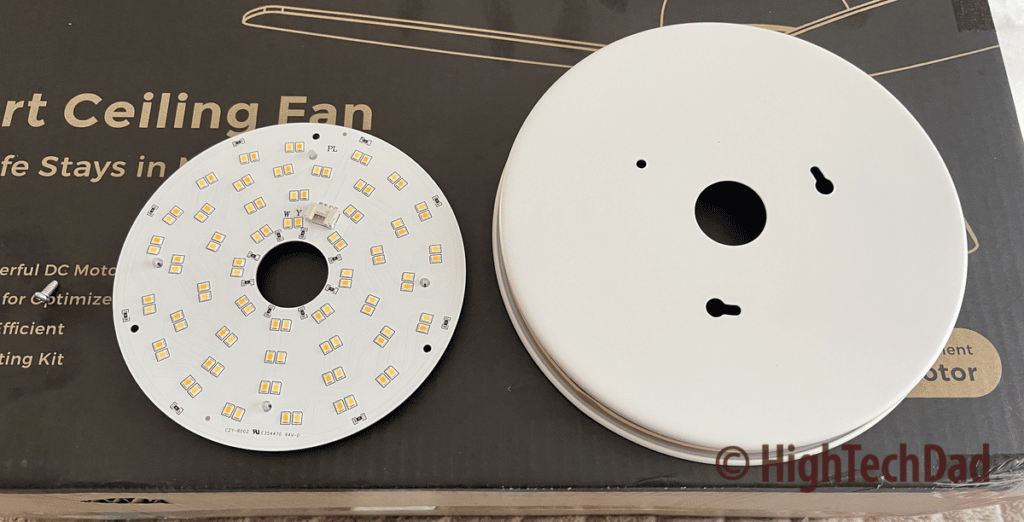
One little side note – I like how the LEDs are simply attached via a few magnets to the light cover. This makes connecting the wiring very easy!
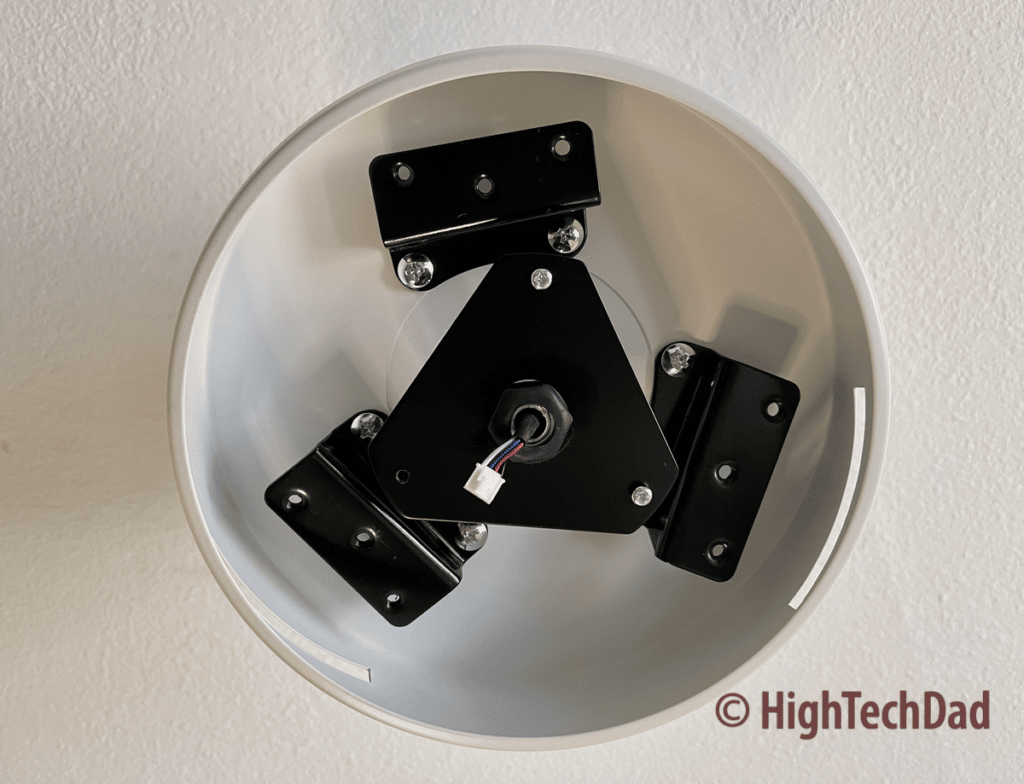
Once you remove the lighting cover, you can attach the blades. Each blade has three screws. Some of the screws are a bit tight when screwing in by hand, so I used a motorized screwdriver (carefully) to do those.
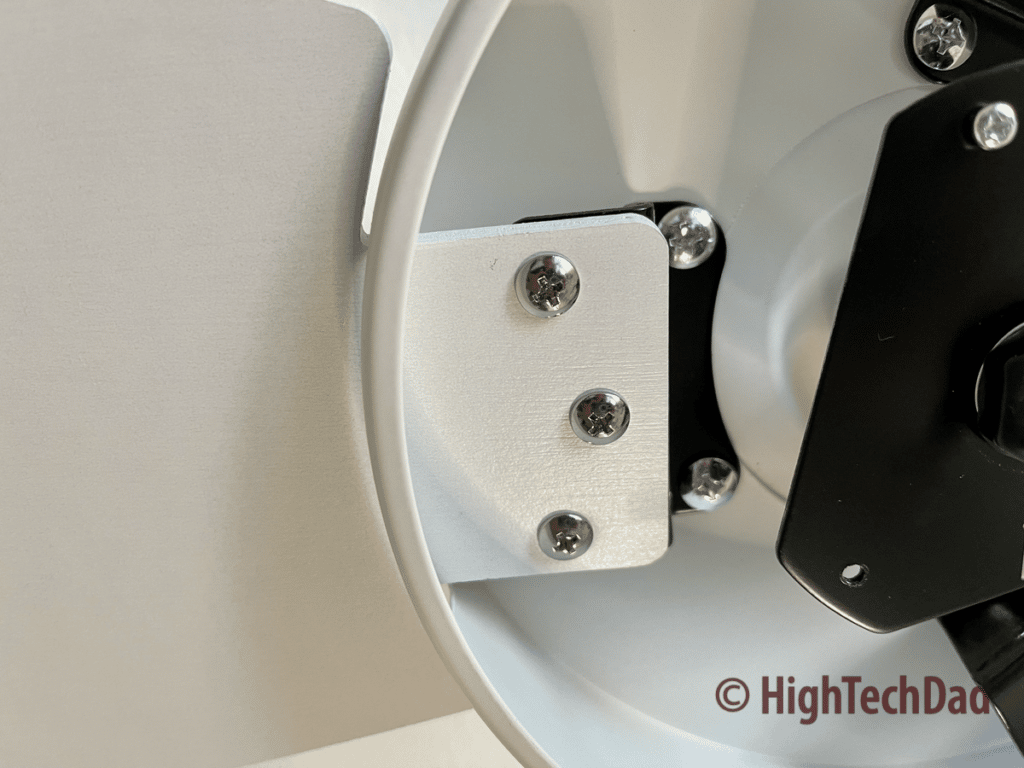
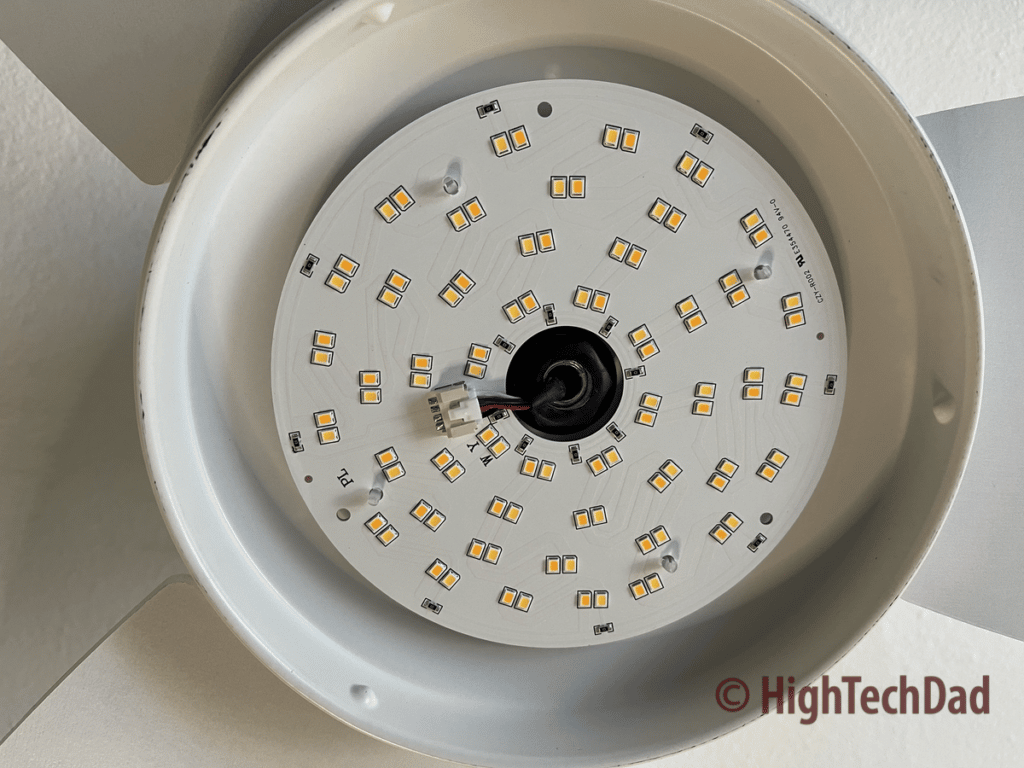
Once you screw in all three fan blades, you just need to screw the light cover back on and attach the LED lights. In the picture below, you can see the LEDs come in pairs – one white and one warm. You can control these independently if you want.
Lastly, you screw in the glass light dome cover, and you are done!
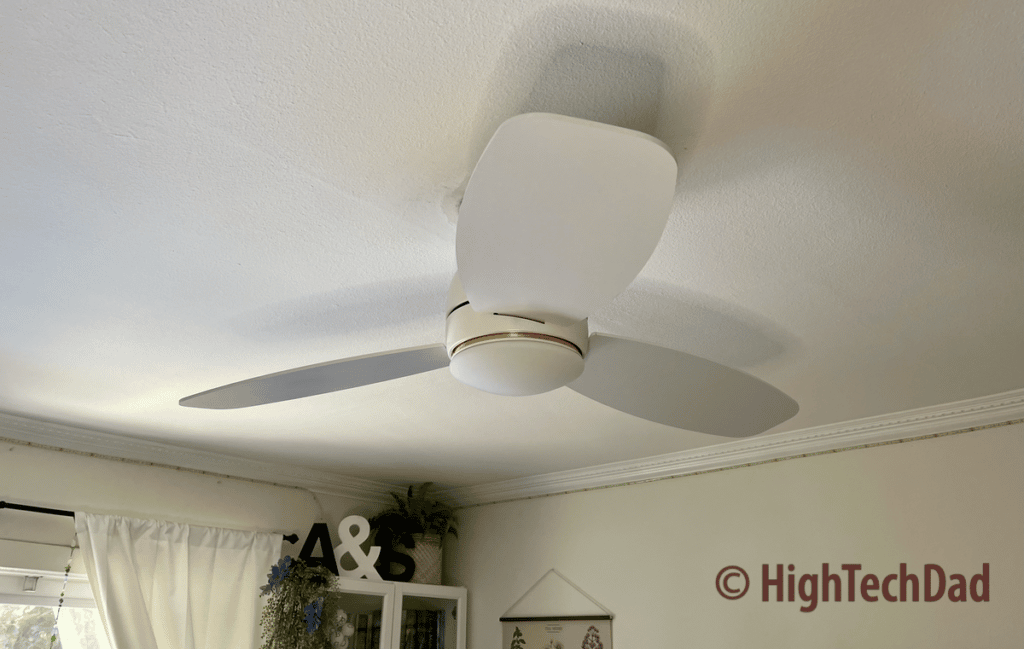
Now, let’s move on to connecting the Smafan smart fan to the smart home.
Controlling the Smafan smart fan with a remote and smart home
The moment of truth always comes when you turn on the power. I had my original light switch off, and the power turned off at the circuit breaker. I turned on the circuit breaker and returned to the room to sync the included physical remote control with the Smafan fan.
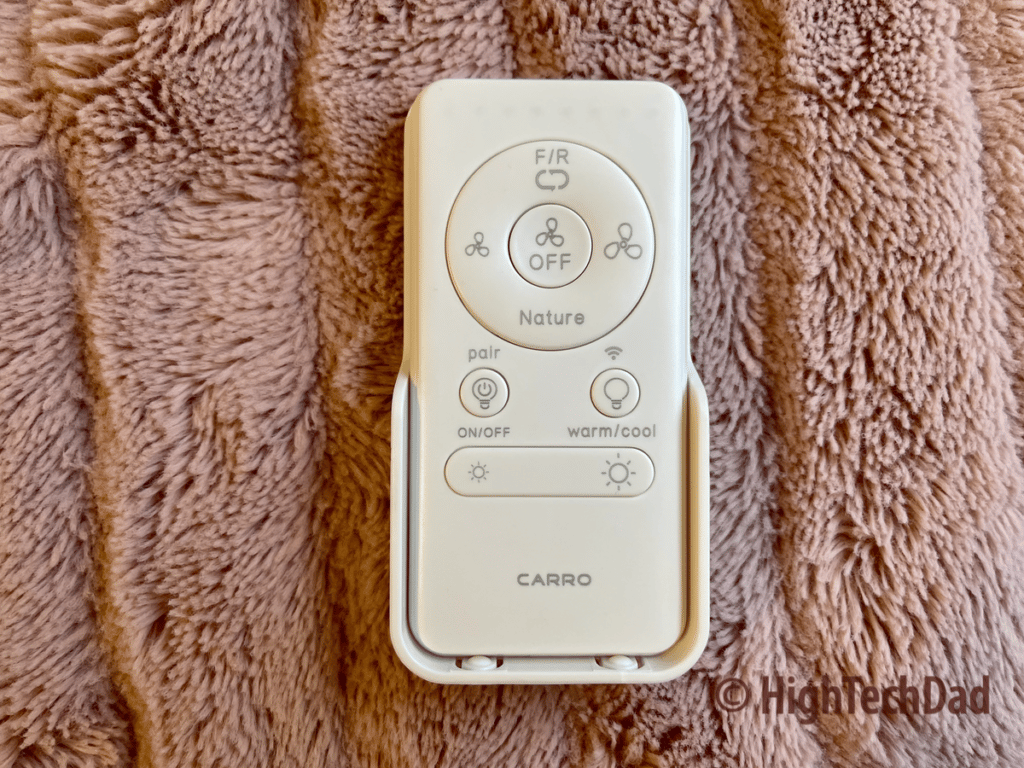
Within one minute of turning on the fan (via the light switch), you need to sync the included remote with the fan so that you can control the fan via the remote. I flipped on the light switch, and the light turned on (YAY! My wiring worked!)
Press and hold the “pair” button (on the left) for three seconds, and once it is paired, the light will turn off. That’s it!
Here are the controls available on the physical remote:
- Dimmer – on the bottom is a dimmer that lets you control how bright you want the lights to be
- On/Off – on the left is a button to turn the lights on and off (and also pair the remote)
- Warm/Cool – this button lets you activate the cool or warm lights and do a combination of the two (also used for WiFi troubleshooting)
- Nature – at the bottom of the ring is the “Nature” fan selector, which varies the speed of the fan to simulate a breeze
- Fan Speed – on the left and right sides of the fan ring are the controls to raise and lower the fan speed
- Forward/Reverse (F/R) – you can change the direction of the fan based on the season. Summer, push the air down, and Winter, pull it up
- Fan Off – in the center of the fan ring is the Off button to turn off the fan
The remote has a mount that can be attached to a wall to hang the remote.
Next, I moved on to connecting the Smafan smart fan to the Carro Home app. First, you must download the app from either the Apple App Store or Google Play store. Once installed, set up an account.
The instructions in the manual are pretty straightforward, and the process on its own is quite intuitive.
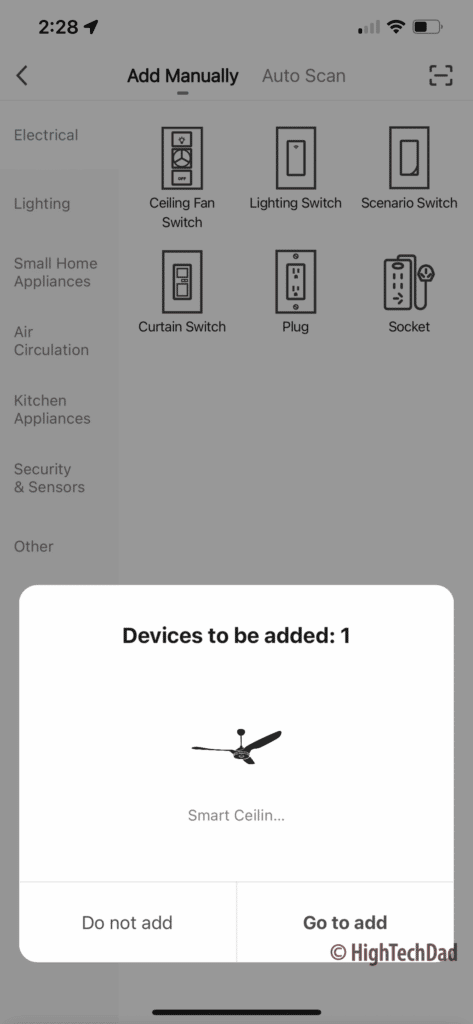
The Carro Home app automatically identified my newly-installed smart fan. It initially attaches via Bluetooth, and then you connect the fan to your WiFi network.
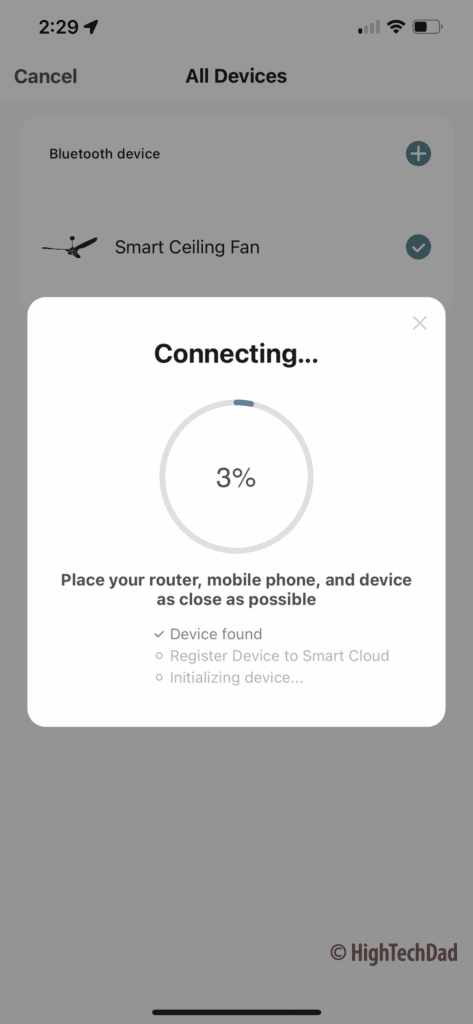
Remember, you can only connect to a 2.4Ghz WiFi network! Once you have fully connected everything, you can use the Carro Home app to control the fan fully. And the app offers more functionality than the physical remote.
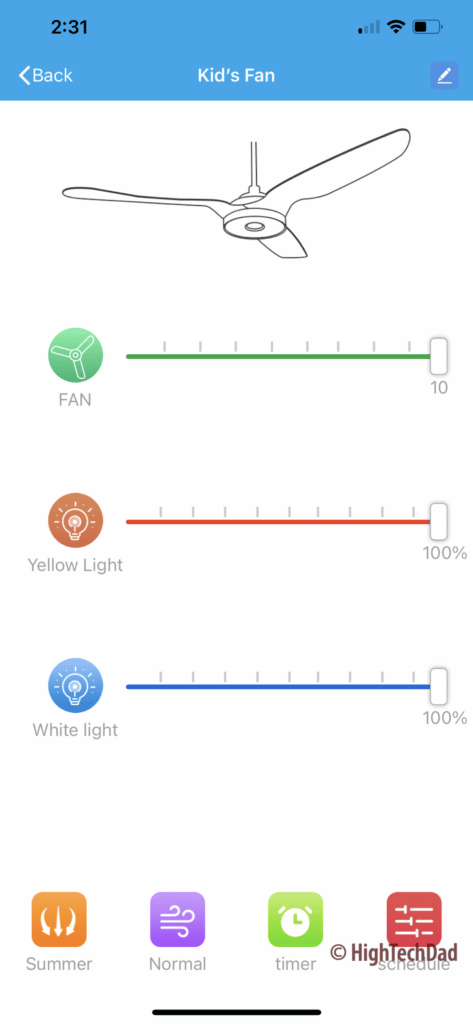
Here are the things you can control via the Carro Home app:
- Fan On/Off/Speed – use the slider to control the speed and the colored button to turn on/off. When off, the button is grey
- Yellow light – independently control the yellow light on/off/brightness
- White light – independently control the white light on/off/brightness
- Fan direction – orange button on the left shows the direction of airflow based on the season (Summer/Winter)
- Fan type – select Normal, Nature, or Sleep
- Timer – set a timer for when you want the fan and lights to turn off
- Schedule – create schedules for when the fan and/or lights should turn on or off
Some things that I haven’t tested out yet are the smart home scenes built into the Carro Home app. You can, for example, set up the fan to automatically turn on if the temperature outside gets above a certain level. Or you can have the lights automatically turn on at Sunset (or XX hours after sunset). You can do a lot within the Carro Home app itself.
But you can also optionally add the Smafan smart fan to your Google Home or Amazon Alexa smart home. And that process is equally as easy once you have the Carro Home app fully configured and your smart fan connected.
In my review and how-to video, I show some of the things you can do once those services are connected. You just add the “Carro Home skill” to connect to Amazon and then link your account. Alexa will discover the device automatically.
Connecting with Google Home is similar. Select “Works with Google” and search for “Carro Home.” You will then authenticate with your Carro Home account, and Google will add the device.
One thing to note, the control within Amazon is slightly better than within Google. Amazon allows you to control the fan speed, whereas Google simply lets you turn it on and off. Both smart home services allow you to control the lights individually, including the dimming. You can also optionally connect the Smafan with Siri (I haven’t tested this), but it is NOT an Apple Home Kit integration.
Overall, the Carro Home app offers the best controls and automation for fine-tuning the lighting and fan. However, you can use smart home routines within Google and Amazon to create even more creative automation!
Pricing and Final Thoughts
Hopefully, this article and the video provide insight into the installation and features of the Smafan smart fan 48″ Trendsetter. Installation is reasonably easy and can be completed in just a few hours (or less, depending on your skills). The look and design of the Trendsetter are modern yet simple. I like the low profile of this particular model, but Smafan has a variety of options on their site, so definitely check them out to match your wishes.
The Smafan Trendsetter 48″ smart fan for the ceiling is currently on sale for $179 (regularly $288 as of this writing). It has different sizes (44″ and 48″) available as well as various colors to choose from depending on the size (white, black, wood, or light wood). Be sure to check out additional specifications on their product page.
Update: Use promocode “HIGHTECHDAD” (no quotes) to get 10% off your next purchase! Enter the code at checkout!
Shop on HighTechDad.com
The product shown below (and related products that have been reviewed on HighTechDad) is available within the HighTechDad Shop. This review has all of the details about this particular product and you can order it directly by clicking on the Buy button or clicking on the image/title to view more. Be sure to review other products available in the HighTechDad Shop.
-
Product on sale
 Smafan 48″ Trendsetter Smart Fan for the ceilingOriginal price was: $288.00.$179.00Current price is: $179.00.
If you are looking for an easy way to add smart lighting and a smart fan to your smart home, getting a Smafan is a pretty great option. If you have any questions about this fan or the installation, please be sure to leave a comment below.
Disclosure: I have a material connection because I received a sample of a product for consideration in preparing to review the product and write this content. I was/am not expected to return this item after my review period. All opinions within this article are my own and are typically not subject to editorial review from any 3rd party. Also, some of the links in the post above may be “affiliate” or “advertising” links. These may be automatically created or placed by me manually. This means if you click on the link and purchase the item (sometimes but not necessarily the product or service being reviewed), I will receive a small affiliate or advertising commission. More information can be found on my About page.
HTD says: The next time you are considering replacing your ceiling fan, or you want to add a smart fan to your smart home, definitely take a look at the options available from Smafan – the 48″ Trendsetter smart fan truly was an aesthetically pleasing and “smart” upgrade to our home!
HighTechDad rating
-
Ease-of-Use
-
Family-Friendly
-
Price Point
-
Features
Summary
The next time you are considering replacing your ceiling fan, or you want to add a smart fan to your smart home, definitely take a look at the options available from Smafan – the 48″ Trendsetter smart fan truly was an aesthetically pleasing and “smart” upgrade to our home! If you are replacing a ceiling fan, the installation of the Smafan smart fan is extremely easy and won’t take too much time. And once it is installed, you can quickly connect it to the Carro Home app to connect it to your home WiFi. Once you do that (and there are great controls within the Carro Home app), it’s just a matter of a few clicks to enable Google Home or Amazon Alexa. From there, you can control the Smafan smart fan from a variety of devices, apps, and even using your voice.
Pros
- Easy to install & set up
- Works with Amazon Alexa and Google Home
- Full-features smartphone app
- Clean design
- Reasonably priced
Cons
- No Apple Home Kit connectivity
- Wiring manual diagram/picture could be a bit bigger
