“Open Source” collection
Discover the best in free, community-driven software and transparent digital platforms. These evaluations focus on versatile, accessible tools that empower users through open collaboration and innovative digital freedom.
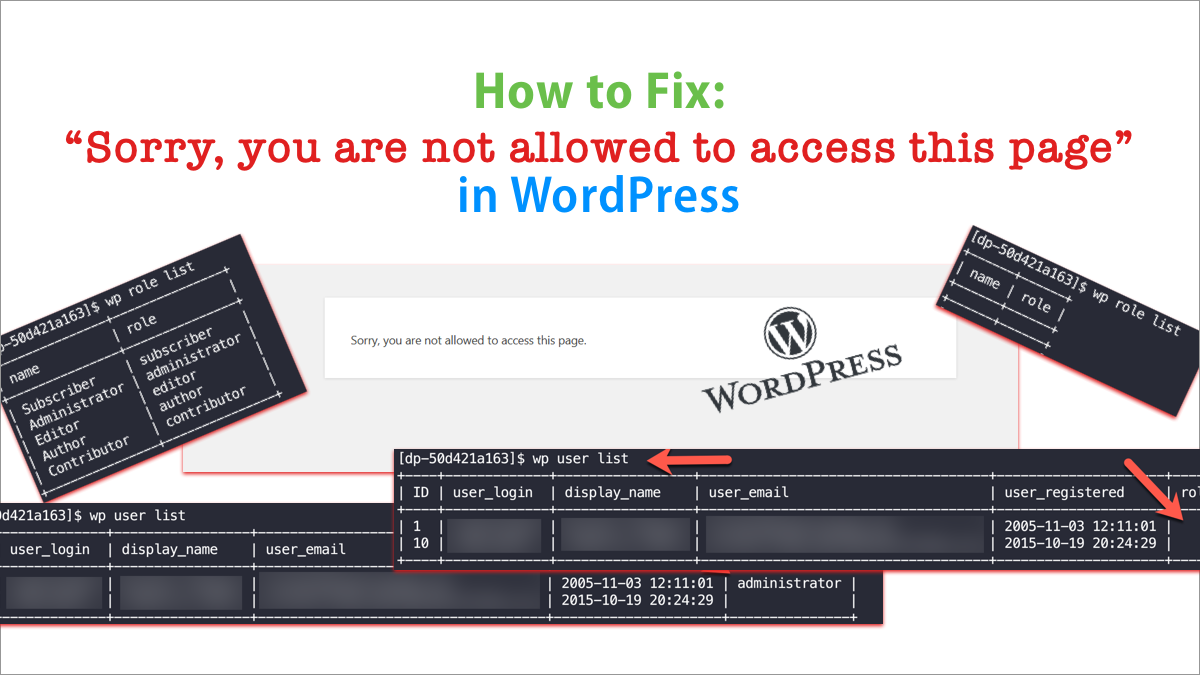
Hidden WordPress Fix for “Sorry, you are not allowed to
How to fix "Sorry, you are not allowed to access this page" on WordPress using WP CLI to easily repair missing items within WordPress.
Site Performance Optimization: MaxCDN, Nginx, CloudFlare and WordPress Caching
My blog has a problem. Or rather it had a problem but I'm making some big improvements to it to make it perform better. For many years, my site has…

How To Fix “Login to server imap.mail.me.com failed” Issues on
There is nothing more annoying than getting repeated email error messages in your email client from an email server. Sometimes this can be caused by issues with the server, or…

How To Automatically Set Up your Mac’s Work Environment Based
There is a lot of great free software out there that provides tremendous value. Smart programmers always want to showcase their talents and I love the fact that there is…

Laptop Got Stolen? Send PREY Out to Find It, for
I'm sure that many of you have heard of the Find My iPhone service for MobileMe that helps you locate missing iPhones or iPads. Or the equivalent on Windows Mobile…

20+ Ways to Harden and Secure Your WordPress Blog
Recently, some high-profile blogs that are running WordPress have been hacked or hijacked by malicious users (e.g., TechCrunch). The worst thing is having to try to recover from such an…

How to Move a WordPress Blog from One Domain/Host to
Over that last couple of days, I have had the "pleasure" of moving a blog from one hosting provider to another (not that difficult of a task) but ALSO changing…

Review: GUNNAR Optiks – Fine Tuning your Digital Perspective
"Hey Bono" my boss says every time I put on my GUNNAR Optiks SheaDog "computer" glasses. I laugh and then focus down on a variety of tasks at hand, one…

Social Experiment: Twitter Dad Tuesdays #twitdadtues
This morning I had some interesting Twitter conversations with a few Dads who are on Twitter about how frustrated their spouses are with them at times. The conversations and threads…

Social Messaging Communicators: Ping.fm versus HelloTxt.com
While Twitter seems to be ruling the airwaves of Social Messaging Platforms, there are plenty of other services that do just as well (or better) at keeping in touch with…


