
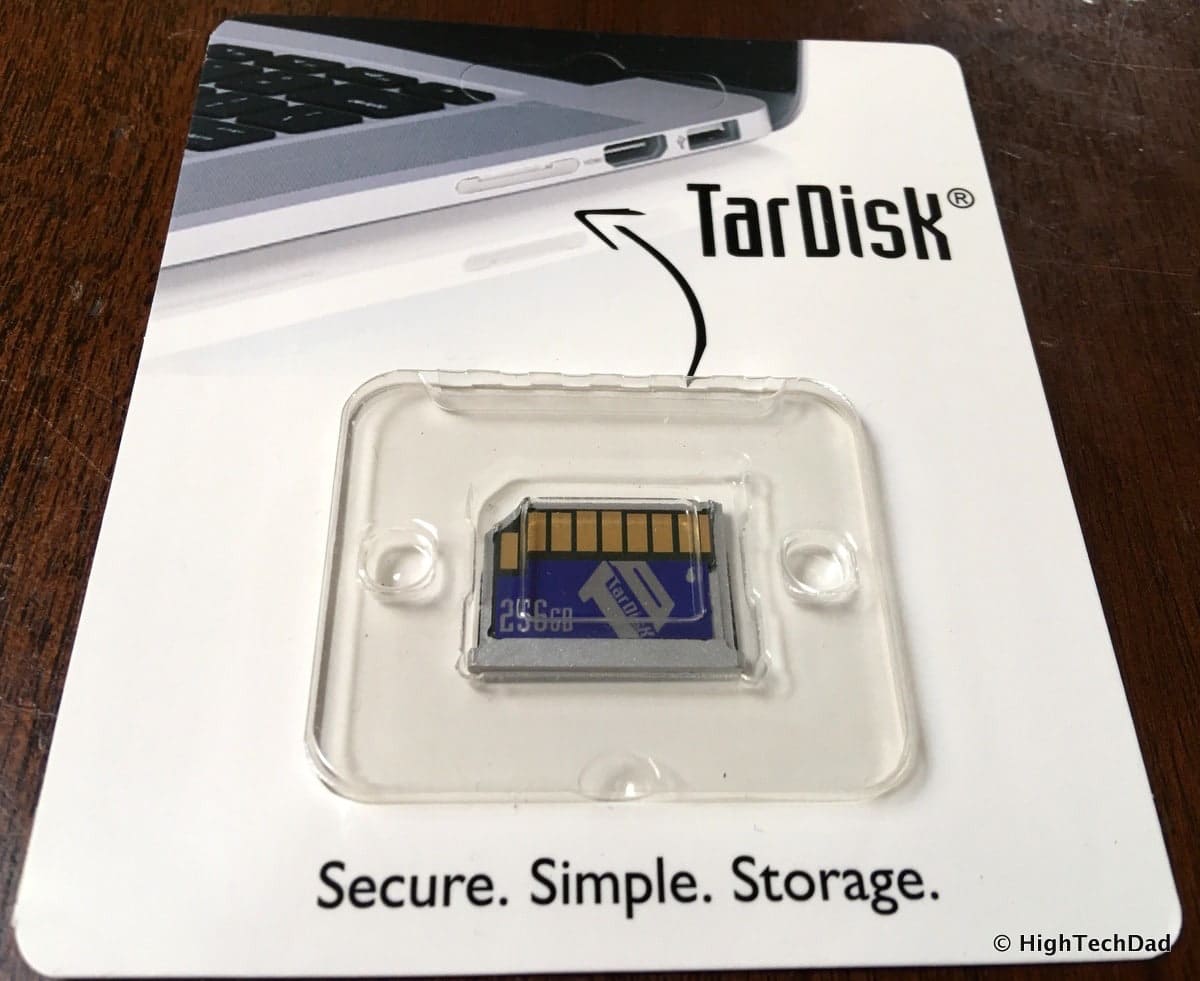
I’m a big fan of do-it-yourself upgrades or repairs when it comes to technology. Most of these mean that you have to roll up your sleeves and open up whatever device you want to fix or make better. I have upgraded hard drives on Macs, replaced keyboards on MacBook Pros, and swapped out batteries on the iPhone 3GS, 4, and 4S, each with success. But one thing that I haven’t tried to do is upgrade the SSD hard drive on my MacBook Pro. These types of upgrades are generally more expensive and a bit difficult. However, this past weekend, I doubled the space on my MacBook Pro in literally just a few minutes (with a little bit of prep time) using the TarDisk Pear 2.0. Here’s how I transformed my MacBook Pro storage from 256 GB to over 500 GB using the TarDisk Pear.

The biggest issue with upgrading a Mac is that Apple designed their devices to be closed systems. This is true with most of their products (with the exception of the Mac Pro which has the ability to accept upgrades a bit more easily). While many Mac products can accept RAM upgrades fairly easily (with the exception of the MacBook Air), hard drive upgrades are a bit more difficult.
When I learned about the TarDisk Pear, I thought, hmmm…they are just using the memory card slot typically used to read camera SD cards to mount another hard drive, much the same way you can plug in a USB thumb drive or portable hard drive to you MacBook Pro or Air. In those cases, the extra storage mounts as an additional hard drive. While this is great, it’s not a “permanent” solution.
This is where the TarDisk Pear is different.
For starters, the TarDisk Pear doesn’t just mount as another hard drive. It actually “expands” the existing SSD drive using some behind-the-scenes software magic. Plugging into the SDXC port on your MacBook Pro/Air is how it integrates with your Mac. Once installed, it is virtually imperceptible. There is no thumb drive or cabling or anything sticking out. It’s truly integrated.
The TarDisk Pear 2.0 actually logically allocates files between itself and your MacBook Pro/Air’s internal hard drive. Once installed, it becomes a logically merged volume which is managed by OS X. But it is smart about the allocation of files. The most frequently used files remain on the internal SSD while other data files tend to be sent to the TarDisk’s drive.
And, the TarDisk still utilizes TRIM which increases the efficiency of deleting and rewriting data on an SSD. A more detailed explanation of TRIM can be found here.
Among other benefits to a “Pear-enabled” SSD environment is equivalent or even improved performance benchmarks, according to the TarDisk site. They cite performance tests by BlackMagic, GeekBench and NovaBench as representative results. Here are a few independent tests using BlackMagic – same read/write speeds installed and a big of a slowdown only when storage is filled up.
Let’s take a look at the setup process. It is actually quite easy. What takes a bit of time is the preparation steps (some of which are optional).
Setting up the TarDisk Pear
At a high level, here are the steps recommended by TarDisk prior to installing and “pearing” the TarDisk Pear. I will go into more details further below.
- Make a backup.
- Turn off FileVault & Anti-Virus software.
- Unplug all other devices.
- Verify & Repair your SSD using “fsck” (optional but I recommend it).
- Verify & Repair your SSD using Disk Utility First Aid tool (optional but I recommend it).
- Quit programs.
- Physically install the TarDisk.
- Run the Pear Installer.
Steps 1, 4 and 5 are probably the tasks which take the longest amount of time.
Let’s go into the details.
1. Make a Backup
This is something you should do before you do any type of repair work. (In fact, you should be doing it regularly anyway.) Cloud backups are fine. Time Machine backups are easy. Whatever way you choose, just do it first just in case you do have any issues.
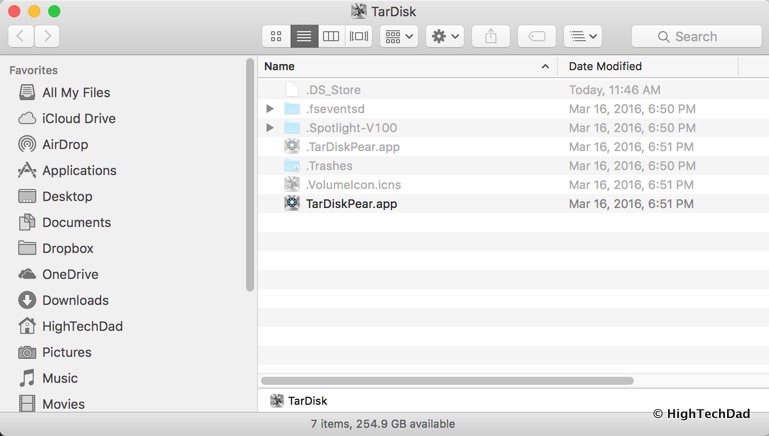
Here you can see the state of my MacBook Pro prior to doing the upgrade. I had less that 30 GB free of my 256 GB SSD. (In fact, prior to rebooting due to some temporary files, I had less than 10 GB). Not having much space can cause performance issues.
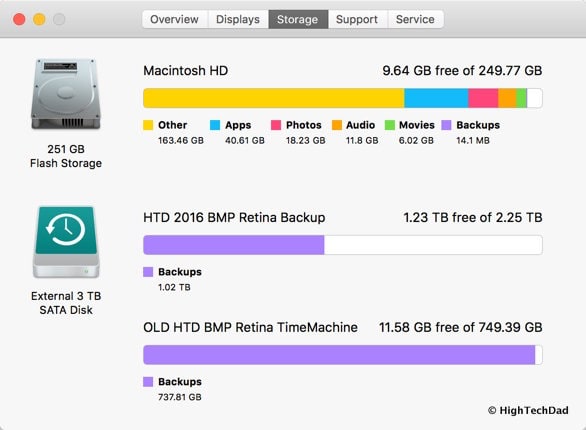
My MacBook Pro was ready for some extra space.
2. Turn off FileVault/Anti-Virus
Not much to show here. But you need to be sure that your drive is not being protected or encrypted in any way to make sure that it can easily be converted over.
3. Unplug all other devices
Similar to the previous step, ensuring your Mac is not being “influenced” by outside forces will make the conversion process much smoother.
4. Use “fsck” to verify and repair your SSD
While this is an optional step, I highly recommend doing it. In fact, you should do this anyway occasionally. (Note, some utility programs like El Capitan Cache Cleaner which I use regularly have a Single User Mode that can do this for you too.)
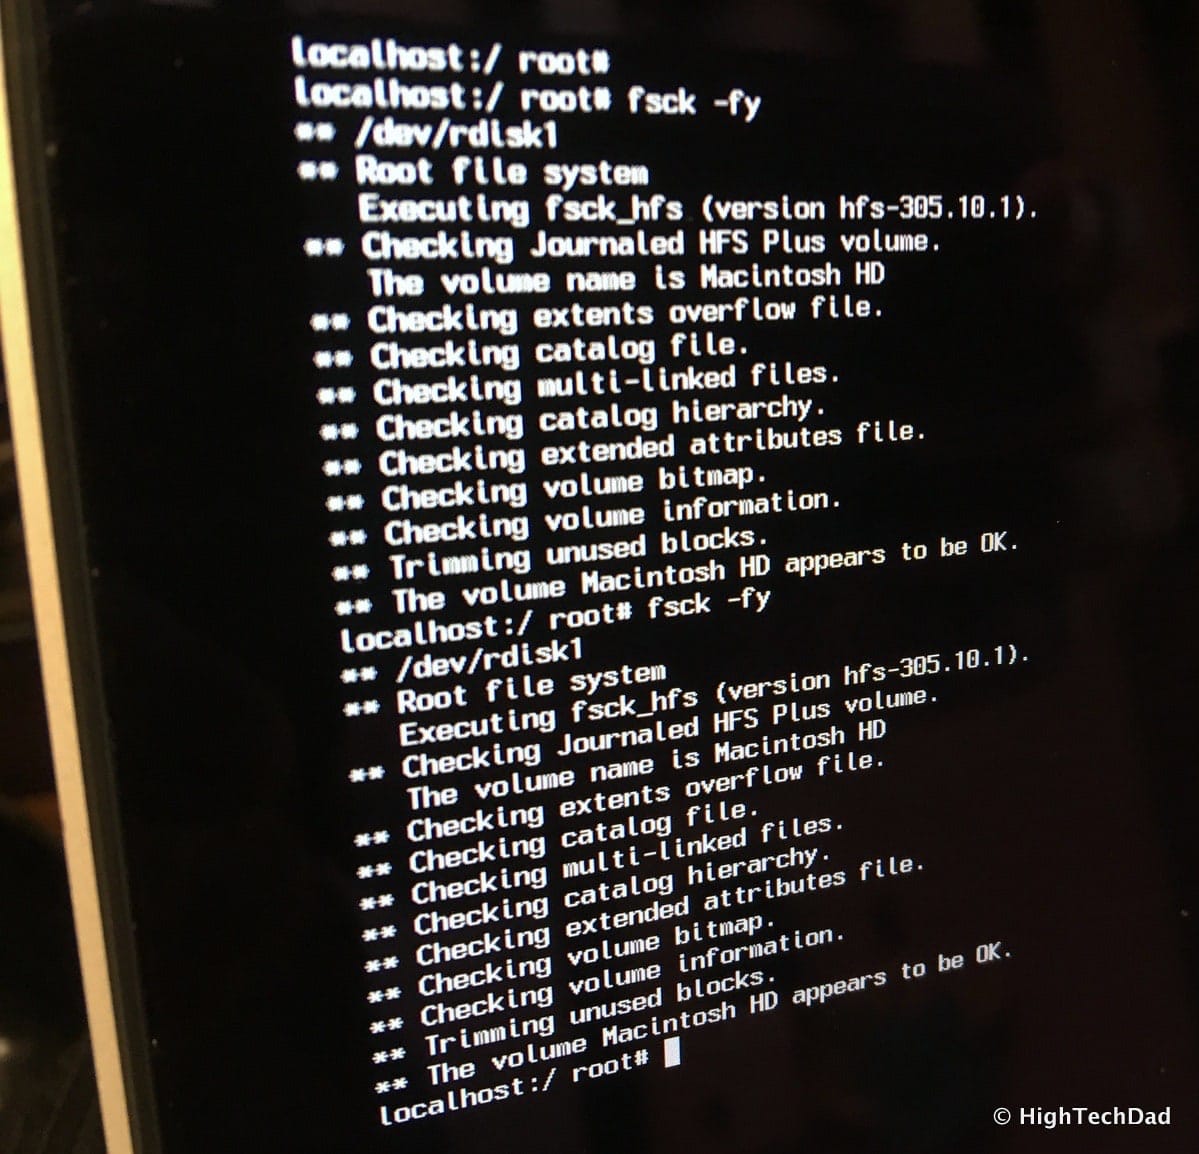
Make sure you run this twice (“fsck -fy”) in Single User mode and that the volume “appears to be OK” on the final step. You may have to run it more than twice.
5. Use Disk Utility to verify and repair your SSD
Another optional step but I recommend doing it anyway, is running Disk Utility’s First Aid. Below you can see my HD before any upgrades. Only 28.23 GB available.
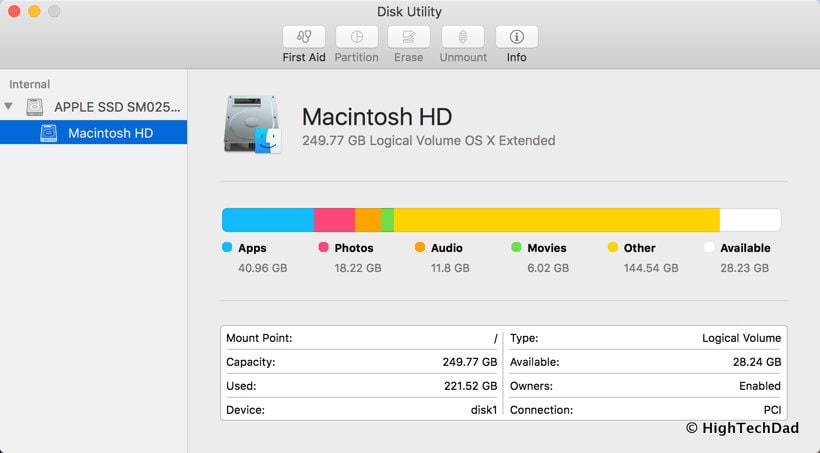
Just highlight the HD and click First Aid.

Hopefully you get the green check mark!
6. Quit all Programs
Another easy step to eliminate any potential outside influences.
7. Physically install the TarDisk Pear 2.0
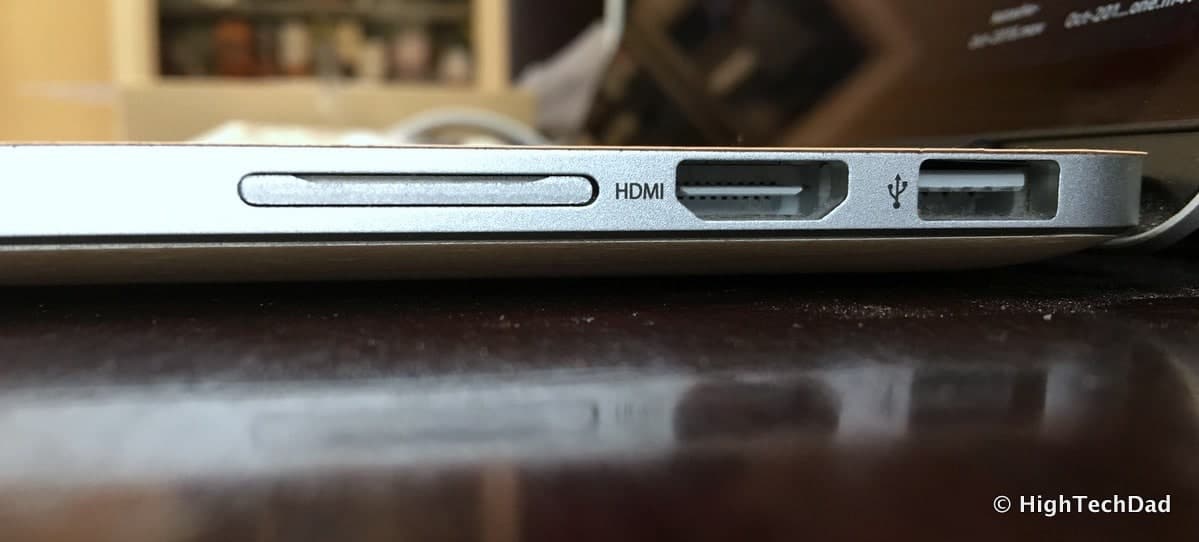
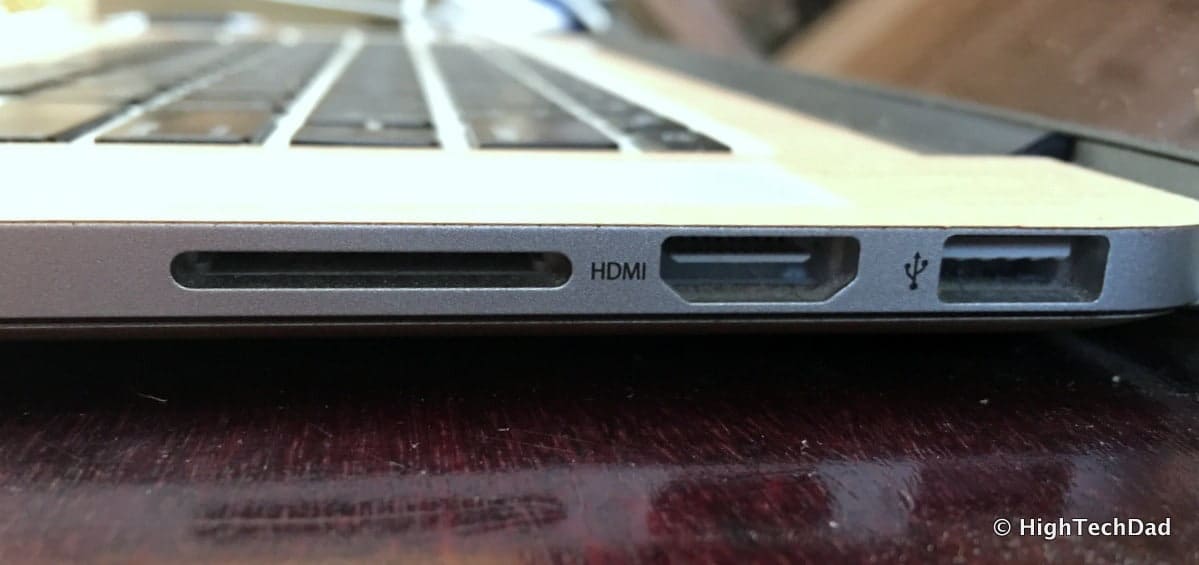
Now the fun begins! The first step is to physically insert the TarDisk Pear 2.0 into the SDXC slot on the side of your Mac. When you order the TarDisk, you need to specify what type of Mac you have so that the properly sized TarDisk is sent to you. This is the SDXC slot (next to the HDMI port).
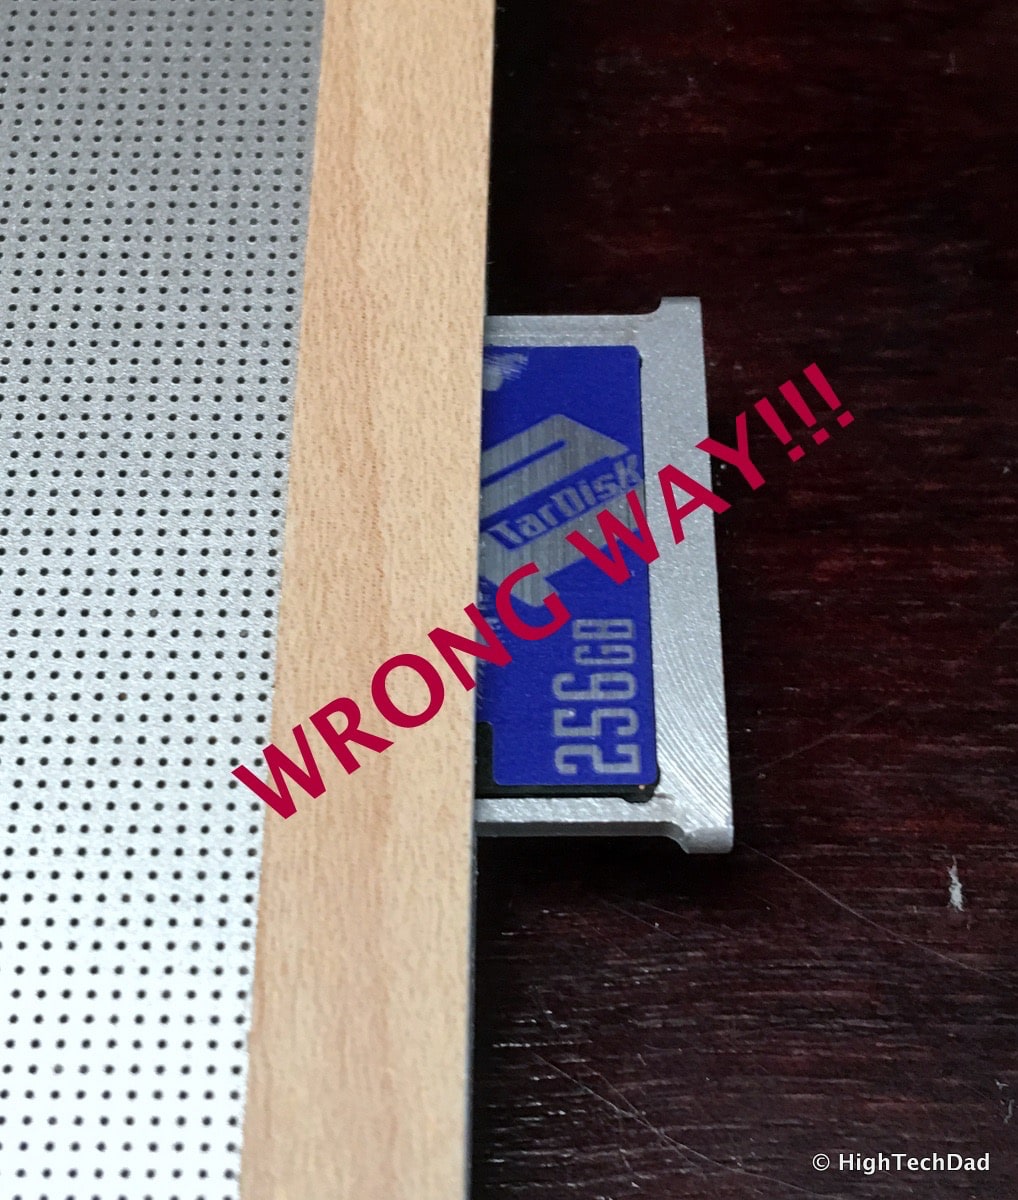
You would think that the TarDisk would go right into the slot with the lettering facing up. IT DOES NOT!

This is the wrong way to insert it.
And this is the correct way to insert it.
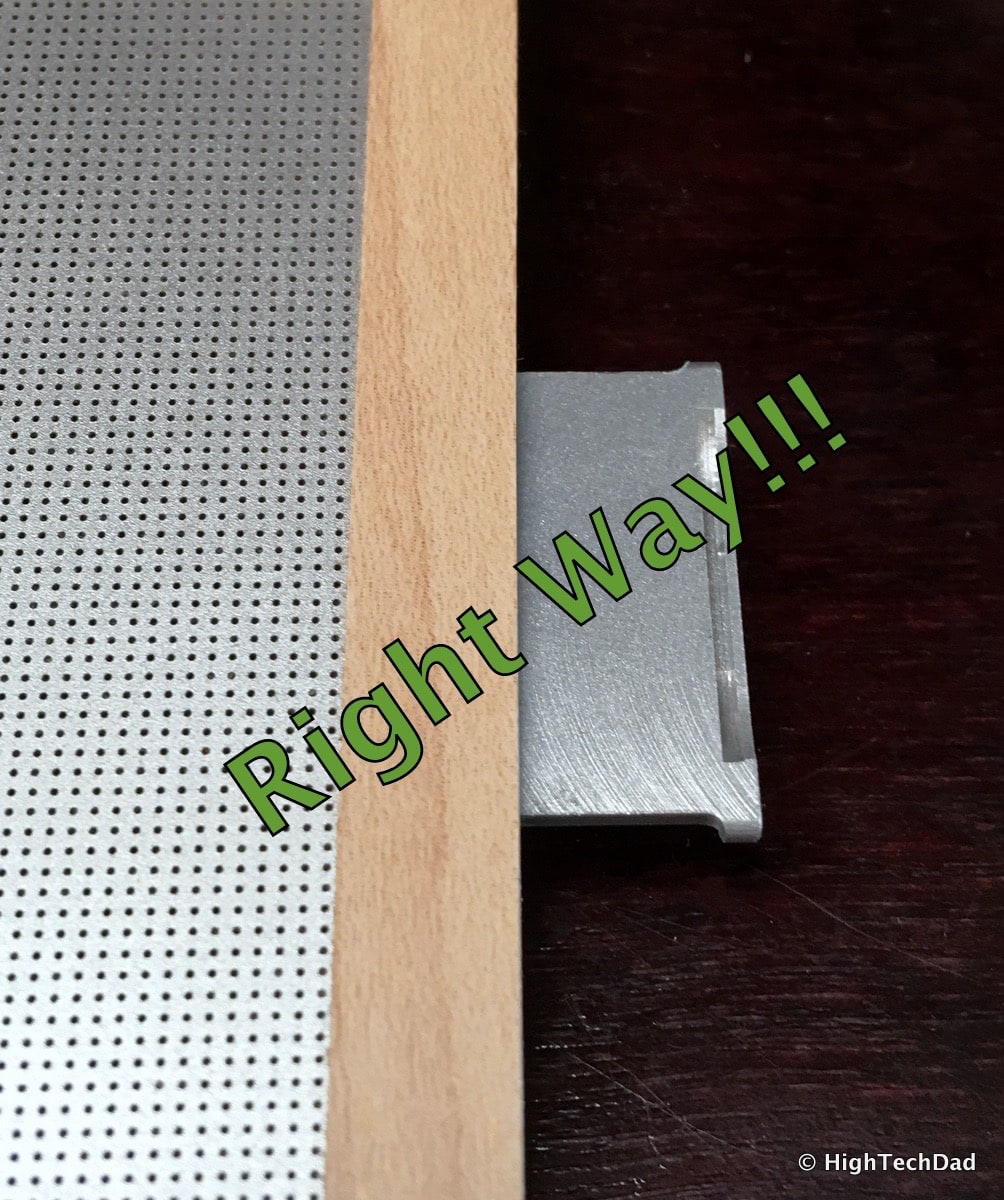
Once it is inserted, it will be completely flush with the side of your Mac.

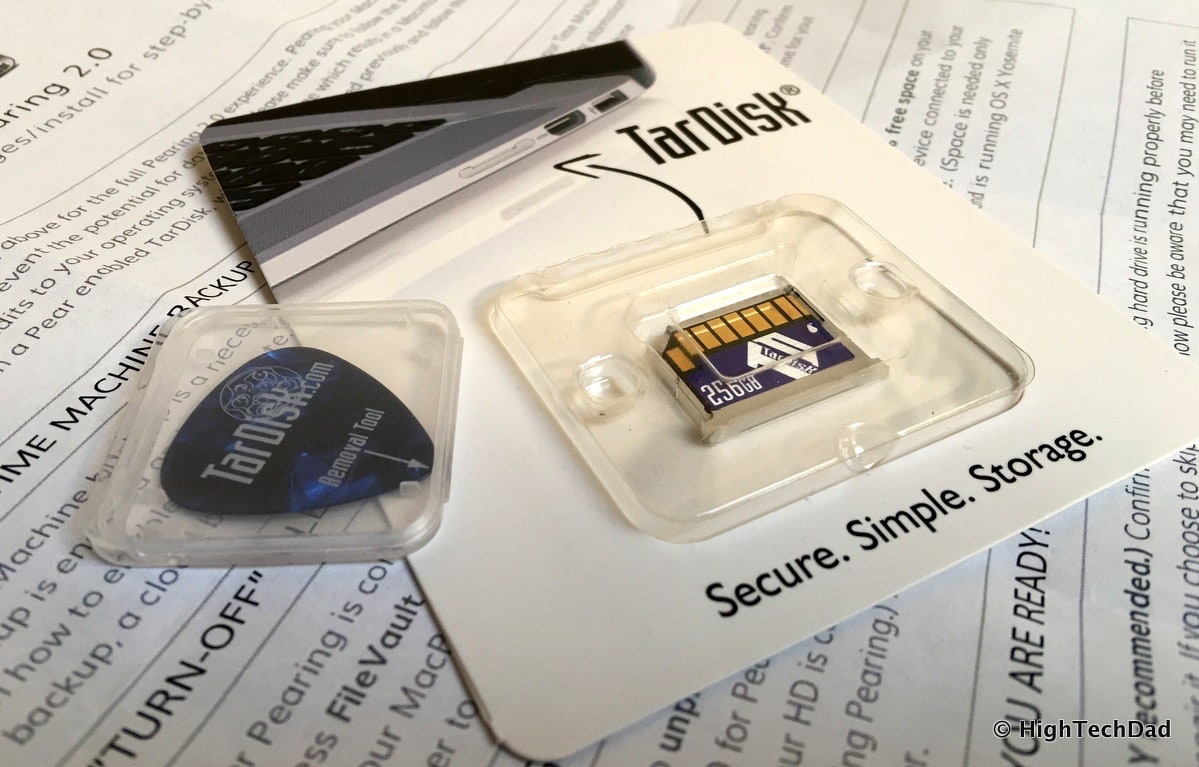
The TarDisk Pear 2.0 does come with a plastic tool (that looks like a guitar pick) for removing the TarDisk. You shouldn’t use a metal tool as you may scratch the metal unibody.
8. Run the Pear Installer
The final step to expanding your Mac’s SSD hard drive is running the installer which logically merges the two storage amounts.
Click the installer which is in the TarDisk on the desktop.
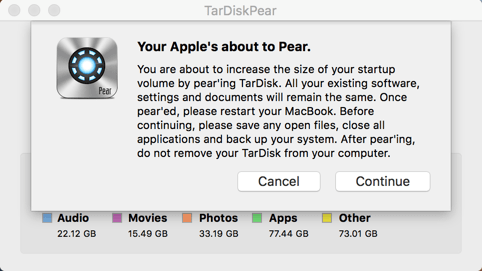
Accept all of the warning items (and don’t just check them off – be sure you have done them.)

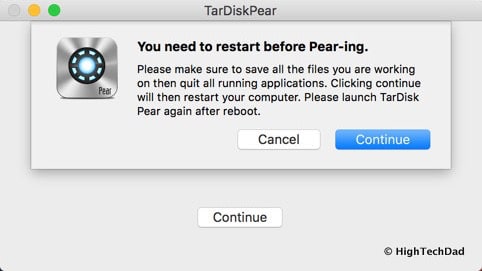
There may be a few restarts during the process. Here’s the first one.
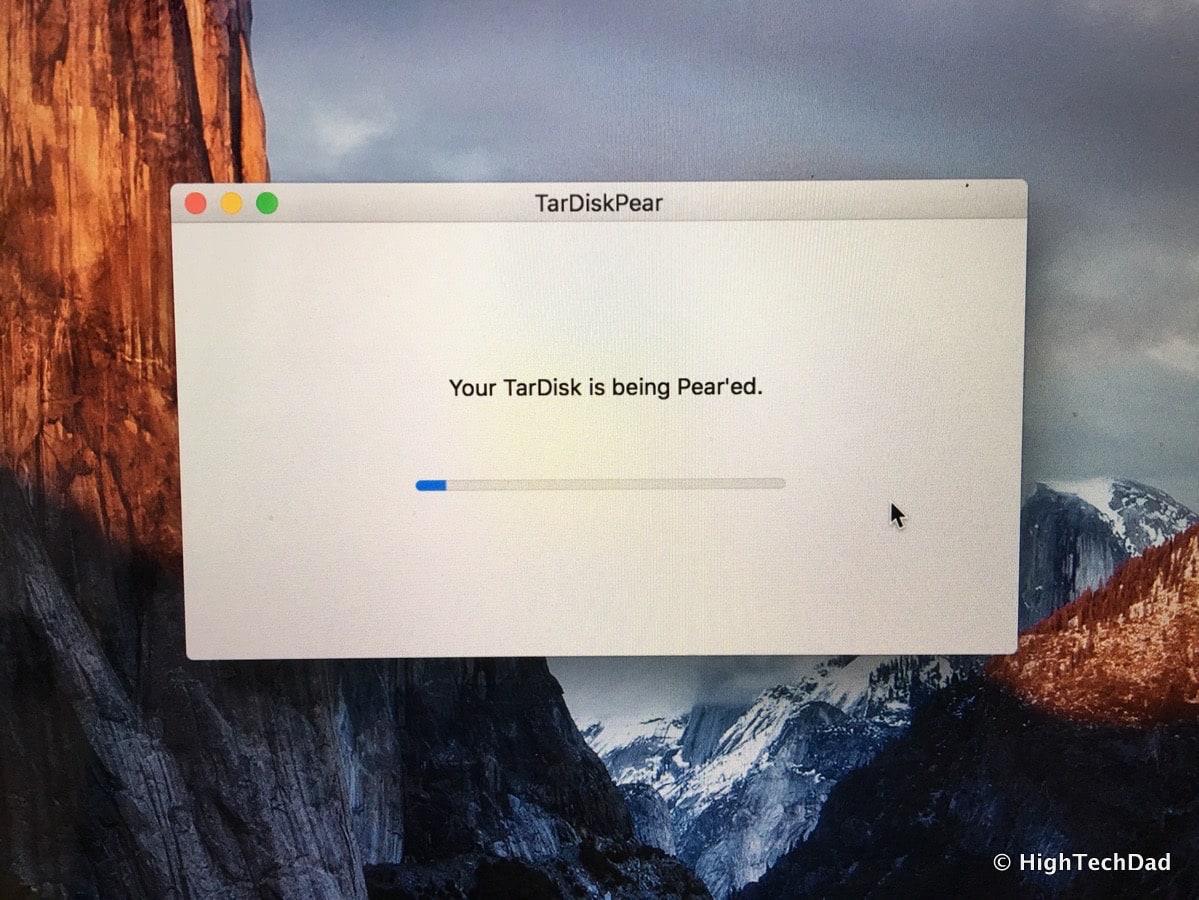
It will go through the process.
Next you do a File System Consistency Check
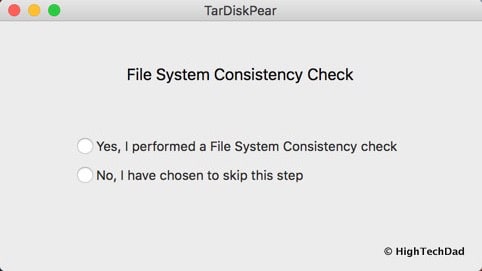
Clicking that will allow you to quickly compare differences.

If things look good, click the “Pear” icon to initiate the process of pear-ing…er…pairing the two storage amounts.
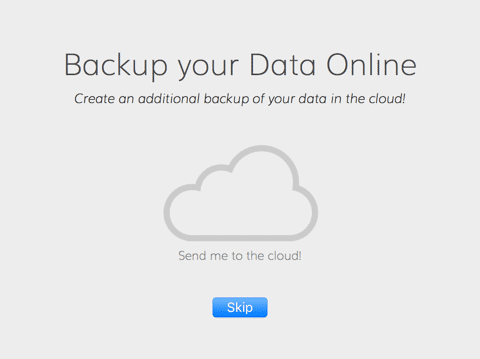
Your computer will reboot and the installer will ask if you want to use an optional Cloud backup.
Pear-ing is now complete!

You can then inspect your Mac’s hard drive to see the new space.
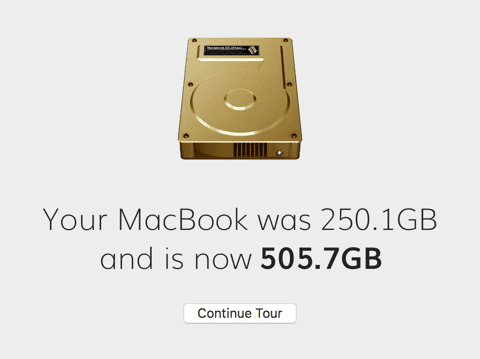
You can see that I doubled my space with the additional 256 GB. And, my HD (icon) magically is now made out of gold! (Oh, and the TarDisk Pear 2.0 uses 14kt gold electrical contacts.)
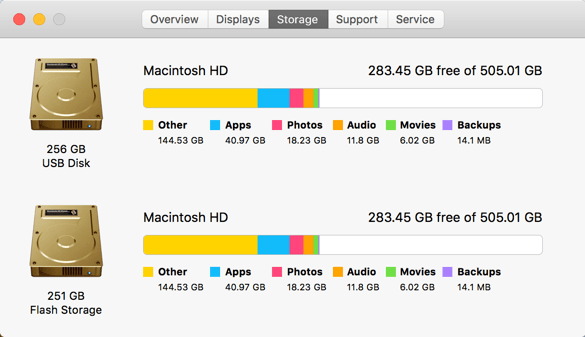
When you look at the Storage aspect of your Mac, it now shows 2 hard drives. For me, 256 GB USB Disk (actually the SSD) and 256 GB Flash Storage (the TarDisk). This is normal, by the way. But the most important thing is the combined storage of just over 500 GB!
I know…lots of writing here. But really the process of expanding the on-board storage of a MacBook Pro/Air couldn’t be easier. Most of the work is actually done in the pre-installation phase – ensuring your Mac’s HD is running well.
So far, after a couple of days running with my newly “pear-ed” and expanded HD, I haven’t had any issues. I did run steps 4 and 5 above (in conjunction with El Capitan Cache Cleaner) and all seems fine. Also, I installed the latest, newly release version of El Capitan (10.11.4).
A few words of warning, however. This solution is expensive (256 GB is $399 and 128 GB is $149) – you are paying for convenience, seamless integration and ease of use really. Also, the uninstallation process is quite involved. You will need to reduce the amount of data to 20% less than the original installed SSD. And you lose the ability to use the SDXC slot (but you can still use USB obviously). Also, if you plan on using BootCamp to run Windows or Linux, you can’t. It currently isn’t supported.
But wow, I didn’t have to completely take apart my MacBook Pro in this DIY upgrade. If you are looking to gain just a bit more space on your MacBook Pro or Air, head on over to TarDisk and see the options available.
[StandardDisclosure]
HTD says: I’m a big fan of DIY projects and while normally I’m used to cracking a device open to do an upgrade, installing the TarDisk Pear 2.0 didn’t involve any disassembly. It’s extremely easy!
HighTechDad's Ratings
-
Ease-of-Use
-
Price Point
-
Features
Summary
I’m a big fan of DIY projects and while normally I’m used to cracking a device open to do an upgrade, installing the TarDisk Pear 2.0 didn’t involve any disassembly. It’s extremely easy! For this rating I actually removed the “Family-Friendly” item simply because I honestly wouldn’t want my kids trying to set this up. However, if you have a kid who is really good with tech, it might be easier to turn the install process over to them. All things being said, if you carefully follow the steps to install (be sure you fully back up your data ahead of time), once it TarDisk Pear is installed, you really don’t have to worry much about it. The fact that it was able to easily double my available storage is great. And that it is truly integrated within the OS (versus just puting in a thumb drive), give it high marks. It’s not exactly cheap but you are paying for the full integration.


