This past weekend, I tried to upgrade my old iPhone 3GS to the latest version of iOS (version 4.3). Unfortunately during the upgrade process, I ran into a “little” issue, that of the fact that my iPhone 3GS got stuck in a recovery loop and kept failing during the upgrade/update process with an Error Code 29. I documented the issue and all of the actions that I attempted to do to correct the issue in this blog post: “WARNING: Do NOT Upgrade Your iPhone 3GS to a Newer iOS if you have Replaced Your Battery! Error 29 Issues Caused by Battery“.
I reached out to the great folks at iFixIt based on the comment that I had encountered in their forums and some other places, and they quickly sent me out a replacement battery for my iPhone 3GS so that I could test out the theory that it was the battery that was causing the update to fail and giving that nasty Error 29.
I decided to have some fun though this time with the iPhone 3GS replacement procedure. I had fully documented the process in my post “How To Install a Replacement Battery into an Apple iPhone 3GS” but this time, I decided that I would Tweet out the process (with photos) as I went through it. (FYI, my twitter account is @HighTechDad.)
To quickly cut to the chase, replacing the battery with the proper battery version for the iPhone 3GS (logic board related) DID FIX my Error 29 and lack of ability to update my iPhone.
So, if you want to stop reading this post and go rush out and replace that replacement battery to get your iPhone 3GS happy again, I won’t be offended. If you want to see the process with the photos that I posted to Twitter, read on!
Live Twitter Stream of Battery Upgrade
Here is my Twitter stream of the entire process:
Here are the tweets and associated pictures (clicking on the “about XX hours ago” will bring you to the actual tweet):
“In a few minutes, I’m going to be replacing my iPhone 3GS battery (again) to resolve this issue -> http://t.co/cLG2ei3 Live tweets as I go!” about 4 hours ago via Tweet Button
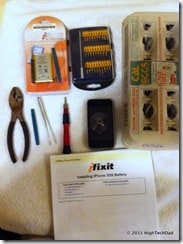
“1st step: assemble tools & work space for iPhone 3GS battery replacement. http://t.co/g9i4WMn” about 4 hours ago via Twitter for iPhone
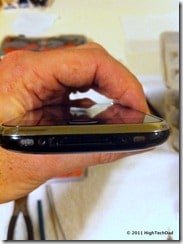
“Step 2: remove 2 #00 screws from bottom of iPhone.http://t.co/NWzcTPq“ about 4 hours ago via Twitter for iPhone
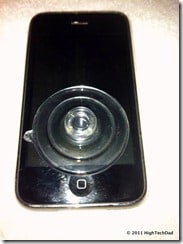
“Step 3: attach suction cup to iPhone screen near home button & gently but w/ force pull up. http://t.co/yVA4O2l” about 4 hours ago via Twitter for iPhone
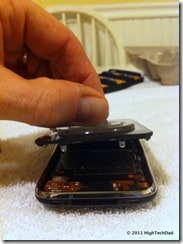
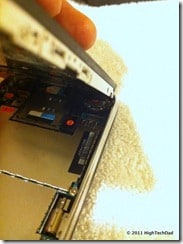
“Step 4: gently lift up screen but there are cable attached.http://t.co/6WH3cRb” about 4 hours ago via Twitter for iPhone
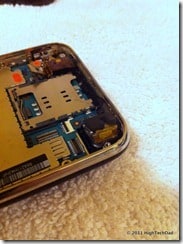
“Step 5: disconnect ribbon #1 using spudger. http://t.co/HB5AzzJ” about 4 hours ago via Twitter for iPhone
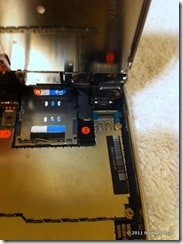
“Step 6: disconnect ribbon #2 with spudger. http://t.co/3OWeLCG” about 4 hours ago via Twitter for iPhone
“Step 7: flip up white (or black) tab holding in connector. It’s really small! http://t.co/zd9bTzN” about 4 hours ago via Twitter for iPhone
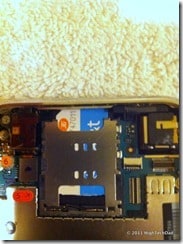
“Step 7: remove the SIM card. http://t.co/yB5mqt4” about 3 hours ago via Twitter for iPhone
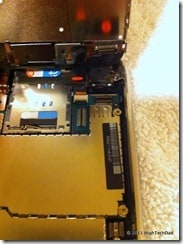
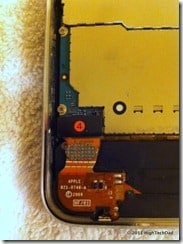
“Step 8: disconnect ribbon #4 using spudger. http://t.co/sOawGuU” about 3 hours ago via Twitter for iPhone
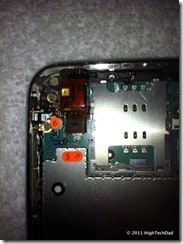
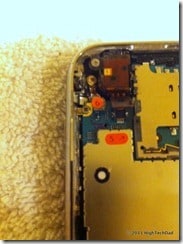
“Step 9: remove ribbon #5 with spudger. http://t.co/urOoP1Y” about 3 hours ago via Twitter for iPhone
“Step 10: remove ribbon #6 with spudger. http://t.co/UjWrHtE” about 3 hours ago via Twitter for iPhone
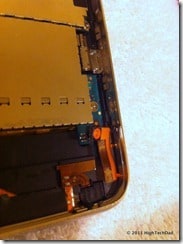
“Step 11: remove ribbon #7 with spudger. Peel back “do not remove” sticker under it ;) http://t.co/vuWzbfb” about 3 hours ago via Twitter for iPhone
“Step 12: remove 8 screws (I use an egg carton to store them, labeled to instructions) http://t.co/PIbw7xi” about 3 hours ago via Twitter for iPhone
“Step 13: pry up but don’t remove camera. http://t.co/Cxlu8kw” about 3 hours ago via Twitter for iPhone
“Step14: pry up logic board near dock connector using spudger.http://t.co/66czj5o” about 3 hours ago via Twitter for iPhone
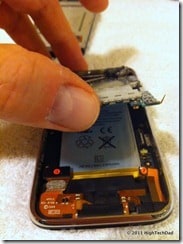
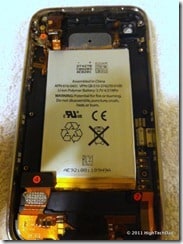
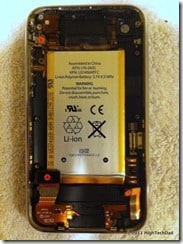
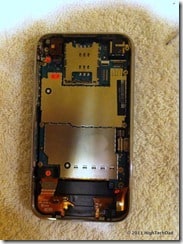
“Step 15: slide out and remove the logic board and you will see the battery. http://t.co/zOmXtZF” about 3 hours ago via Twitter for iPhone
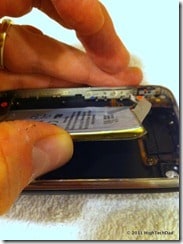
“Step 16: use spudger to pry up the battery (don’t use plastic pull). Hardest part since adhesive is strong! http://t.co/484YXvQ” about 3 hours ago via Twitter for iPhone
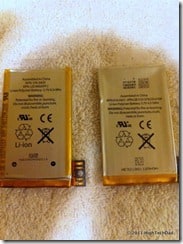
“Step 17: battery removed! Whew! Side by side – old (on right) & new (on left) batteries. http://t.co/7Li8Q1R” about 3 hours ago via Twitter for iPhone
“Step 18: remove adhesive on back of new battery and put back in.http://t.co/e82T0d4” about 3 hours ago via Twitter for iPhone
“Step 19+: do everything I just tweeted but in reverse. I will skip the reassembly photos and just put it back together. Stay tuned!” about 3 hours ago via Twitter for iPhone
“Step 20: status update, screws back in and logic board secured.http://t.co/1kLk4e2” about 3 hours ago via Twitter for iPhone
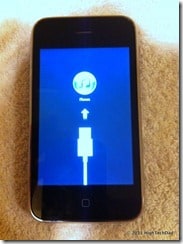
“Step 21: DONE! All back together! Still in Recovery Mode. Now to test if error 29 is resolved w/ new battery. http://t.co/ZGZ4afQ” about 3 hours ago via Twitter for iPhone
“CONFIRMED – Replaced battery causes Error 29 in iPhone 3GS when updating. Issues details here: http://t.co/cLG2ei3 New post coming.” about 2 hours ago via Tweet Button
That was the Twitter stream. All in all it took about an hour to do.
Resolution
So just to reiterate, if you have an iPhone 3GS AND you replaced the battery or had the battery replaced for you AND you tried to do an iOS update (e.g., to iOS 4.3) AND you received the Error 29 in iTunes and the update fails, then most likely, you have an “incompatible” battery. The fix? Replace the iPhone 3GS battery yourself or get it replaced! If you do it yourself, be sure that you get the how-to from iFixIt.com and watch my install video.
Below is the video of the iPhone 3GS Battery Replacement process that I did a few months ago. (Sorry about the shaky, caffeinated hands!)
[iframe_loader title=”YouTube video player” width=”560″ height=”349″ src=”http://www.youtube.com/embed/oEmlPK9R6Og?rel=0″ frameborder=”0″ allowfullscreen]
You can read about the initial install here.
Special thanks to Kyle and Scott at iFixIt.com for the replacement battery and quick turnaround!
Be sure to leave a comment to let me know if it worked.
Disclosure Text : I have a material connection because I received a gift or sample of a product for consideration in preparing to write this content. I was/am not expected to return this item or gift after my review period. More information can be found in my About page as well as here.
HTD says: I’m so glad that this fix was confirmed!






12 Responses
I too am experiencing the dreaded error 29 while trying to update my 3GS. The only difference is that my phone is less than 2 months old and has never had a battery replacement. Is it possible that my phone was factory built with a unsupported battery?
It could be, or perhaps it was a refurbished phone?
can you tell us which battery you got? I’m having the same problem.
hello, I have the same problem, the past month I replaced the battery and now I updated the firmware; result? Error 29, the exchange tomorrow
As an iPhone Tech, I can suggest a few tips:
Instead of using a suction cup (You might apply too much force and rip the front panel away from the connectors – in particular, connector no 3 [c3] – which goes out to the sensors and earpeice) get either the putty knife/metal spudger _SET_ from ifixit (the individual ones are much thicker and rather useless), or order from DealExtreme (SKU 53159). Take out the two screws at the base, then jam the metal spudger between the rubber frame and chrome bezel just below the home button and gently lever up till it pops out of place – then just tilt the panel up to get to c1, c2 & c3.
There might be a tiny bit of damage to the rubber frame, but it will pretty much guarantee that you don’t rip off the ZIF socket of c3.
As for screws, it doesn’t take too much to keep them in order. There is 1 screw with the retention clip for the camera. The top-left screw for the mainboard (just next to c6) has a fully-threaded screw, the other 5 screws that are not under the DO NOT REMOVE sticker are identical and are the same length/shape as the one next to c6 but only half threaded, then there is the one under the DO NOT REMOVE sticker which is slightly longer then the other 6 screws for the mainboard.
When pulling out the mainboard, its best to flip the rear-camera up from its frame on the back case as it can have a habit of getting stuck there when pulling out the mainboard, and may apply too much rotational force to the cameras flex cable causing damage to the camera.
When putting it back in – there are little guides near the internal-side of the power button in the back case, the mainboard should slot into place under them then fold down flat with the bottom of the board almost flush with the dock port/loudspeaker/mic/primary aerial (the black plastic box thing that the dock is a part of).
Also make sure c5 & c6 are above the mainboard when slotting it in, and be very careful to not bend c6 too much – it is a rather stiff and fragile connector, and if you break it it will greatly diminish GPS & WiFi signal. C4 you have to hold at a right angle as your seating the mainboard back in place, c7 is a little bit easier to get positioned once the other three connectors are on the right side of the mainboard (you can lift the mainboard back up just enough to flip up c7 – but not enough to lose c4 under the mainboard again).
To play it safe with any 3G/3GS battery (the E29 thing is purely a construct with newer iPhone 3GSs and iOS 4.3), get ones that are (or 100% compadible) APN 616-0435, it doesn’t matter what iPhone 3 you have it will work.
Thanks for the additional and clarifying steps!
thanks a lot…. was looking for this error and you give me the answer! after replace the battery must be careful to the update.
I have the same error message but it comes after my phone went for a quick swim in the toilet. Do you think the battery replacement is worth a try?
Possibly. It wouldn’t hurt to try. I think the error does represent a hardware issue so it might be something else.
k i dont got a iphone 3 i got the iphone 4 but my problem is that my cuz tightened the screw to much that he broke the screw top off of the screw so now i got a screw end stuck in the washer how do i get it out or can i remove that nut with the broke screw in it and glue a diff nut on and use one of the other screws to hold my battery down or is that nut used as a ground for my iphone? email me back at [email protected]
i’v changed the batterie, but after a successful upgrad, im stock in recovery mode without any error during upgrading procedure.
(sorry for my bad english)
how to check battery