It’s BBQ time again. Actually, BBQ season can exist year-round in many locations; it’s just a bit more enjoyable doing the BBQing process when the weather is a bit nicer. I mean, who wants to stand out in the rain or snow trying to figure out when your meat is cooked to the proper temperature and not become a charred piece of coal on the grill. Guess what! BBQing is becoming smarter – yes, that’s right, another smart device to help you be your best. I recently got to test out the Yummly Smart Thermometer with a couple of huge pieces of tri-tip. And not only did the Yummly Thermometer keep up updated on the cooking process, I knew exactly when I should take the meat off the grill! (*Disclosure below.)
Back to that situation where it is pouring rain or snowing out, or you simply want to be inside with your family, friends, or guests instead of hovering around a hot grill. Traditionally, when you BBQ, you are either a seasoned expert and know exactly how long a piece of meat, fish, or poultry needs to be on the grill and when it needs to be flipped, or you are a bit of a newbie like me and run back and forth, sticking an old fashioned cooking thermometer into the meat every five minutes. The meat becomes holy but not in a religious way.

With the Yummly Smart Thermometer, you pretty much take all of the guesswork out of grilling, roasting, or cooking. Once whatever you are cooking is monitored by the Yummly Thermometer, you can join your guests or stay out of the rain or cold while your BBQ cooks away. And, you get notifications when the meat is cooked based on your preference, and even when to flip it.
How the Yummly Smart Thermometer Works
As I mentioned, I had an older digital thermometer that I used for all of my grilling. You turned it on, selected the type of meat, fish, or poultry you were grilling, and then stuck it in to get a quick read on the internal temperature. If you had hit that “cooked” threshold, some of these thermometers would beep. But the whole process was repeatedly sticking the thermometer into the flesh. It was labor-intensive, inefficient, and a bit of a pain in the butt.
Enter the Yummly Smart Thermometer! For starters, this smart thermometer is completely wireless, meaning that you can connect it to your smartphone and have a bunch of other readings and notifications. Also, the recommended way of using the Yummly thermometer is to stick it into the side of the meat and leave it there throughout the entire cooking process (instead of piercing the meat repeatedly).

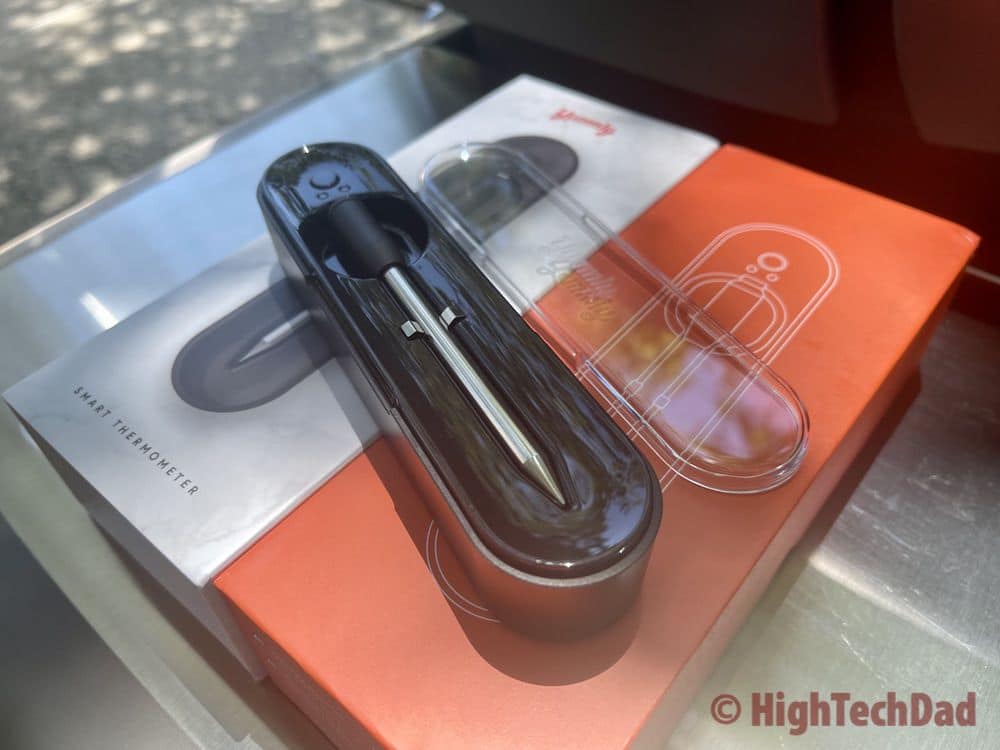
The Yummly has two main components: the thermometer itself and the charging dock. The charging dock also has another critical function – it maintains wireless communication with the thermometer (there are no wires between the thermometer and the charging dock) and then relays that information via Bluetooth to your smartphone and the Yummly app. And, the dock also charges up the wireless thermometer when it is not in use and stored away.

Once the Yummly is inserted into the thickest part of the meat (and you typically insert it in the side so that you can flip the meat as needed), you leave it in throughout the entire cooking process. The Yummly will give you real-time temperature readings from the inside of the meat, as well as “external” temperature reading from inside the grill or oven. Basically, you have two real-time readings always available.
Let’s take a look at the initial setup and my first grilling experience using the Yummly!
Initial Setup of the Yummly Thermometer
The first time you use the Yummly, I recommend setting it up at least an hour before you actually want to grill. There are a couple of reasons for this. First, you need to run through all of the Bluetooth pairing processes. Then, you need to be sure that there isn’t a firmware update required (mine needed one). And lastly, you need to charge up the thermometer before the first use.

You start by putting the included AAA batteries in the base. And make sure you install the Yummly app first. There are actually two parts to the Yummly smart app – one is all about planning meals and getting recipes (there are premium subscription services for that – this review is not about that service as I don’t have a premium account…yet), and the other is about setting up the Yummly Smart Thermometer.
The smart app will walk you through all of the required setup steps, including pairing and updating the firmware. They do recommend that you charge the Yummly at least 30 minutes before going through the setup. So, as I said, install the batteries and leave the smart thermometer in the case to charge up.

To use the smart connectivity, you do need to make sure you have Bluetooth enabled. During the setup process, you will pair the thermometer case via Bluetooth to your smartphone. Keep your smartphone next to the case for the fastest setup.
Once you go through the setup and pairing, you are ready to start grilling!
Getting Grilling!
When you are ready to grill, and the Yummly is all charged up, all you need to do is simply remove the smart thermometer from the charging case. Make sure your phone is close by and Bluetooth is on. The Yummly app will indicate when your smartphone has connected to the case. Once it is connected, you are ready to cook.

Click on “Ready to Cook” and then choose what you will be cooking (meat, fish, or poultry). You can make a manual selection if you want. For my grilling, I chose Beef. In this particular instance with beef, you choose the type of cut you have – I chose Steak (as I had two big slabs of tri-tip).
Next, you insert the thermometer fully into the thickest part of the side of the meat. Ensure that you insert it all of the way so that no metal from the thermometer is showing and just the black cap remains.

You are then reminded to keep the charging/connected dock within five feet of the thermometer itself. Don’t put it too close to heat though!

The last step for grilling beef was choosing how well cooked the meat should be. I chose Medium Rare. Each setting has a target temperature that the Yummly should hit to indicate if the meat is cooked enough or not. For Medium Rare, the temperature has to hit 135º.

You can optionally check off the “Tell me when to flip the food” setting (I didn’t, unfortunately) so that Yummly can tell you the best time to flip the meat.
As you grill, you can spy on the internal temperature of the meat. And, you can even get the ambient temperature from inside the grill (but not inside the meat).

One of the great features is that the estimated “ready time” of the meat is displayed. While I was grilling, one of my daughters kept asking me when the meat would be ready. With a quick look at the app, I could give an exact time. And, I wasn’t even in front of the grill!

However, I did make the mistake of having my iPhone go beyond the Bluetooth range of the charging case. Once I did put it back in range, I got a notification (actually on my Apple Watch) that the meat was almost done! So I raced outside to remove the tri-tip from the grill.

One last setting that I didn’t test out but will next time is the Rest Timer. Once you remove meat from a grill, it is important to let it rest for a few minutes before carving it up. With the Yummly, you can set the timer, and you will be notified when you can start carving.

Under the case is another item that you use to remove the thermometer from the meat. You definitely do not want to touch the Yummly directly right when you take it off the grill as I learned it is quite hot. The attachment allows you to securely grab the thermometer and remove it from the meat.
A Great Gift for Grillers!
I must say, my first time using the Yummly smart thermometer was easy and effective. The meat was cooked nicely to slightly over a medium-rare (probably because I waited just a few minutes too long before removing the tri-tip). The thinner cuts were cooked a bit more medium than medium-rare, but that was fine because there are some members of my family who, for some reason, like their steak cooked a bit more – but I’m working on changing that!

Clean-up is easy. Once you let the thermometer cool down, just rinse it off with a sponge and soap. Don’t put it in the dishwasher, though. Then, put it back into the charging case so that you are ready for your next grilling adventure. A fully-charged Yummly should have enough battery for about 25 hours – perfect for a slow-cook brisket or something.
The Yummly Smart Thermometer retails for $129.99. But as of this writing, it is on sale on Amazon for $99.00! Honestly, even at the full price, I think this is a nice deal, especially if you or one of your loved ones enjoys grilling!
Buy on HighTechDad
The product shown below (and related products that have been reviewed on HighTechDad) is available within the HighTechDad Shop. This review has all of the details about this particular product and you can order it directly by clicking on the Buy button or clicking on the image/title to view more. Be sure to review other products available in the HighTechDad Shop.

Disclosure: I have a material connection because I received a sample of a product for consideration in preparing to review the product and write this content. I was/am not expected to return this item after my review period. All opinions within this article are my own and are typically not subject to editorial review from any 3rd party. Also, some of the links in the post above may be “affiliate” or “advertising” links. These may be automatically created or placed by me manually. This means if you click on the link and purchase the item (sometimes but not necessarily the product or service being reviewed), I will receive a small affiliate or advertising commission. More information can be found on my About page.
HTD says: In order to take your grilling to the next level, you need to learn the art of cooking your meat, poultry, or fish to perfection. You either have to hover over the grill, or simply plug in the Yummly Smart Thermometer and have it do all of the smart temperature monitoring and notifications for you!
HighTechDad Ratings
-
Ease-of-Use
-
Family-Friendly
-
Price Point
-
Features
Summary
In order to take your grilling to the next level, you need to learn the art of cooking your meat, poultry, or fish to perfection. You either have to hover over the grill, or simply plug in the Yummly Smart Thermometer and have it do all of the smart temperature monitoring and notifications for you! Apart from charging the Yummly thermometer the first time, which can take 30 minutes, the actual setup is literally just a few minutes. The process of cooking meat to the ideal setting and temperature is so incredibly easy that anyone can do it (although I wouldn’t recommend kids get around a hot grill). The range of the Bluetooth connection is good, which allows you to get real-time updates on the internal as well as the ambient temperature of the food and grill. The Yummly allows you to remotely monitor your grilling so that you can sit with your family and friends instead. And, once the food is cooked to the desired setting, you get a notification. You can even be alerted as to when you should flip the meat over. Overall, extremely easy to set up and use, and Yummly makes you a grilling expert in the process.
Pros
- Easy to set up
- Easy to monitor cooking temperatures
- Good price point
Cons
- It doesn’t flip your food for you (haha!)