
Most people don’t think of a microwave as a gadget, but I guess if it plugs in, has buttons and a display, it excites me a bit. But before I go in a major analysis of popcorn pop timing (or burning), I wanted rewind back. Here’s the story. I had a microwave that was on its last legs, the outer case was cracking and the gears within that drove the turntable were broken and grinding. While the microwave did work, it had only basic features and was really, really noise when it was running.
As luck would have it, I was having some conversations with the Panasonic folks about potentially doing some reviews of items coming out of CES. One thing led to another, and I was able to “pitch a story” to the PR firm that handles the consumer household products division for Panasonic. The story: I would show how to install a Panasonic microwave as well as talk about some of the features of the new microwave.
I had never installed a microwave before but I’m always up for a challenge. So before I go into the features of the Panasonic NN-SD277WR Microwave that I installed, I thought that I would map out the install process a bit. For those who are a little bit handy, it really is pretty straight-forward and actually relatively easy. As with any project, there is usually no way that you will have a standard install. There is always something that will throw you a curveball, and you may have to get a bit creative in your work. Watch the video or read on to learn more.
The Install Process
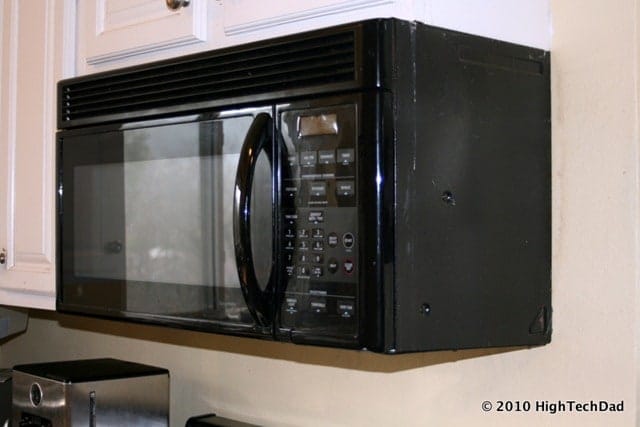
So this is the old microwave. For starters, when we moved into the house, we had the entire kitchen painted white, so that black color really stood out badly. Also, as I mentioned, the gears of the turntable grind pretty loud when it tried to rotate.
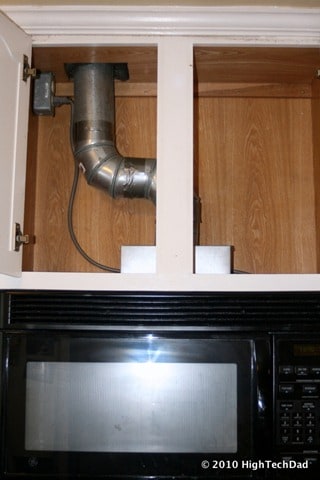
The old microwave was set up to vent through the top. This microwave was installed only about 4 years so upon reviewing the duct-work, things looked pretty good (even to my inexperienced eye), so no new work had to be done there.
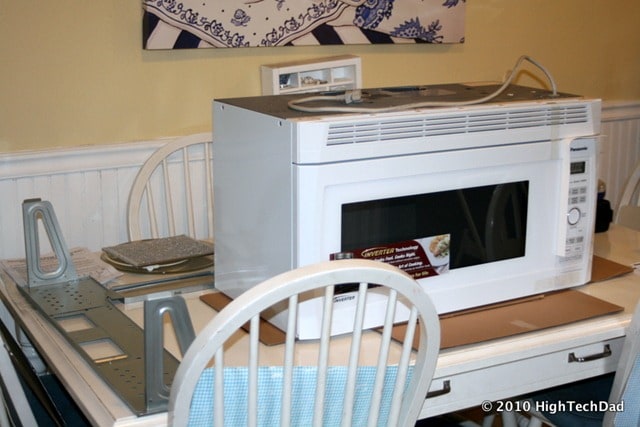
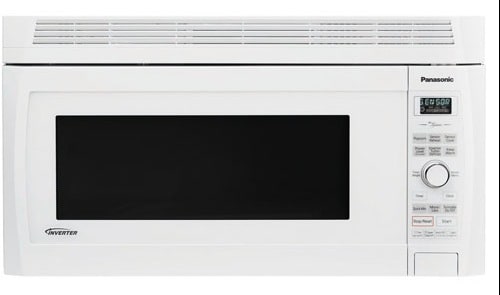
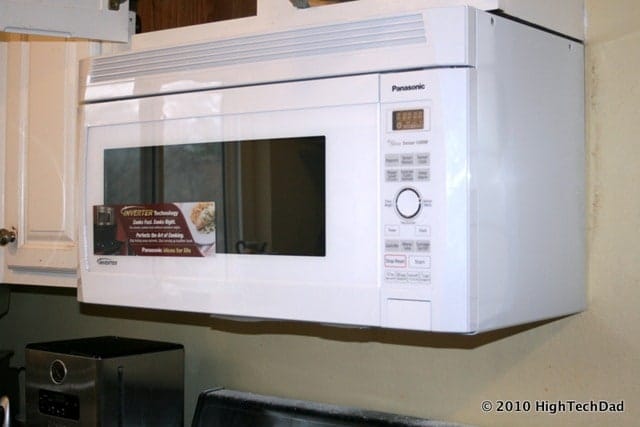
Here is the new Panasonic, unboxed and ready to go. I really do recommend that you carefully unpack you microwave and do an inventory of the items. For example, I tested sliding the bracket that is anchored against the wall into the back of the microwave a few times. Even despite this, it was a bit more difficult once the bracket was on the wall, but at least I knew how it was supposed to work.
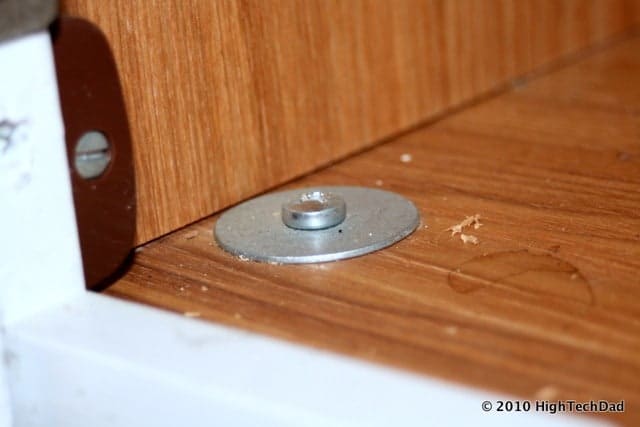
These are the bolts that screwed down into the top of the old microwave. Be sure to save all of the parts of your old microwave (if you are replacing one) since you never know if you need to use some of the parts. I ended up using the larger washers in the install of the Panasonic.
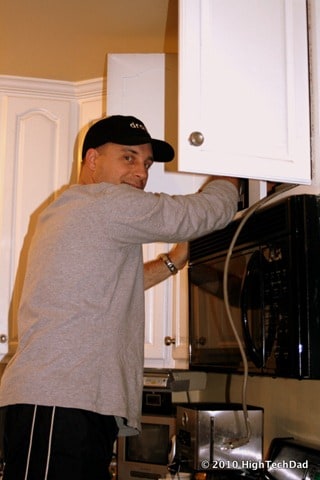
I was able to start the process of removing the old microwave on my own. However, I do recommend that you get someone to help when it comes to removing the old microwave as they can be awkward and heavy. My wife helped me take the old one down. My neighbor later helped me with the install and lifting it up the new microwave. Don’t try it alone.
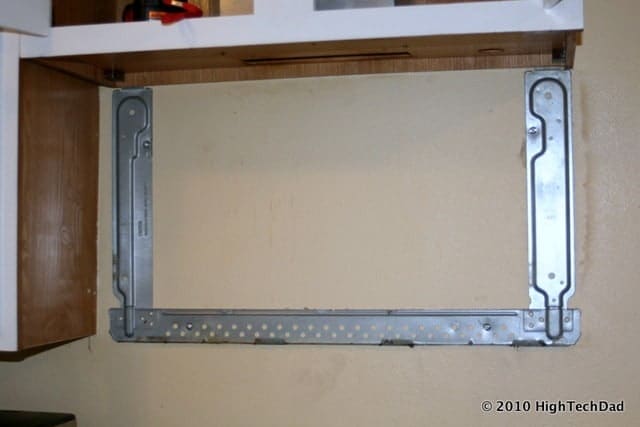
A lot of times, looking at the old install bracket can give you some insight into the installation environment.
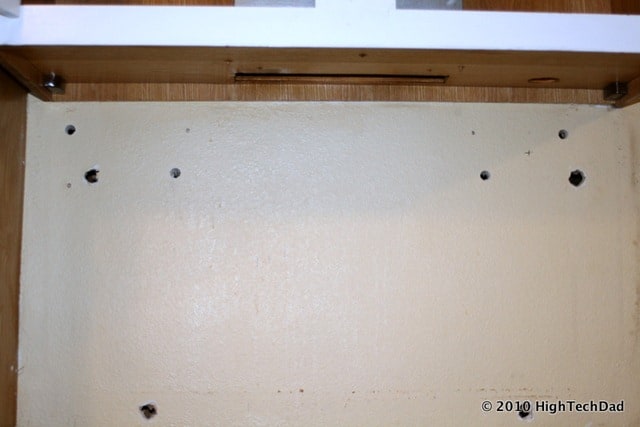
After removing the bracket, we found that no part of it was anchored to a wall stud. This is something that you really should do when you have this much weight. The larger holes were for anchor or molly bolts (that’s all that the previous installer used.)
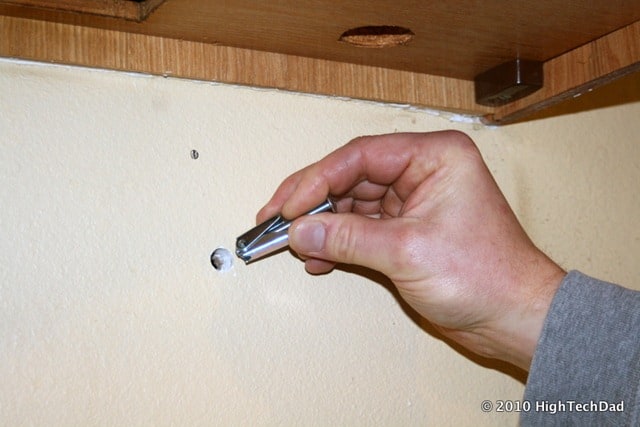
So we drilled some smaller holes for some new locations for the anchor bolts.

The anchor bolts were threaded through the bracket.

Since the holes for the anchor bolts were pretty small, it was a bit harder to punch them through, but the reason we kept them small was to be sure that we didn’t weaken the strength of the wall too much.
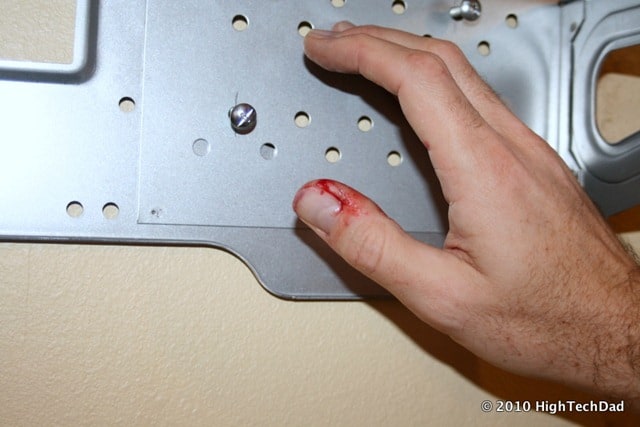
Be careful around sheet metal. I managed to slice my thumb a bit. No major damage though.
The anchor bolts were tightened in.
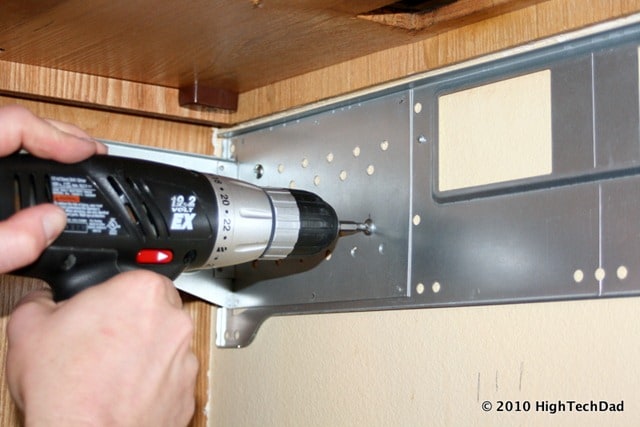
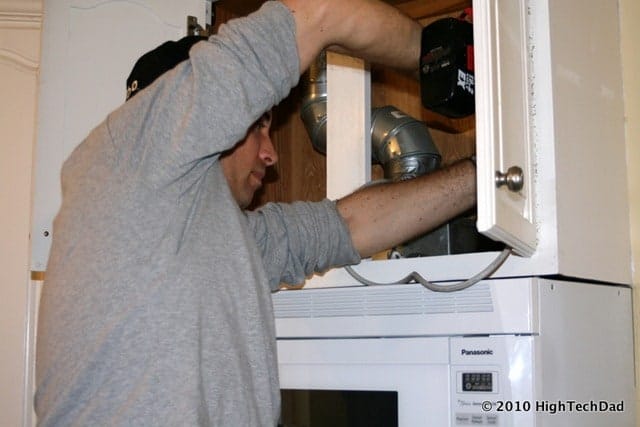
Although a bit hard to see, we drilled through the brace’s sheet metal so that we could anchor it to the wall stud. Panasonic recommended having at least 2 screws attached to a wall stud and 4 anchor bolts simultaneously in the drywall.
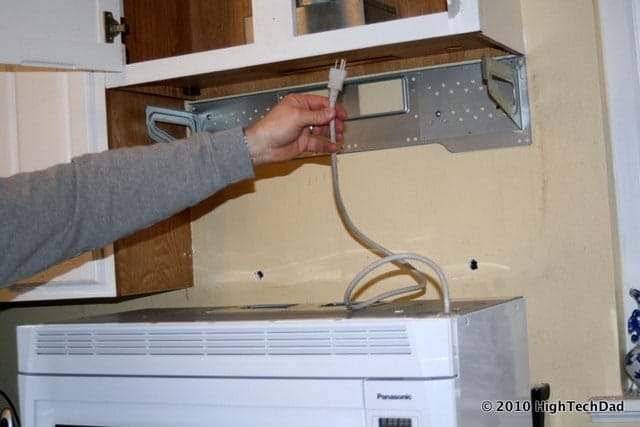
We threaded the power cord up and through and anchored it down.
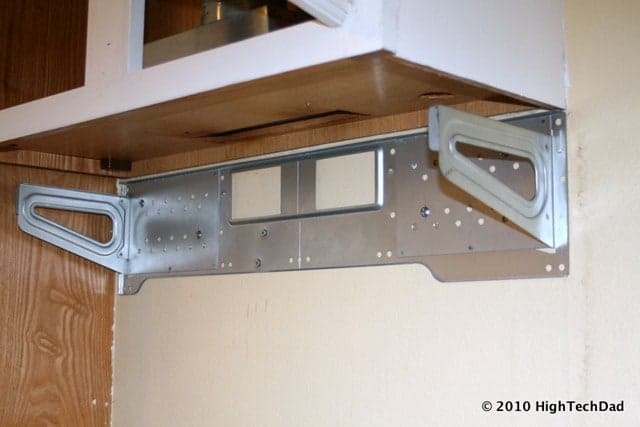
The nice thing about the Panasonic brace was that it basically slid in on some tracks (which supported it pretty well). I probably could have slid it on myself.
Be sure to tighten down all of the bolts.
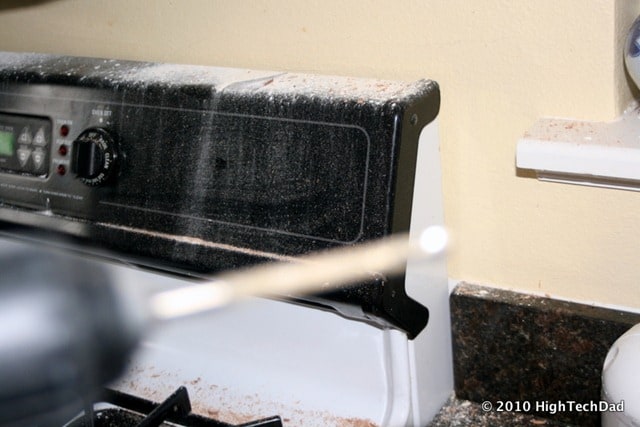
Yes, you will make a mess but don’t worry about it! That is what vacuums are for.
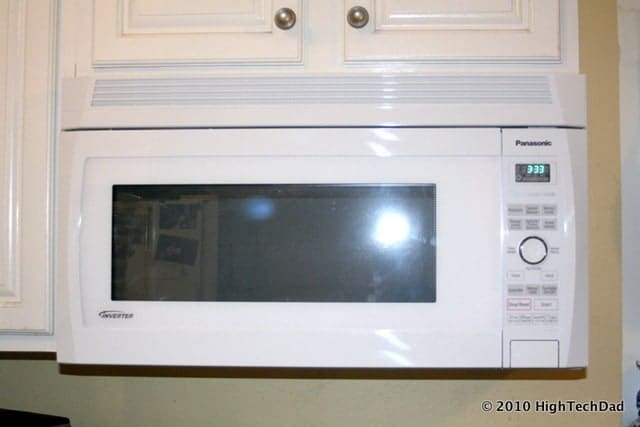
Here is the final product installed. It only took about 2 hours to do everything, even including having to think out some creative solutions.

The happy installers.
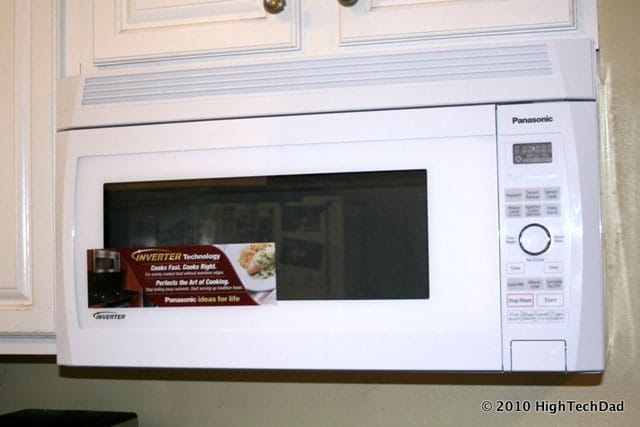
The Panasonic ready to go!
Below is a video that shows some of the highlights of the install. (I felt a bit like Bob Villa.) The video doesn’t include all of the work so don’t worry, you don’t have to sit through 2 hours of installation.
The New Panasonic Microwave
I have only had about 24 hours with the new Panasonic NN-SD277WR but I must say that I do really like it. It is definitely an upgrade from my previous microwave and not having the loud gear grinding makes me (and my wife) very happy.
Here are some technical specs on the Panasonic NN-SD277WR microwave:
- 2.0 cubic foot interior
- 12 inch turntable
- Power output – 1200 Watts
- 10 Power levels
- Product Dimensions: 15.4 x 29.9 x 16.4 inches ; 62.4 pounds
- 120 Volts power requirement
- 4 level fan (low/high/turbo/super)
- Weight 53 lbs
This microwave felt a lot lighter than the one it was replacing. Also, the white color (a personal preference) seemed to really brighten up our kitchen.
The first thing that you notice is that there is no touchpad for entering numbers (e.g., the minute and seconds for cook time). This is a unique design to the Panasonic. In the center of the control panel, there is a pop-out dial that lets you spin to select the cook time duration (among other things). The front control panel is clearly organized with a variety of buttons that are dedicated to specific functions, specifically (from top to bottom, left to right):
- Popcorn – while I haven’t tested this out yet, there is a dedicated popcorn button that senses when steam is coming out during the popping process. (Note, you can use the Less/More button to add or subtract a percentage of cook time. How well this works depends on many factors including the size of the popcorn bag, the type of popcorn and your preference of how many kernels you want left unpopped. Watch out for burning!
- Sensor Reheat – this button allows you to simply put some food in and reheat it. It detects the amount of steam coming from the food and then adjusts the cook time automatically. I tested this and it really does heat things up HOT!
- Sensor Cook – similar to the Sensor Reheat, you can simply put in food and push this button and the Panasonic detects the steam output and sets the appropriate cook time.
- Power Level – you have 10 levels of power to play with. One thing that I liked about this was how the power level on the display would shrink or grow depending on how many times you clicked the button. Use this for fine-tuning the cook time.
- Inverter Turbo Defrost – with this feature, you simply enter in the weight of the meat or poultry that you want to defrost and the Panasonic will ensure that you know when to flip it over as well as prevent the outer edges from cooking (a common problem with many defrost settings in some microwaves)
- Keep Warm – this is a nifty little feature that lets you keep food warm after cooking for up to 30 minutes. The Panasonic will automatically turn on and boost the heat of the food periodically.
- Pop-out Dial – this is where you control many aspects of the microwave, most importantly, the amount of time you want to cook something. Simply push the dial in and it pops out. Then spin it to the desired number (minutes or clock setting).
- Timer – this is your basic countdown timer. Coupled with the dial, you can specify when an alarm will go off after a set amount of time
- Clock – you can use this to set the time on the display
- Quick Min – easily set cook times in minute increments
- More/Less – this button is used with other functional buttons to add/subtract cooking times (as a percentage)
- Turntable On/Off – this controls whether the turntable will turn as well as change the directions
- Stop/Reset – this should be obvious, no?
- Start – if you don’t know what this button does, you probably shouldn’t have a microwave at all!
- Fan Hi/Lo – this is the button for the standard fan settings. The fan is pretty quiet using this button.
- Fan Super/Turbo – if you really need to clear out smoke or vent things, kick your fan into overdrive here. It is much louder but does its job!
- Auto Off – you can set the fan to turn off after a set amount of time with this button
- Light Hi/Lo – this controls the over-the-range lighting which is actually quite good!
Another nice thing about the design is that the turntable is slightly recessed into the base. This allows you to fully load up the space with taller microwavable cooking containers. Also, the sides of the space are indented as well to allow for wider containers to rotate without obstruction. Included is a removable metal rack that lets you have two layers of items being microwaved simultaneously. However, if you do that, remember to switch out the items from the rack to the turntable and visa versa so that your food rotates for even cooking. You can see the inside of the microwave as well as an overview of the features in the video overview below.
I have not put too much time into the use of the Panasonic. I’m sure over time, more things that I like or dislike will come out. One thing that I did notice that I didn’t particularly like was when using the Timer function. While you can set an alarm for when the timer should go off, it only beeps 3 times and then is silent after that. I think that the Timer should keep beeping until you actually come back to the microwave and turn it off. Otherwise, if you are in the other room and don’t hear the initial 3 beeps, you might miss some critical cooking timing. This is the only things that I have to “complain” about at this point.
The power of the microwave is really great and food and liquids seem to be heating much faster and more evenly than with my previous microwave (probably due to a higher power output as well as a functional turntable). The fan is really, really powerful! I recommend making sure that you have your vent working well as it does move a lot of air. I had to tape off and block some of the install holes from my previous microwave as they were venting into the cabinet above. You can set it up to vent from the top, the back or just out the front (see the install guide for changing the blower directions on this). Another nice feature is that the microwave will detect if a lot of heat is coming from the stovetop. If there is, the fan will automatically turn on to vent some of the heat. I have not gotten this to happen yet but it is a nice feature to have.
All in all, the install process was very straight-forward and relatively easy to do (with some help). The features and functions of the Panasonic NN-SD277WR are pretty great, a definite upgrade from what I had. The MSRP is $419.95 however you can pick one up from Amazon for about $330, making it a very good value for what you get. As my wife and I continue to use the Panasonic, we will become more experienced with its workings. If you have questions about the functionality or the install process, please leave a comment on this review.
DISCLOSURE OF MATERIAL CONNECTION: http://cmp.ly/2 My full review product review policy and disclosure can be found on the About page of my site.
HTD says: Don’t be afraid to try some do-it-yourself installs. You save money and can apply those install fees to getting a better device in the long run!


19 comments
Yannick
Hi, I bought a house with this microwave already installed, It is not venting (or not venting) in the front and I want to vent it outside. In the instructions, they mention an exhaust damper that seems to be if you exhaust from the back. I am not sure if it is needed for top venting installation nor if it is still screwed behind the microwave. Do you recall if you needed extra parts or you were just drilling a hole through the cabinet et fit it in there ?
Thank you very much
Yannick
hightechdad
As I was simply replacing an existing microwave, the hood and vent were already in place. My particular vent does not exhaust from the back but rather, from the top.
Good luck!
bccron
Some more to share! The Only good thing was got on sale for a newer over the oven vented microwave I figured at least one installation would not hurt. But owe after the first install the cabinets taken down it had to do its Second Install. Why did we put a new microwave when we knew it would be taken down and put back up? It was all because needing to see the new color with the color of the new cabinets and glazing which did help quite alot. Well Asked GE for sample color sheet for their new colors. That was No Deal.
So hope this ends in some satisfactory way. And not to much in cost. That is why I worked so hard to changing the walls venting height taking my time and new tools. Eventually we will have our old fridge put back in and an oven again. But at least the microwave and toaster kept us eating something.
hightechdad
Thanks for sharing. Sounds like a HUGE project.
bccron
With help of neighbor tried to remove an old microwave had for many years. We unscrewed the screws on the top in the cabinet floor then tried to lift it up it did not budge! Call the manufacturer that was little help at all. Looked even at their manual. Low and behold when an installer came they knew about a secret metal strip on the top of the microwave’s front that had to be unscrewed also then it would have been a piece of cake.
Now the next issue: We got new cabinets installed and they were about 3 inches higher than the former ones. So the venting on the rear of course was perfect 3 inches below but now the venting had to be raised also. While an electrician was working on changing the outlets and wiring for our new kitchen I got a hole saw for sheetrock and he offered one too, Cut into the sheet rock about 2 inches higher. Since the metal of the vent was there that was another issue. Went to the hardware store which recommended aircraft shears. That helped alot to cut and other tools to bend and cut off the higher vent area. Saw how it would work and decided it needed more. next cut about 2.5 inches extra to be sure. then of course the lower part had the sheetrock missing.so put some other sheet rock but fist took old plates which could be shaped and cut some in and secured them in place. then the sheetrock was put back in. The Vent was lip was bent over the sheet rock as it has been before. All that to put in a microwave…
Next with the help of the electrician no template. tried to measure where the whole woiuld be above in the cabinet. GE was of little help on their own microwave’s installation acted they never dealt this it before! Oh and online template? Spent 30 minutes trying to find that on their site. After trial and tribulation and another hole got the microwave mounted. the problem was not when screwed tightly it popped of the hinge in its bottom side edge. So got it hung on screws later realized the air was not going into the vent but circulation down in the back. Great for the future.grouted wall. Then called GE Service to see if they could help with this venting issue. A guy came who could list one these with one hand. He said He fixes electrical issues and that is what they are prepared to do. This he claimed was install problem. I called GE and HD and said if this does not get fixed I guess it will go back to the store and a different installed.
Now having a local appliance and repair shop coming to get this hopefully finally seated and in place as it should be. Asked the carpenter who built the cabinet box for help. He looked at it said next time he comes he would help. Well now is Wednesday and at the end of the week a countertop is being installed. So that microwave either had to go or get installed. How many days to try to do this? About 4 including adjustments and figuring out the issues. So yes they can be easy to install but one thing or more can make it require extra handyman experience. My experiences when younger build with landscape timbers a 4 timer high planter about 5 feet long. Figured out a drainage method which has worked though not perfectly to this day about 15 yrs later. But this darn microwave..
somegirl
Hi,
Would you by any chance have an idea where the fuse is located in the microwave? Ours just stopped working and before anything else we want to check on that. So do not want to dismount it to open and explore. The Panasonic helpline was of no help either. =/
MarySU
Well, you may have the manual, please refer to that as well.
hightechdad
That is odd because I got it from their site I believe.
Jerry
Thank you for your response. Unfortunately the Panasonic website does not have installation or dimensional drawings. I've called their CR department and was transferred to tech support, but they could not provide me with the required info. Looks like I will have to stick with a Whirlpool. Thanks!
hightechdad
Good luck to you. Unfortunately, I don't have the exact dimensions, however, I would recommend going to the Panasonic site and downloading their documentation which should include the template that you use for mounting. If you print that out, it will show you accurately, the measurements. The power cord, from my memory, it more towards the front but there is some flexibility on that. However, instead of just taking my guesses and running with them, I would look at the install guide.
Jerry
Thank you for the guide. It was very informative. I am interested in this Panasonic microwave to replace a Whirlpool we had for 5 years. However I have some installation concerns for this unit with my existing kitchen cabinets. The kitchen cabinets are only 12 inches deep, so I do not know if they will accommodate the power cord of the Panasonic microwave, which from your pictures is shown coming out from the front of the unit. If it is not too much trouble, can you give me the dimension from the back of the microwave to the power cord and the dimension from the back of the microwave to the top supporting screws. Thank you in advance for your help.
wz
Great! Thank you very much for the quick response!
hightechdad
Glad that the guide helped. Yes, doing the internal recycling is one of the options. I think that I mentioned that there are 3: upwards, out the back or recycled.
So, you should be safe. Yes, I still like the Panasonic. It is very powerful (especially compared to our older one). It's a pretty good deal.
Good luck with the install!
wz
Hi,
Thank you very much for the guide. We are considering the exact same model. We do not have the exhaust duct system for our current over the range microwave oven and the air comes out from the front of the microwave (recircle internally). Can we do the same for this Panasonic one? we do not want to poke a hole to our house to install the duct.
Do you like this microwave oven after several month?
Thanks!
cheap Nintendo DS
Thanks for the guide. I may buy this microwave next week. So i'll be visiting.
hightechdad
I believe that if you contact Panasonic, you can get the install template (like what I showed in the video/review). That will show you where to put the screws and mounts. There should be two screw holes (at least on mine) on the top where it attaches. You do need to carefully line them up (be sure to look at the pictures).
I was lucky in that I didn't have to replace the duct work and just used what was already there. Be sure that you check first (before installing) which direction the fan is blowing. There are ways to have it vent upward (the default), out the back (through a wall) or simply without a duct (you will need to change the blower direction I believe). When doing without a duct, it will basically vent back into the room above your head. It does help to have the install template though to know where to cut your cabinet or wall.
The best thing to do is to contact Panasonic to see if they have the installer guide.
Good luck and let me know how it goes or if you have any other questions!
ashkai
Thanks so much — I am just about to instal a similar Panasonic, bought it second hand and was clueless as to how to start. Although I have the manual I don't have any instalation instructions and I was searching for some online.
I have a couple of questions — how did you know where to screw through the cabinet down into the top of the microwave? Also when you hooked up the vent/ duct did you leave the adaptor thingy on top of the microwave and fit it up through the cabinet and then attached the vent to it?
Thanks!
hightechdad
I agree! You never really know what you are getting into when you start on a project like this. Just be prepared for the unexpected and be ready for the project to take a lot longer than you originally anticipate. I started this one, for example, on a Saturday morning, so that I would be sure that I had the full weekend to work through any issues. I was lucky (with the exception of the wall stud being in the center of the mounting bracket). I have replaced drywall too, not fun or a clean project, but luckily it is doable on your own (assuming there are no surprises behind the old drywall). I'm by far, NOT an expert so I guess I was blessed with having help as well as having a relatively manageable environment.
mrmerlot
Thanks for the walk-through and lessons learned. Here's a tip from when I installed our new microwave in our home, built in 1969: be prepared for the effects of previous installations. When I removed the old microwave and its bracket, not only did I have the holes from that bracket, but, apparently, also the previous two or three microwaves!! And, naturally, the new microwave's mounting hardware required…new holes to be drilled. Because the wall is now Swiss cheese, I anticipate having to completely redo the drywall the next time I need to replace the microwave. Argh!